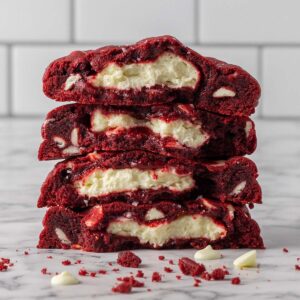
Chewy Red Velvet Cheesecake Stuffed NYC Cookies
These chewy red velvet cookies are stuffed with a creamy cheesecake filling. They’re crispy on the outside and gooey in the center with a rich velvety chocolate flavor.
Ingredients
Cheesecake stuffed
- 200 g cream cheese block softened
- 40 g caster sugar superfine sugar
- 7 g vanilla extract
- 15 g corn flour corn starch
- 15 g heavy cream thickened cream
Red Velvet Cookies
- 350 g all-purpose flour plain flour
- 20 g Dutch processed cocoa powder sifted
- 15 g corn flour corn starch
- 2 tsp baking powder
- 1/2 tsp salt
- 180 g unsalted butter cold and cubed
- 90 g caster sugar superfine sugar
- 160 g brown sugar
- 14 g vanilla extract
- 14 g red food dye liquid, not gel or paste
- 2 large eggs 55g each, room temperature
- 200 g white chocolate chips plus extra to sprinkle
Instructions
Cheesecake Filling
- Create filling - Add the softened cream cheese to a bowl and smooth out with a spatula. Then add the sugar and vanilla extract and mix by hand with the spatula until smooth and lump free. Add the corn flour and heavy cream and beat until well combined.
- Freeze - Line a baking tray with baking paper. Spoon, pipe or use a small ice cream scoop (1 tbsp in volume) to portion the filling into 8 even sized dollops onto the baking tray (about 35g each). Flatten slightly with a spoon to create disc shapes about the size of a tablespoon. Freeze for 1 hour. You can prep this the day before as well.
Red Velvet Cookies
- Prepare baking trays - Line two large baking trays with baking paper, set aside.
- Combine dry ingredients - Add the all-purpose flour, cocoa powder, cornflour, baking powder and salt to a medium mixing bowl and use a whisk to combine. Set aside.
- Cream the butter - Add the cold cubes of butter to the bowl of a stand mixer fitted with a paddle attachment. Mix on medium speed for about 1 minute until thse butter has broken up and begins sticking to the sides of the bowl. This can also be done using and electric hand mixer.
- Add sugars - Add the caster sugar, brown sugar, vanilla extract and red food dye and beat on medium high speed until well combined, about 1 minute.
- Add egg - Add the whisked eggs and mix on low speed until the dough comes together. It will be a soft and sticky dough.
- Add dry ingredients - Scrape down the bowl using a spatula and add half the dry ingredients and chocolate chips. Mix on low speed until a paste like consistency forms and no dry ingredients are showing. Add the remaining ingredients and repeat until a dough forms. You can also do this using a spatula.
- Portion and chill the dough - Using two spoons (not your hands which will melt the dough), divide the dough into 8 even sized balls weighing 140g each. Form them into balls shapes. Chill in the fridge for a minimum of 2 hours. Overnight is best for great tasting cookies!
- Stuffing the cookies - Take one cookie dough ball from the fridge, keeping the rest chilled. Use your thumbs to create a hole in the dough ball without going to the bottom and keep working the dough as you spin it round and round to create a bowl shape large enough for the cheesecake disc to go inside, just a little smaller than your palm. Place the chilled cheesecake filling in the center and wrap the dough around it, pinching the edges to seal completely. Repeat with the remaining cookie balls.
- Chill for 1 hour - Cover the tray with plastic wrap and chill for 1 hour or up to 24 hours.
- Preheat oven and baking trays - 20 minutes before you’re ready to bake, preheat your oven to 180C / 355F (160C / 320F with the fan on). Place one of the baking trays in the oven to preheat as the oven heats up. This will help give the bottom of your cookies and instant boost of heat and a crispy bottom!
- Bake - Line the hot baking tray with baking paper and carefully add 4 cookies on top. Bake for 8 minutes, then turn the tray around and bake for a final 8 minutes. Cookies will be very soft when they come out of the oven.
- To get round cookies - To round them out, use a small offset spatula to shape the soft edges into a rounder cookie. Or, use a large round cookie cutter that is slightly bigger than the cookies to shuffle them around the cookies. Sprinkle with extra chocolate chips and a dash of sea salt. Let them cool completely on the tray before serving, this will help them finish cooking in the center and develop a crispy bottom. Inside will be gooey and soft, outside will be nice and crispy!
Notes
Chocolate chips - these can be found in the baking isle of your supermarket. Opt in for good quality chocolate chips for best flavor results.
Red food dye - use liquid red food dye, not gel or paste coloring. It just doesn’t give you the same bold red color as liquid food dye.
Storage - These cookies can be stored in an airtight container, in or out of the fridge for about 3 days before they start going soft because of the cheesecake filling.
Nutrition – is an approximate and is based on per cookie. Try stopping at one though!
A note on measurements – This recipe uses weight measurements for the most accurate results. Cup measurements can vary depending on where you are, which affects the precision needed for a recipe like this. Here is where you can learn more about how to measure ingredients using digital kitchen scales.
Nutrition
Calories:658kcal | Carbohydrates:77g | Protein:12g | Fat:29g | Saturated Fat:18g | Polyunsaturated Fat:1g | Monounsaturated Fat:8g | Trans Fat:1g | Cholesterol:105mg | Sodium:477mg | Potassium:304mg | Fiber:2g | Sugar:38g | Vitamin A:676IU | Vitamin C:0.1mg | Calcium:238mg | Iron:3mg
Have you tried this recipe?Tag me on instagram @thescranline!