Tiramisu (rich and creamy)
This easy tiramisu is soft, rich, creamy, and melt-in-your-mouth light. The coffee-soaked biscuits and mascarpone cream come together for something really special.
Ingredients
Coffee Syrup
- 425 espresso coffee see notes, very important!
- 425 g milk
- 70 g granulated sugar
- 60 g liqueur of your choice I used Licor 43 (optional)
Savoiardi
- 400 g sponge fingers Savoiardi (see notes)
Mascarpone Cream
- 5 egg yolks from large eggs see notes
- 40 g caster sugar superfine sugar
- 14 g vanilla bean paste or vanilla extract
- 600 g heavy cream whipping cream cold
- 250 g mascarpone cold (see notes)
Instructions
Coffee Syrup
- Prepare coffee mixture - Add the espresso coffee and sugar in a large jug and mix using a spoon. I’ve left instructions in the notes on how to make the coffee. Stir in the liqueur and milk. Set aside in the fridge to chill.
- Whip egg yolks and sugar - Add the egg yolks, sugar, and vanilla extract into a medium mixing bowl and whisk on high-speed using a stand mixer with a whisk attachment or electric hand mixer until pale and fluffy, about 3-4 minutes. It will fall off the beaters in a ribbon.
- Whip mascarpone and cream - In a separate bowl, add the heavy cream and mascarpone and whip on high speed until you reach stiff peaks. That’s really important!
- Fold together - Add the egg mixture to the whipped cream and fold through using a spatula until well combined. It will loosen the cream which is normal. Set aside in the fridge.
Baking tin
- I used a 22 x 33cm / 9 x 13-inch baking dish that’s 5cm / 2-inches in height. Anything around that size will work. Halve the recipe for a 23cm / 9-inch square baking tin.
How to layer the tiramisu
- Cocoa powder - Begin with a light dusting of cocoa powder in the base of your dish. It helps absorb excess moisture from the biscuits.
- Dipping your sponge finger biscuits - Different brands absorb coffee differently. Some can handle a longer dip, others fall apart fast. Test one biscuit first to see how much it soaks up. Usually, a quick dip right into the coffee is enough. Mine needed a longer dip. Remember, the biscuits continue to soften as they sit, so avoid over-soaking or you’ll lose structure. Aim for biscuits that are evenly soaked but still firm enough to hold their shape.
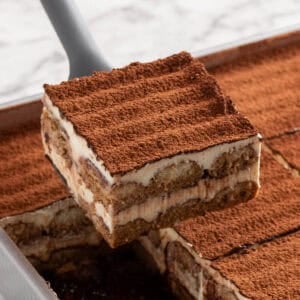
- Biscuit layer - Arrange the dipped biscuits in neat rows in your tin. I used two rows, and they fit perfectly, but use your judgment based on the size of your biscuits. Leave small gaps between them so they have room to expand and for the cream to sink in. It looks great when you slice into it!
- Cocoa - Lightly dust the soaked biscuit layer with cocoa.
- Adding cream - Once you have a layer of soaked biscuits, add half of the cream (it’s about 465g on each layer) and spread evenly using a spatula or spoon. Get it as even as you can for nice, neat layers when you slice into it.
- Cocoa powder - Dust with more cocoa powder to soak up excess coffee syrup.
- Biscuits - Add the final layer of dipped sponge biscuits.
- Cocoa - Dust with more cocoa.
- Cream - Add the final layer of cream and spread evenly. I like using a cake decorating tool to create a ridge pattern on top. It’s completely optional.
- Cocoa - Dust the tiramisu with cocoa powder.
- Chill overnight - Very loosely cover the tiramisu with plastic wrap. Chill in the fridge for a minimum of 12 hours before slicing into 12 pieces and serving. I like using a bendy silicone spatula to take out and serve.
Notes
Sponge finger biscuits - also known as lady fingers or ‘Savoiardi’ biscuits are found at specialty Italian delis or at most supermarkets in the biscuit/cookie isle. Each packet usually has 30 cookies and brands vary in biscuit size. You’ll need 40 (400g) to make this recipe using the baking dish I used. I tested this recipe with home made biscuits. Store bought ones are drier and soak the coffee in better. Plus it’s quicker to use store-bought.
Is this a traditional recipe? - It is absolutely NOT a traditional tiramisu. Nor will you ever see me say it is. Traditional tiramisu does not have whipped cream. Rather, this is my own twist on the classic and I like my version better. Surprisingly, the cream does not make it feel heavy to eat. It’s still super light!
Mascarpone - Is an Italian cheese that is similar in flavor to sour cream, but more creamy and less sour. Adding it to your whipped cream mixture helps set it better so your slices don’t slide around. Opt in for a better brand one as they tend to be thicker and make sure it’s cold straight out of the fridge! Make sure you give your mascarpone cheese a mix before using. Some brands are soft, some are firm and can cause your Chantilly cream to go lumpy.
Coffee
Which coffee to use - Ask any Italian what coffee to use in tiramisu, they’ll all say the same thing. Under penalty of death you must absolutely use espresso coffee made in a cafetera. It gives the tiramisu a uniquely strong coffee flavor that other coffee will not. Trust me, it makes a difference to the flavor. I tested the recipe three times. This coffee gives the best flavor.
How to make Italian espresso coffee - Fill the bottom of the cafetera with boiling water up to the line. Add the filter basket and fill it with freshly ground coffee, or use ready ground if you prefer. The grind should be sandy, not too fine. Slightly mound the coffee above the rim, then gently level it with your finger without pressing down. Screw the top jug on firmly and place over medium heat. When the coffee starts flowing, reduce the heat if it sputters to prevent burning. Once the jug fills, remove from the heat. Depending on your cafetera size, you may need to brew a second batch to get enough coffee.
What if I don’t have a cafetera? You didn’t hear this from me, but mix 30g of instant coffee powder with 425g of boiling water. Mix until dissolved. Or you can use coffee made from your coffee machine.
Eggs - You want to make sure your egg yolks are at room temperature for this recipe. If you live in a country where it is not safe to eat raw eggs, use pasteurized eggs in place of regular store-bought eggs.
Eating raw eggs - Eating fresh eggs in their raw state is generally safe in most countries. But I understand that for some, the mere thought makes them feel anxious or afraid of salmonella poisoning. You can
To pasteurize your eggs
If you’re pregnant, serving this to young children or immunocompromised and want to be extra safe, you can use pasteurized egg whites. These are eggs that have been gently cooked to kill any food born illnesses, making them safe to eat raw. You can buy pasteurized eggs at some stores, but if you can't find them here's how to pasteurize eggs:
- Start with room temperature eggs.
- Fill a medium pot with enough water to cover the eggs by an inch
- Heat to 60°C / 140°F (use a thermometer to check).
- Place the eggs in the hot water for 3 1/2 minutes.
- Take the eggs out and cool them under cold water for a minute to stop the cooking process.
- Dry the eggs and let them get back to room temperature before using.
Nutrition
Calories:610kcal | Carbohydrates:60g | Protein:13g | Fat:34g | Saturated Fat:20g | Polyunsaturated Fat:2g | Monounsaturated Fat:7g | Cholesterol:236mg | Sodium:105mg | Potassium:1405mg | Fiber:0.3g | Sugar:12g | Vitamin A:1378IU | Vitamin C:0.3mg | Calcium:181mg | Iron:3mg
Have you tried this recipe?Tag me on instagram @thescranline!