Cake By The Ocean Beach Cake
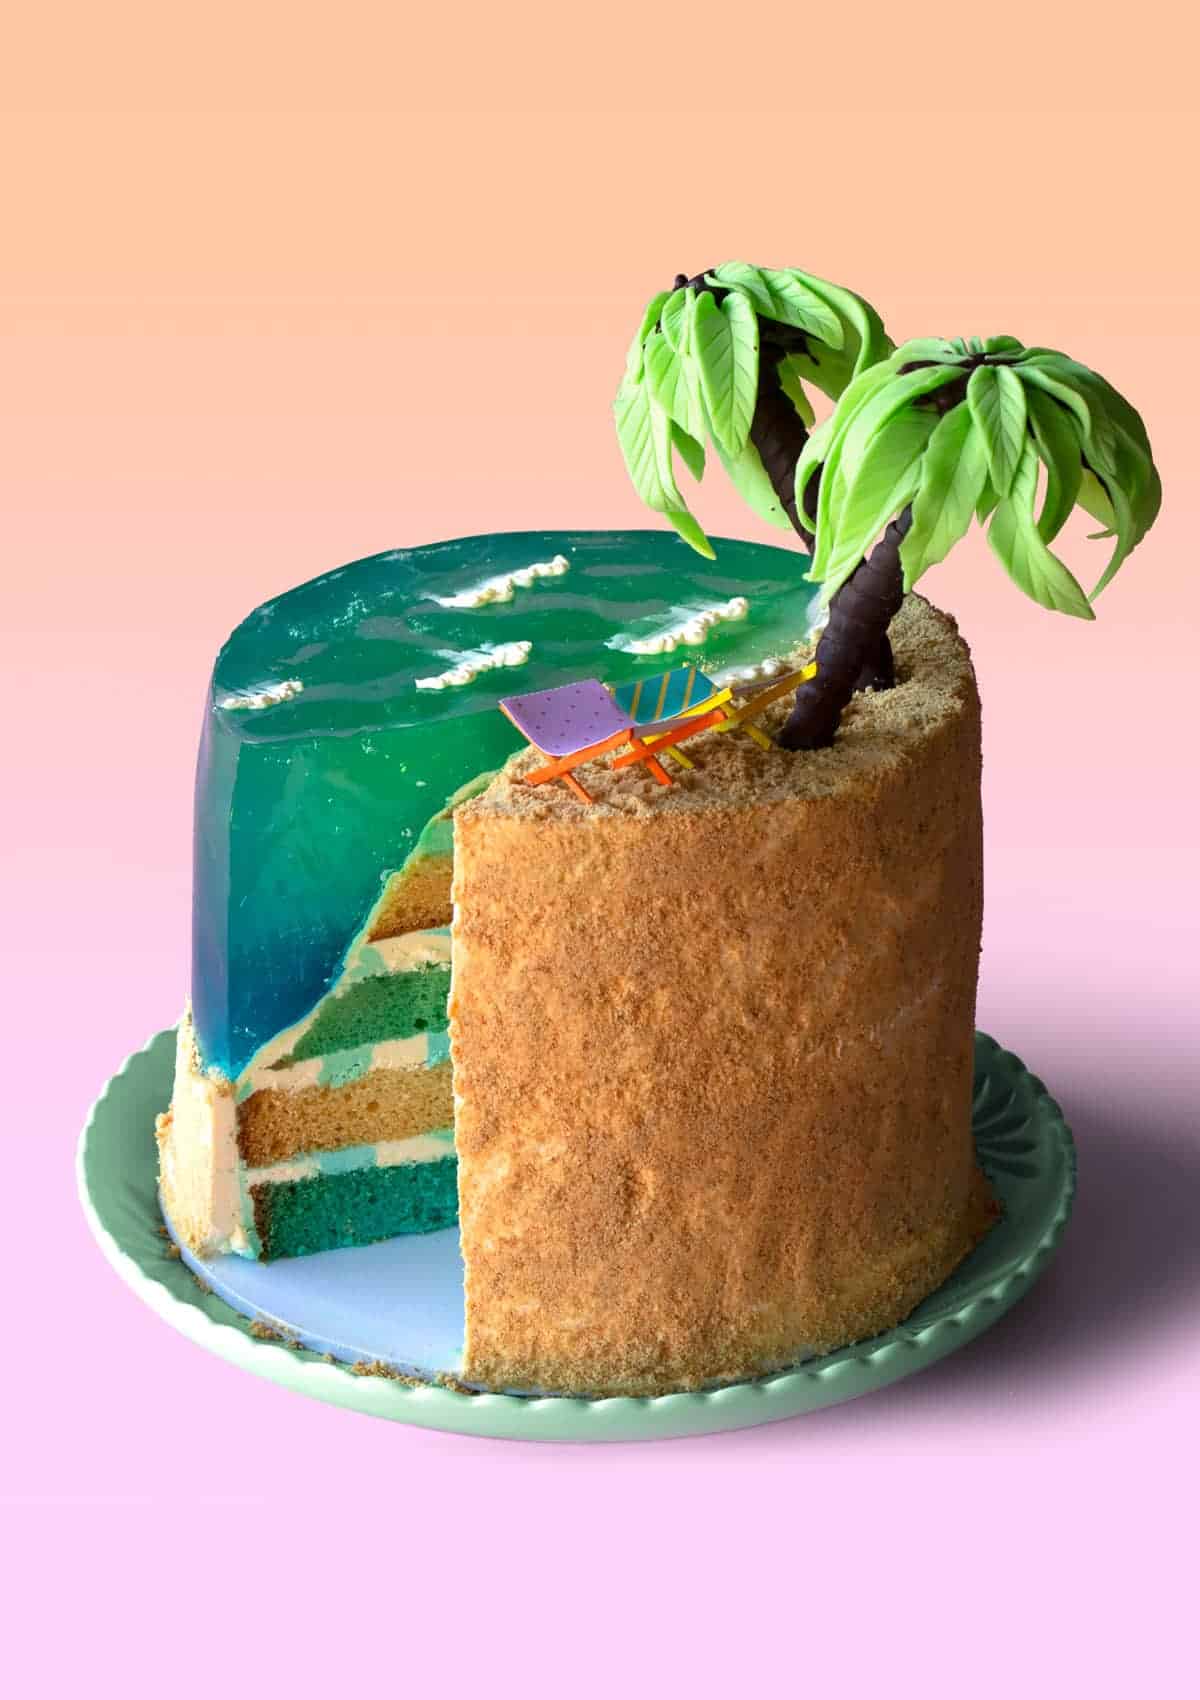
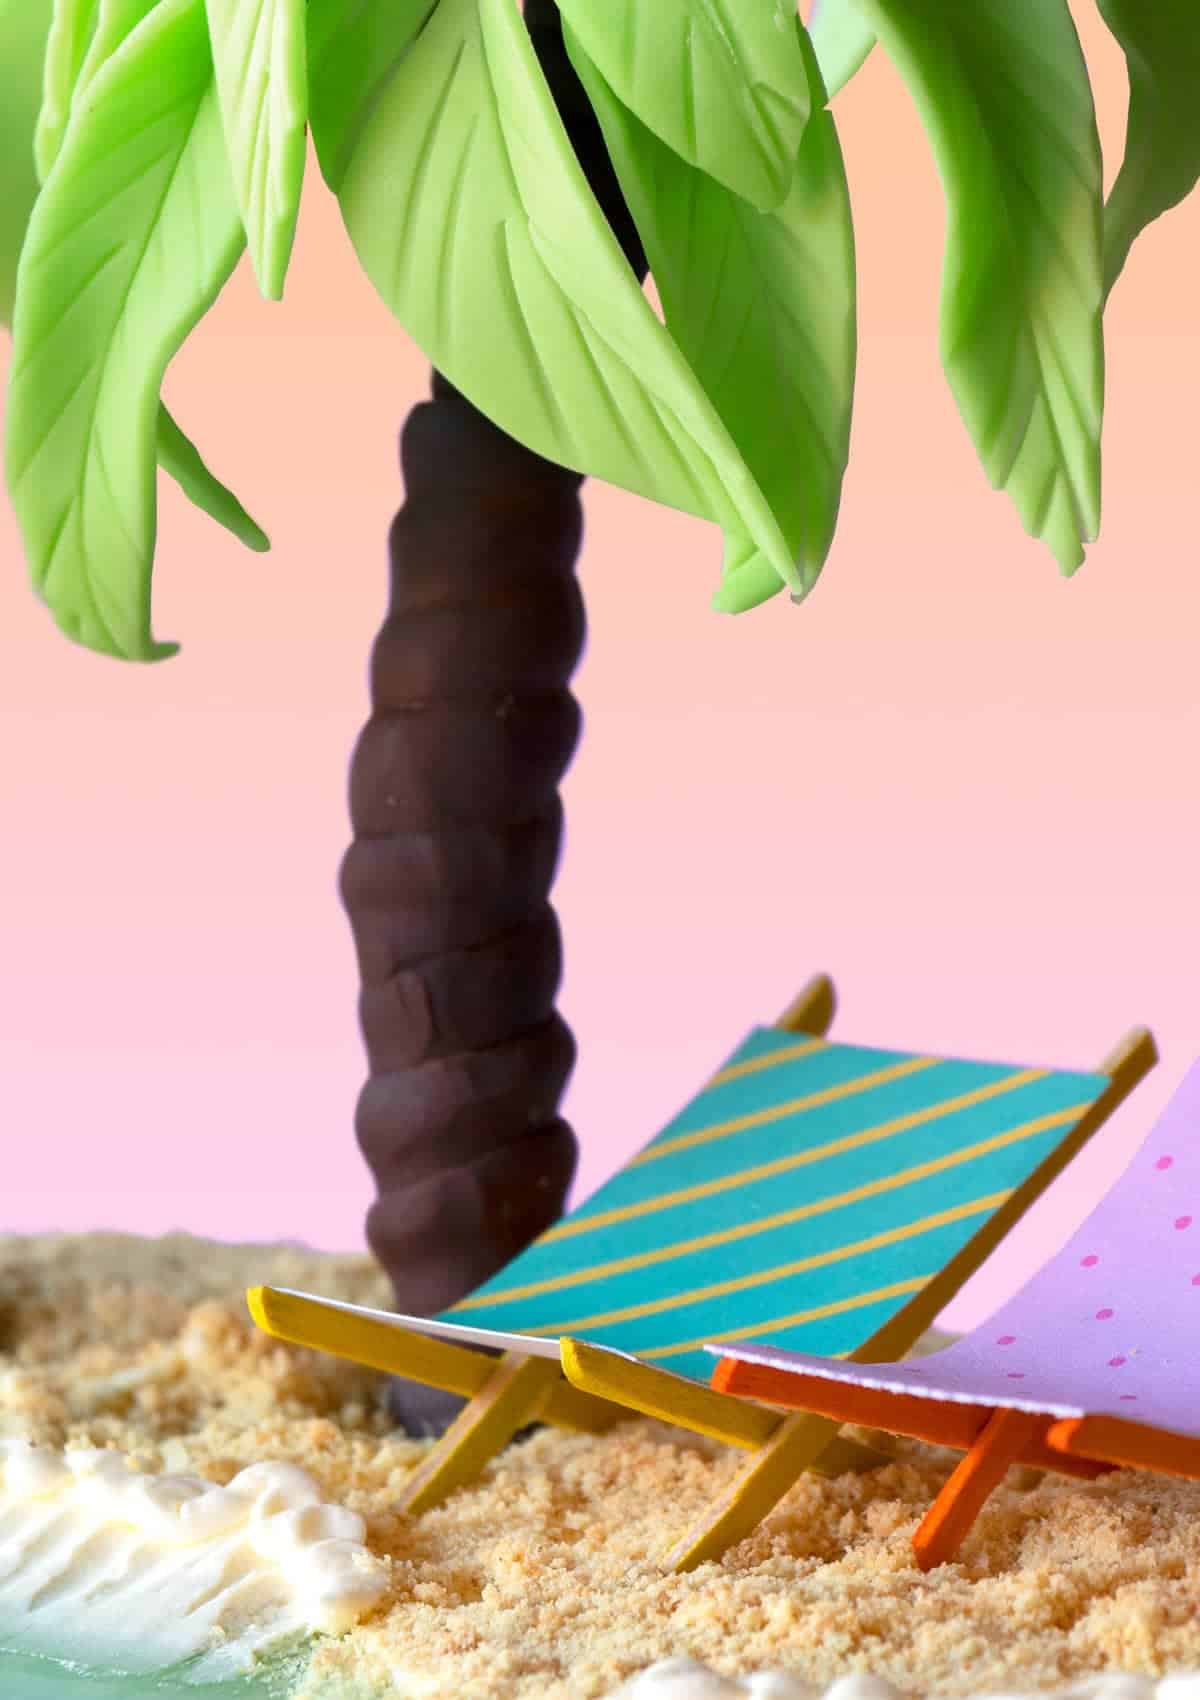
This is perhaps my most ambitious cake ever! I spent three weeks agonizing over the details and easiest way to put it all together. The idea was to create a beach cake to help celebrate summer. I think I achieved it? In this recipe I’ll show you how to make the modelling chocolate palm trees, the cute little paper beach chairs and how to get that awesome ombre sea!

Just a note guys: the jelly portion of this cake is made using gelatin. There’s a large amount of gelatin in it to help it stay together, stay on the cake and not collapse on itself. So for that reason, it’s more of a food safe decoration than an edible portion of the cake. Can you make it using agar agar? I never tested it, so I’m not sure, but maybe?

Nicks favorite thing…
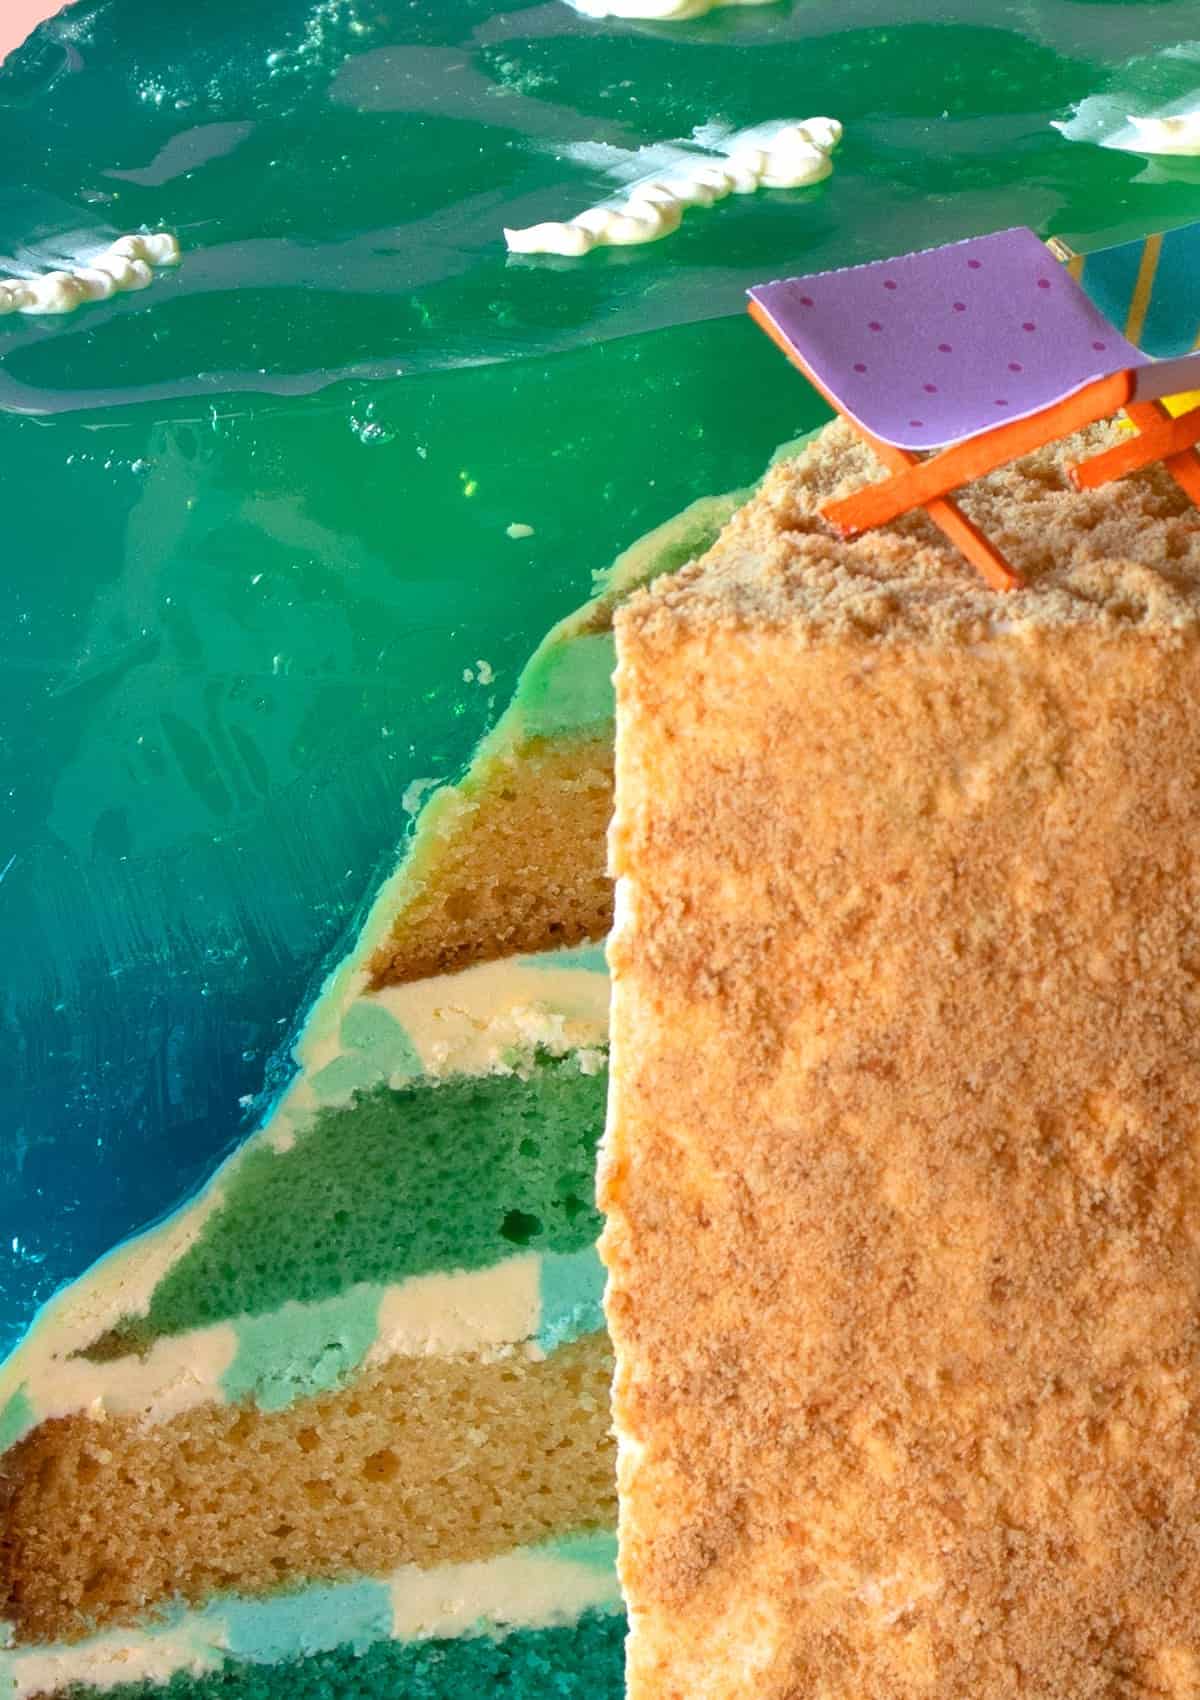
I absolutely love how much of a challenge this cake is. See below for my layout of how to tackle this cake. I love the way it looks. I love the cookie sand on the outside and I love the clear ombre blue sea water too. Visually, this cake looks really cool!
What does it taste like?
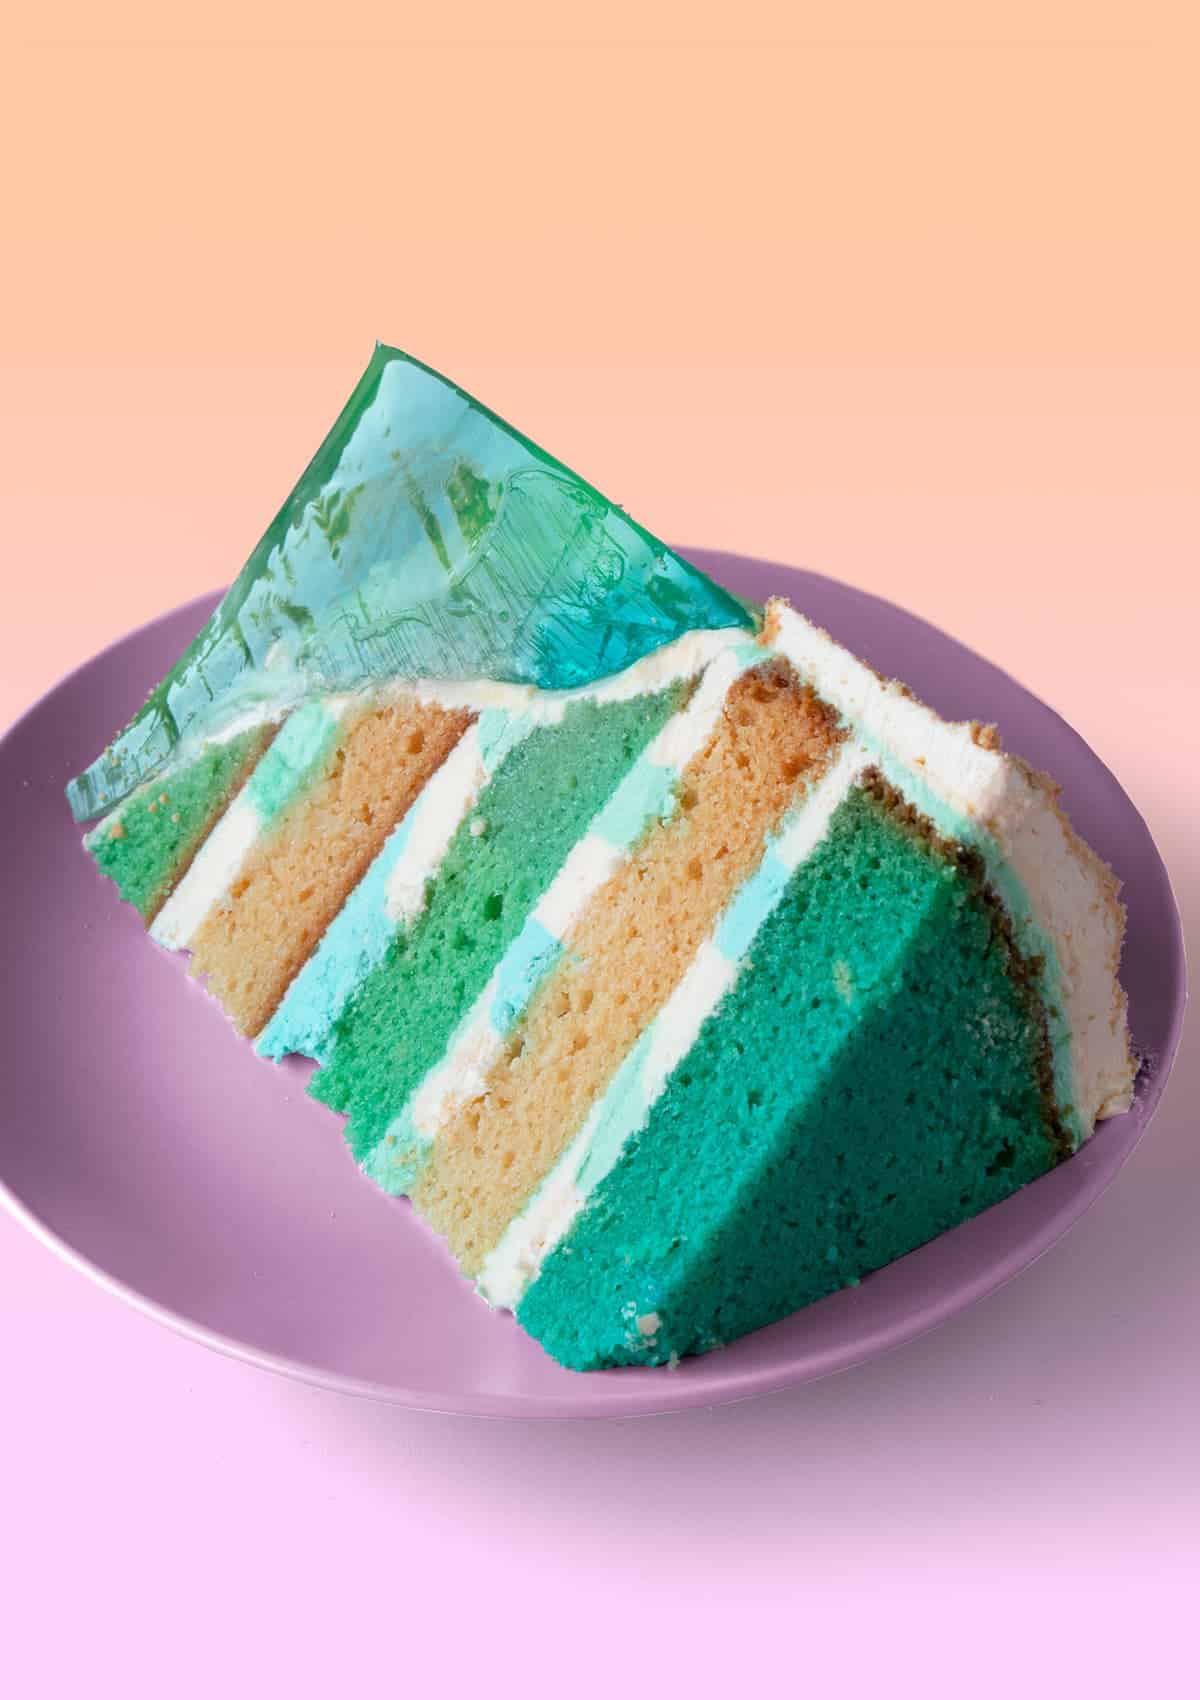
This cake uses my vanilla cake recipe which is moist and delicious. I’ve added lemon flavoring to the ocean jelly too.

This cake will take four days to create
There’s a lot happening on this cake. It took me three weeks to film. Heres a rough layout of how you should tackle it!
Day 1
- Bake the cake
- Make the palm tree decorations
- Make the gummy jelly.
Day 2
- Make the frosting
- Layer, carve and set the cake
- Wrap the cake and add the jelly mixture. Allow to set for two days.
Day 3
- Make the chair decorations
Day 4
- Unwrap the cake.
- Finish final decorations and put the cake together.

What are the ingredients I need?
- American buttercream frosting – you’ll need 2 batches of this frosting.
- Food gel coloring – I used Americolor food gel.
- Graham crackers – you want to crush these up really finely so they resemble sand. If you can’t get graham crackers, any sandy colored vanilla cookie will work. Even golden Oreos!
- Dark chocolate – I used cooking chocolate.
- Corn syrup – also known as glucose syrup. Either will work.
- White chocolate – I used cooking chocolate.
- All-purpose flour – also known as plain flour
- Caster sugar – also known as superfine sugar.
- Baking powder – this will help the cake rise.
- Salt – I used fine salt.
- Unsalted butter – make sure your butter is softened before using.
- Eggs – I used large eggs
- Milk – I used whole milk for this recipe.
- Vegetable oil – you can use sunflower oil in it’s place. Heavy or strong flavored oils will not work in this recipe.
- Greek yogurt – I used Greek yogurt to help make the cake moist. You cannot taste the yogurt in the cake. You can use sour cream in its place if you wish.
- Vanilla extract – always use good quality vanilla extract when baking.
- Mermaid (melon) flavoring – I used a flavoring made by Queen Fine Foods called ‘mermaid food flavoring. It is simply melon flavoring. You can use any flavoring you like though.
- Food gel – I use Americolor food gel in this recipe. Liquid food dye will not work.
- Gelatin – I used a lot of powdered gelatin in this recipe. It’s so that the water section of the cake sets properly and does not collapse once you unwrap it. It’s technically edible. Although nobody is going to be rushing to eat it.
My Top Tips!
- I’ve outlined what to make on each day above. I’d recommend taking a look so that you can plan ahead when making this awesome but time intensive cake.
- Always allow your gelatin to bloom before using. Blooming your gelatin simply refers to letting it soak in some water before using. That way the gelatin crystals can softened and soak in some water which will help it dissolve or melt easier in the recipe. In this case you’ll bloom it and then allow it to melt in the boiling water.
Other Recipes You Might Like!
- Strawberry Mango Margarita Cupcakes – Perfect for warmer weather.
- Watermelon Freakshake Cupcakes – The perfect summer Freakshake cupcake!
- Neapolitan Cupcakes – Ice cream inspired cupcakes.
A Quick Baking Guide
If you’re new to baking or just want to brush up on the basics, these guides are a great place to start!
Loved the recipe? Let me know!
If you enjoyed this recipe, leave a star rating and comment below. It helps others find the recipe and keeps the baking community growing. Tag me on Instagram so I can see your version too!

Cake By The Ocean Cake
Serves 20
Ingredients
Frosting
- 2 batches American buttercream frosting
- 5 drops teal food gel
- 5 drops blue food gel
Sand
- 200 g graham crackers
Beach Chairs
- Craft paper with cute patterns
- 4 colored craft sticks
- Craft glue
Palm Trees
Dark modelling chocolate
- 225 g dark chocolate chips
- 112 g corn syrup/glucose syrup
Lime colored modelling chocolate
- 225 g white chocolate chips
- 225 g corn syrup
- 2 drops teal food gel
- 2 drops yellow food gel
- 150 g dark chocolate, melted (for glueing things together)
Cake
- 430 g all-purpose flour, plain flour
- 265 g caster sugar, superfine sugar
- 3 tsp baking powder
- 1/2 tsp fine salt
- 125 g unsalted butter, softened
- 2 large eggs, 55g each
- 375 g full-cream, whole milk
- 125 g vegetable oil
- 50 g Greek yoghurt, or sour cream
- 7 g vanilla extract or vanilla bean paste
- 1 tsp mermaid, melon flavoring (optional)
- 5 drops teal food gel
- 5 drops blue food gel
Jelly Crumble
- 90 g gelatin + 250g cold water
- 500 g boiling water
- 225 g granulated sugar
- 7 g lemon flavoring
- 250 g cold water
- 3 drops blue food gel
Gummy Ocean Jelly
- 300 g gelatin, yeah you read right! + 500g cold water
- 500 ml – 2 cups boiling water
- 500 ml – 2 cups sugar
- 7 g lemon flavoring
- 1 drop blue food gel
Instructions
- Just a note: The jelly portion of this cake is technically edible. But, there’s a large amount of gelatin in it, which gives it more of a gummy bear consistency, rather than a jelly consistency. I tried using less gelatin so that you wouldn’t be able to taste it, but it collapsed when I unwrapped it. So the large amount of gelatin in the recipe is supposed to help prevent that portion of the cake from collapsing in on itself when you unwrap it. Can you use agar agar in it’s place? Maybe… I’m not sure, I never tested it using agar agar. The jelly portion is there for effect, it’s not really there to be eaten. The cake portion is what you will serve to your guests.
Frosting
- Split one batch of frosting into two bowls. Color one bowl teal using teal food gel, one blue using blue food gel and leave the third one white. We’ll use the remaining frosting for the filling, crumb coat and waves.
Jelly Crumble
- Add the gelatin and cold water to a mixing bowl and mix using a fork until well combined. Set aside to set for 5 minutes.
- Add the boiling water and sugar into a large mixing bowl and whisk together until the sugar is completely dissolved. Add the gelatin and mix until the gelatin is completely dissolved. Then add the lemon flavoring and additional cold water and mix to combine.
- Split the mixture into three bowls. Add 2 drops of blue food gel to one and use a spoon to mix until evenly colored. Add one drop to the second bowl and mix until combined. Add about 1 tbsp of the blue mixture from the second bowl into the third bowl and mix to give it a light blue color. Allow all three bowls to set in the fridge for 2 hours. Then, right before you’re ready to add it to the cake, use a fork to crumble each one into large chunks.
Cake
- Please note: To make the 6 layered cake you see pictured; you’ll need to double the cake recipe only. All other measurements are enough to fill, crumb coat and finish decorating the cake.
- Preheat a fan-forced oven to 140°C (275°F) or a conventional oven to 160°C (320°F). Spray three 20 cm (8 inch) cake tins with oil spray and line the bottoms with baking paper. Set aside.
- Add the flour, sugar, baking powder and salt to a large mixing bowl and mix with a hand mixer until well combined.
- Next, add the softened butter and mix on low speed until the mixture reaches a crumbly, sand-like texture.
- Add the eggs, milk, oil, Greek yoghurt, mermaid flavoring and vanilla, and mix on low speed until all the dry ingredients are incorporated. Scrape down the side of the bowl and mix for another 20 seconds.
- Split the batter into three separate bowls. Color one teal using teal food gel, the second one blue, using blue food gel and leave the third plain.
- Divide the different colored cake mixture between the three tins. I find that using an ice-cream scoop makes it easy to distribute the batter evenly, ensuring that all three cakes will bake at the same rate.
- Bake for 50–60 minutes, or until a toothpick inserted in the middle of the cake comes out clean. If the toothpick is coated with wet batter, continue baking for 10 minutes at a time until fully baked.
- Allow the cakes to cool to room temperature in the tins, then chill them in the fridge overnight. Chilling your cakes overnight makes them easier to trim and decorate, so I always bake my cakes the day before I decorate them.
- To trim your chilled cakes, use a cake leveler or large serrated knife to carefully trim the crust off the top of each cake. Then trim each cake in half. You’ll end up with 6 layers.
- To crumb coat your cake, add a dab of frosting onto a 10” cake board or flat serving plate. Use a small offset spatula to spread the frosting around before adding the first cake layer. Gently press down the center of the cake layer to make sure it’s stuck to the frosting underneath.
- Add the teal, blue and white frosting to three separate piping bags and snip the end of the bag off. Pipe a ring of white frosting around the first layer of cake. Then pipe a ring of teal, a ring of white, then blue and repeat that until you’ve filled the layer. Use a small offset spatula to smoothen out the frosting before you add the next layer of cake. Repeat the same frosting technique with the remaining layers. Place in the fridge and chill for 2 hours.
- We’re going to carve away some of the cake to make way for the jelly ocean. You want to use a large knife to cut a slope shape on one side of the cake. You can freeze the offcuts and use them for cake pops.
- Add frosting around the sides, on the slope and top of the cake. Use the small spatula to smoothen out the top and sides of the cake, taking care to fill in any gaps in between each layer of cake.
- Use a cake scraper (otherwise known as a bench scraper) to smoothen out the frosting on the sides and top. Get it as neat as you can. This should just be a neat, thin layer of frosting which is aimed at trapping any cake crumbs so that random bits of cake crumbs don’t show up on the final layer of frosting. Chill for 2 hours or overnight.
- Add another layer of frosting on the cake, get it as smooth as you can and chill for another 2 hours.
- Once the cake has chilled and set in the fridge, wrap the cake in acetate. Would recommend going around the cake twice to seal it up well and prevent leaking. Wrap it three times in plastic wrap as an extra bit of security against leaking.
- Add the crumbled gelatin in the mold you’ve created starting with the dark jelly first. Let’s move on to the
Gummy Ocean Jelly
- Add the gelatin and cold water to a mixing bowl and mix using a fork until well combined. Set aside to set for 5 minutes.
- Add the boiling water and sugar into a large mixing bowl and whisk together until the sugar is completely dissolved. Add the gelatin and mix until the gelatin is completely dissolved. Then add the lemon flavoring and mix to combine.
- Carefully pour the mixture into the cake wrapped in the mold. Set aside in the fridge to chill for 6 hours or overnight.
Beach Chairs
- Begin by cutting all 4 of the sticks in half-length ways. You’ll end up with 8 sticks. Cut 4 sticks 6cm in length using a knife, cut the other 4 sticks 4cm long. Discard the offcuts. Add some craft glue to the long sticks and stick the shorter sticks on top. Stick them at an angle as shown in the video. Make sure the angles are the same otherwise your beach chairs will look wonky. Let them dry for an hour or two.
- Cut out two pieces of craft paper 6cm x 3cm (preferably different patterns). Gently bend your paper pieces. This will make sticking them to the stick much easier.
- Turn the slightly bent papers upside down. Add some craft glue on the bottom and top of the craft paper. Stick the angled pieces on top and allow to dry a couple hours.
Palm Trees
- The method for making both modelling chocolates is the same. Let’s make the dark chocolate modelling chocolate. Begin by adding the dark chocolate into a microwave safe bowl. Microwave for 20 seconds at a time, stirring each time until smooth.
- Add the corn syrup into a small microwave safe bowl and microwave for 5-10 seconds. You want to get it to body temperature.
- Add the corn syrup to the melted chocolate and use a spatula to gently fold the two ingredients together. As soon as they’re combined and the chocolate looks like it’s about to split, pour the mixture onto a large piece of plastic wrap. Wrap it up and allow it to set at room temperature until it’s soft and pliable.
- Unwrap the modelling chocolate and knead on your workbench until it’s nice and smooth like a dough. At this stage it’s usable.
- To make the lime colored, follow the same process. Once the modelling chocolate has set and you get to the kneading stage put on some food safe gloves and add the food gels. Knead until evenly colored and pliable.
- Here’s a tip. If your modelling chocolate becomes crumbly and impossible to kneed there are a couple things you can do to prevent yourself from getting so mad you throw it at the cat.
- First try gently warming it up in the microwave. 5 seconds at a time, until it’s soft enough to kneed. If it becomes really oily when you try kneading it, let it cool a little and try kneading again.
- If that doesn’t work, this next step def will, but you need to be careful because it can also prevent your modelling chocolate from setting stiff enough for the palm tree leaves to keep their shape. Lightly wet your hands with water and knead the modelling chocolate until it becomes pliable and almost stretchy without breaking. Again, take care not to add too much water, it will make it impossible to make the leaves.
- Ok, so making the stalk is easy. Begin by bending two thick and long cake pop sticks so there’s a slight bend.
- Dust your workbench with corn starch and then roll the dark chocolate out to a couple millimeters thin. Use a pizza cutter to cut out 2 long strips of modelling chocolate.
- To help the fondant strips stick and secure to the cake pop sticks you want to add a little bit of melted chocolate along one side of the sticks, then wrap the strip around the stick, starting at the bottom, leaving about 4cm bare (that will go into the cake and anchor the stick in the cake so it doesn’t topple) until you’ve gone all the way to the top. Set aside to chill in the fridge to set.
- To make the leaves, roll out the fondant to a couple mm thin. The thinner you get it, the more realistic your leaves will look. You don’t however want to roll it so thin that the fondant looks transparent. Use a sharp knife to cut out long leave shapes. Cut 8 long ones, 8 medium ones and 6 smaller ones.
- Use a table knife to gently indent a line in the middle of the leaf, then lines coming off it. It’s time consuming, but it makes the leaves look more like leaves.
- Give the leaves a slight bend as shown in the video. Set aside on a baking tray and allow to chill overnight.
- Ok, we’re ready to assemble! To put the top of the palm trees with the leaves together, you’ll need a packet of cupcake liners. Turn it upside down and place on your work bench.
- Add a small piece of softened/warmed up dark chocolate modelling chocolate on top. You’re going to be sticking your leaves into it. Dab the bottom of the warm ball with melted chocolate and stick the larger leaves around it. Then add more melted chocolate and add the medium leaves. Lastly finish with the smaller leaves on top.
- Gently transfer to the fridge to chill and set. Once it’s set careful turn upside down and add more melted chocolate to the bottom of the shape you’ve created. You can even go as far as adding some melted chocolate on the leaves to set everything in place really well. Place back in the fridge to set.
- To store excess modelling chocolate, wrap tightly in plastic wrap and flatten out with your hands.
Sand
- Add the graham crackers to the bowl of a food processor and crush until you reach fine crumbs.
Assembly
- Ok, so everything is ready, let’s put it all together. Begin by unwrapping your cake from the mold and acetate.
- Frost the outside of and part of the top of your cake taking care around the jelly portion. Use a small offset spatula to spread around as evenly as you can. Add the graham cookie crumb around the cake including partly on the top
- Place the paper beach chairs on top.
- To finish, dip the end of your palm tree trunks in some melted chocolate, then carefully stick the exposed cake pop stick portion into the cake. Place the leafy portion of your trees on top and hold them there for a minute to allow them to set.
5 comments
I love this concept! Do you think one could use a few packets (to make up the 20 tbsp) of flavored jelly powder, obvs keep the water quantity really low as per your recipe, and add some blue food colouring?
This is one of the coolest desserts I have ever ever seen. I may have to give this a try. Thank you.
Thanks so much! N x
You said to put gelatin in 3 separate bowls but you didn’t say how much flood coloring to put in the 3rd bowl.
Hi Stacey, great catch! For the third bowl, add about 1 tablespoon of the blue mixture from the second bowl and mix it in to create a light blue color. Thanks for pointing that out—I’ll update the recipe to make it clearer. Let me know if you have any other questions! N x