Caramel Crunch Brownies (no candy thermometer)
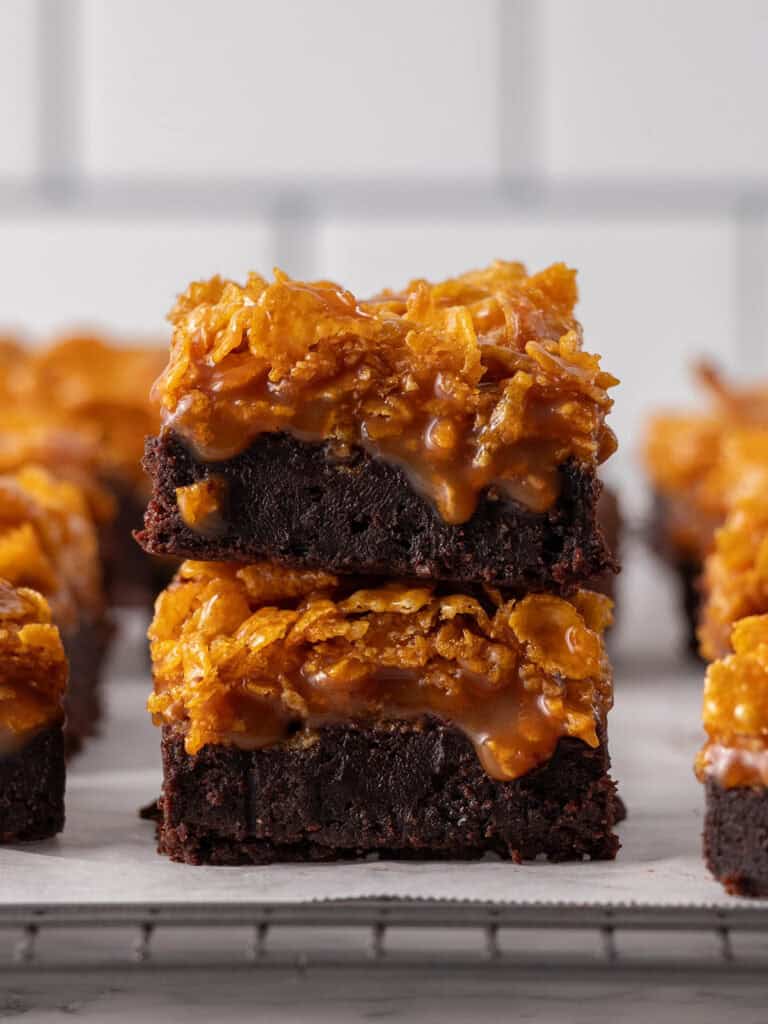
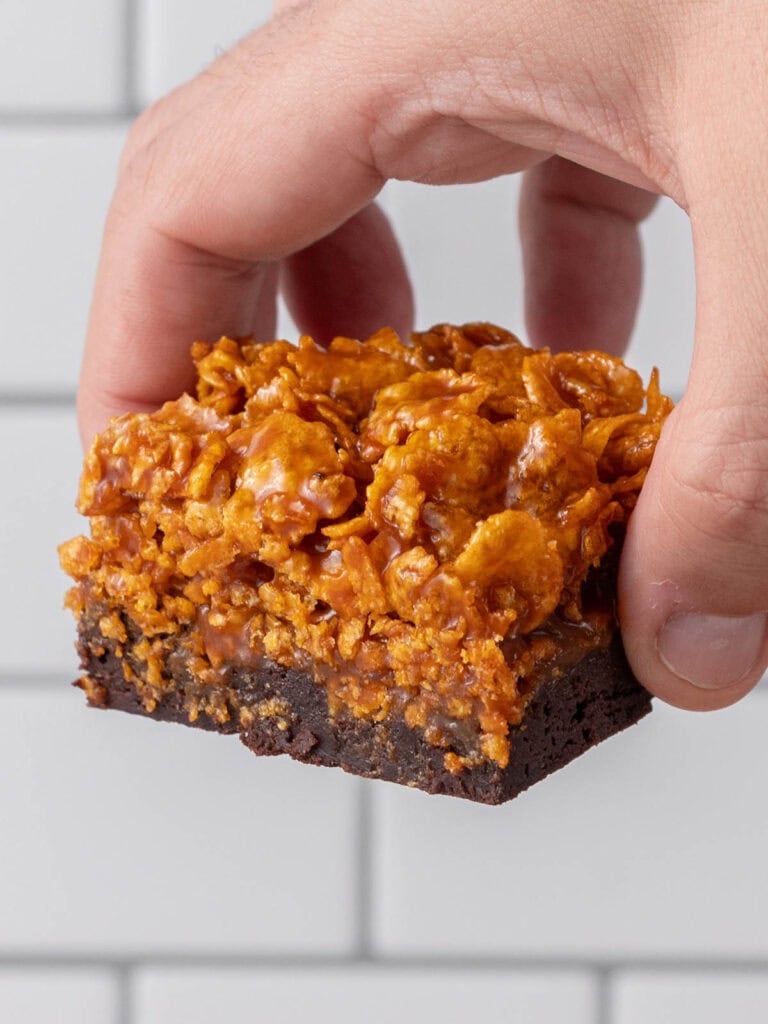
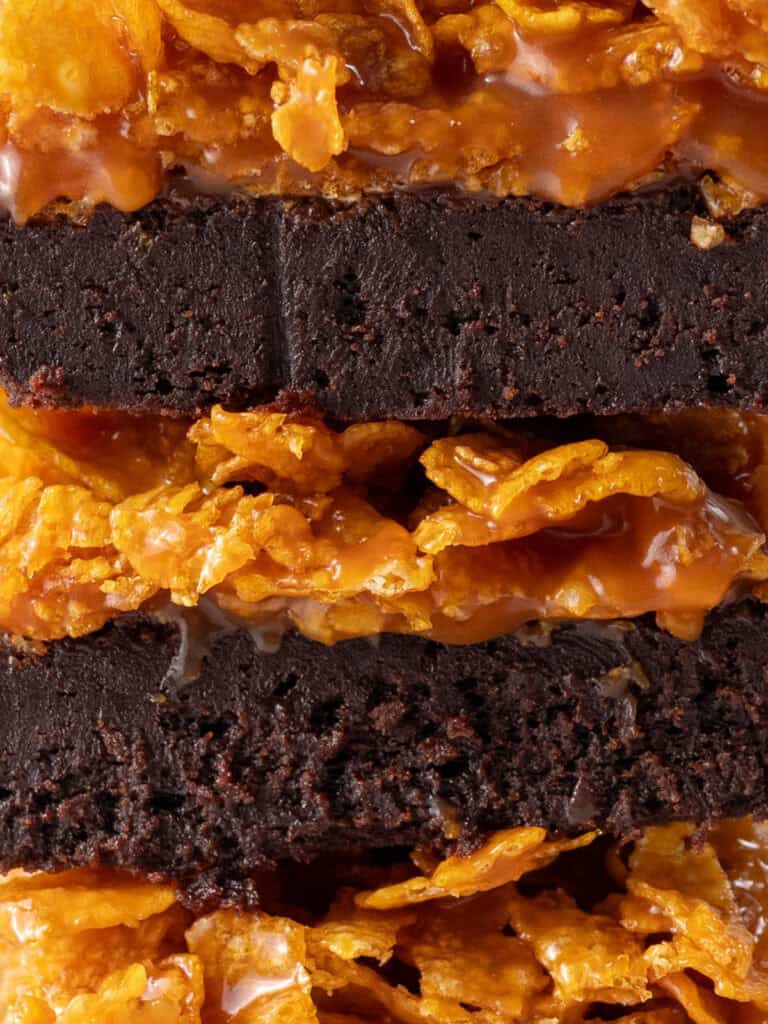
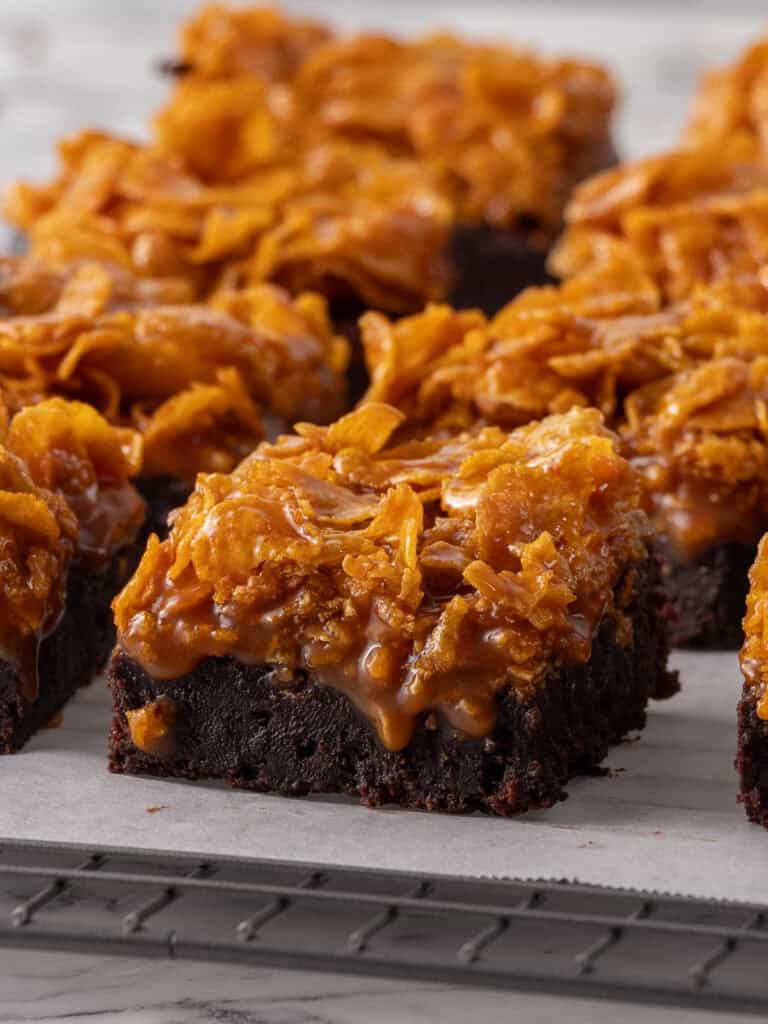
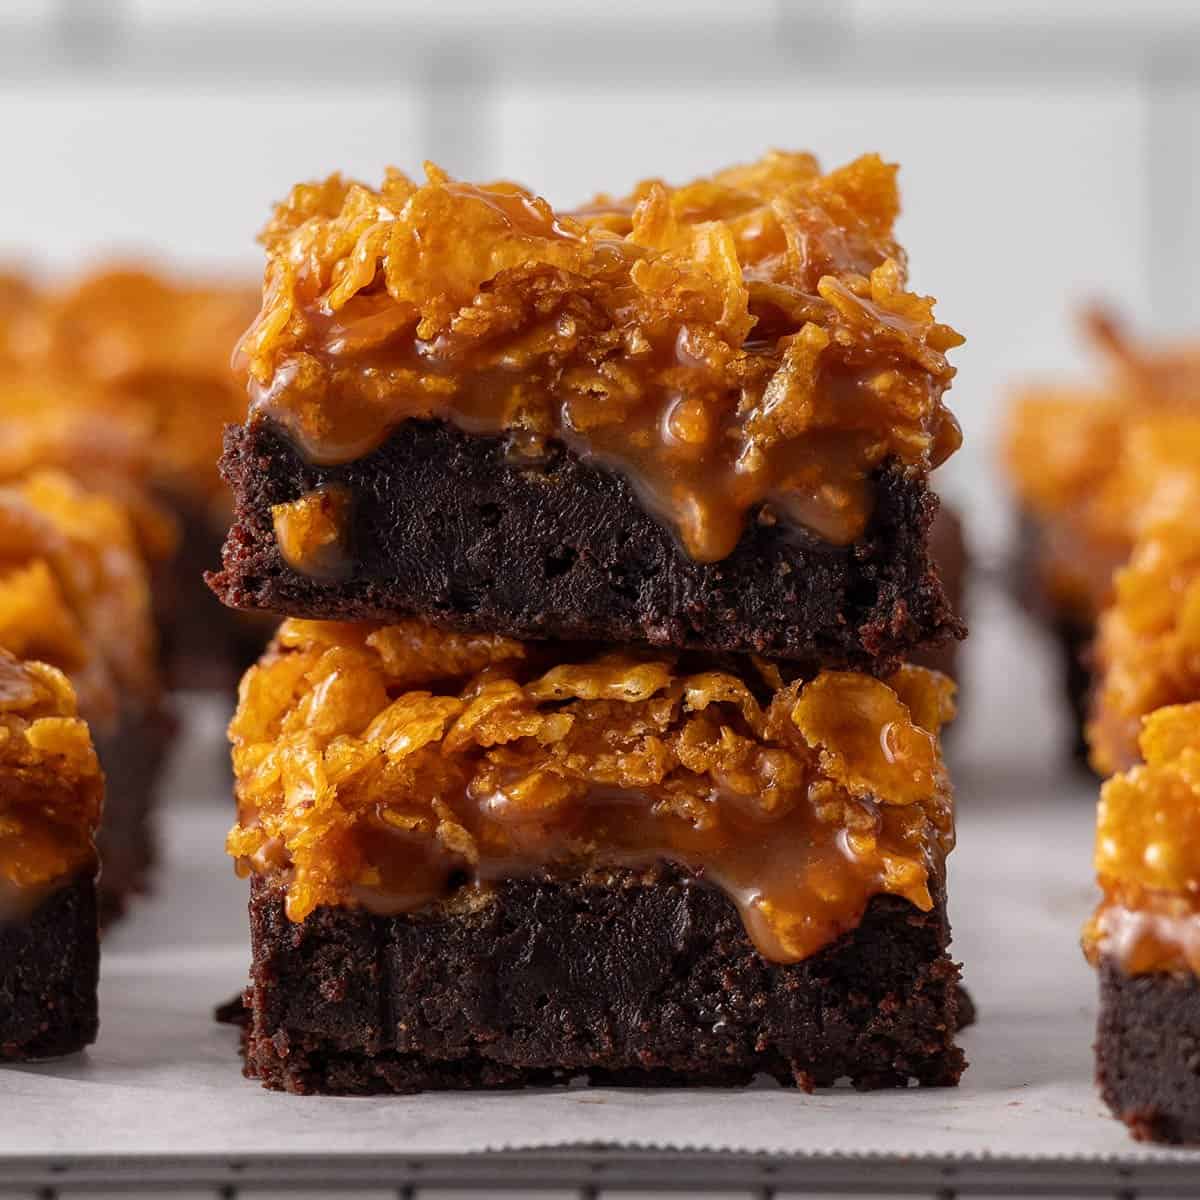
These Caramel Crunch Brownies start with a deliciously rich brownie layer and are topped with a chewy layer of caramel coated cornflakes. The brownie layer is deeply chocolatey, soft and buttery and the caramel crunch on top sets firm and crisp so every bite give you a texture party!
Hey team, Nick here! I bloody love caramel recipes. Especially if salt is involved. Caramel is already really sweet (it’s mostly made of sugar) but when salt is in the mix, it boost that caramel flavor and brings it to the forefront. I use this technique in my caramel chews which are soft and buttery and in my salted caramel cupcakes.
The crisp caramel layer on top of the brownies is the star of the show for me. It’s made using the dry caramel technique which has no water. Oh and no thermometer either. You’re going based off sight. You melt the sugar until it’s golden and then add cream and salted butter. Then you coat the crispy cornflakes in it and pour it on. Waiting for it to set is the hardest part of making this recipe!
This recipe has been on the site for a while, but when I updated my deeply chocolate brownie recipe I had to come back and give this a revisit too. The brownie layer is buttery, soft, chewy (without being raw, a pet peeve of mine) and it has a melt in your mouth texture. I actually use it for my chocolate mousse cake as a base and for my caramel brownies which have a thick fudgy layer of caramel in the middle that doesn’t ooze out. I’m really proud of that recipe.
Let’s Talk Toffee!
There are 3 things I learned about making toffee that I want to share with you. If you’ve never made a dry toffee before (no water), it’s actually super easy to make and the flavor is super deep. In this recipe it’s what binds everything in the cornflake layer and helps it set.
- It can burn easily – Don’t take your eyes off the toffee when making it. Cook on a medium low heat. Take your time. Once the toffee
- Stir very gently and slowly – A rigorous stir can cause sugar crystals to stick to the sides of your pot and they will burn or can cause your toffee to crystalize (turn into a big, solid sugar crystal).
- Cook on a low, slow heat – There’s no speeding up this part of the recipe. It will take about 10 minutes to make the toffee. A low and slow heat will give the sugar time to melt and brown gently without burning.
How to make the buttery brownie layer
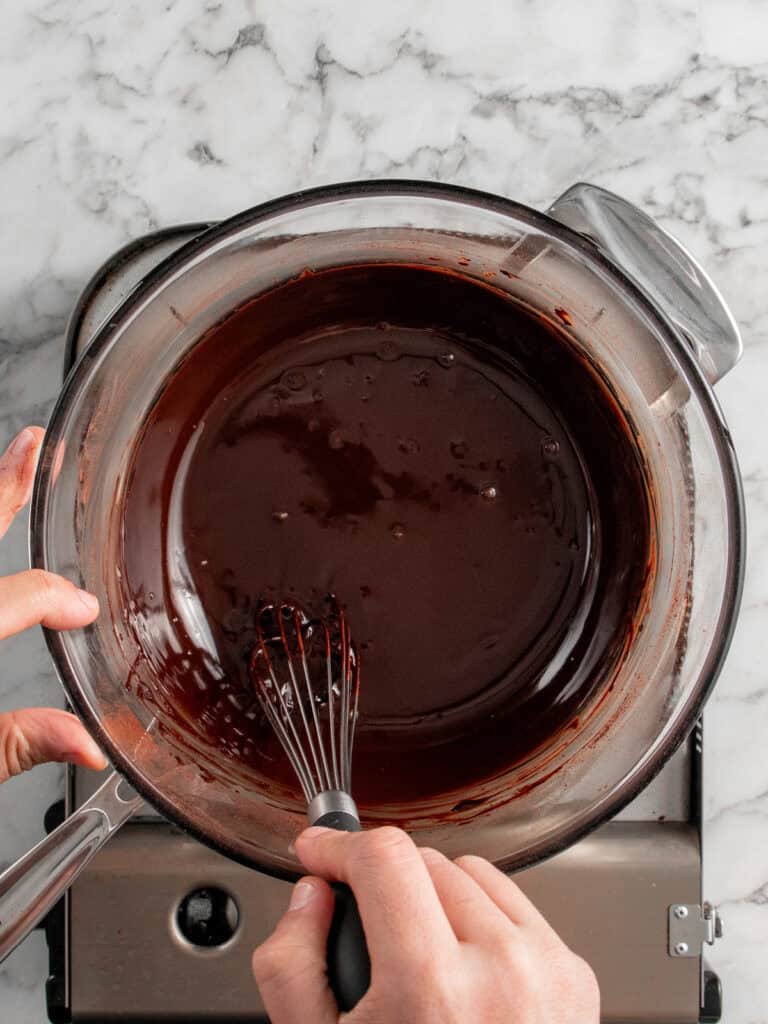
- Melt the butter and dark chocolate together until smooth. Whisk in the cocoa powder to deepen the chocolate flavor.
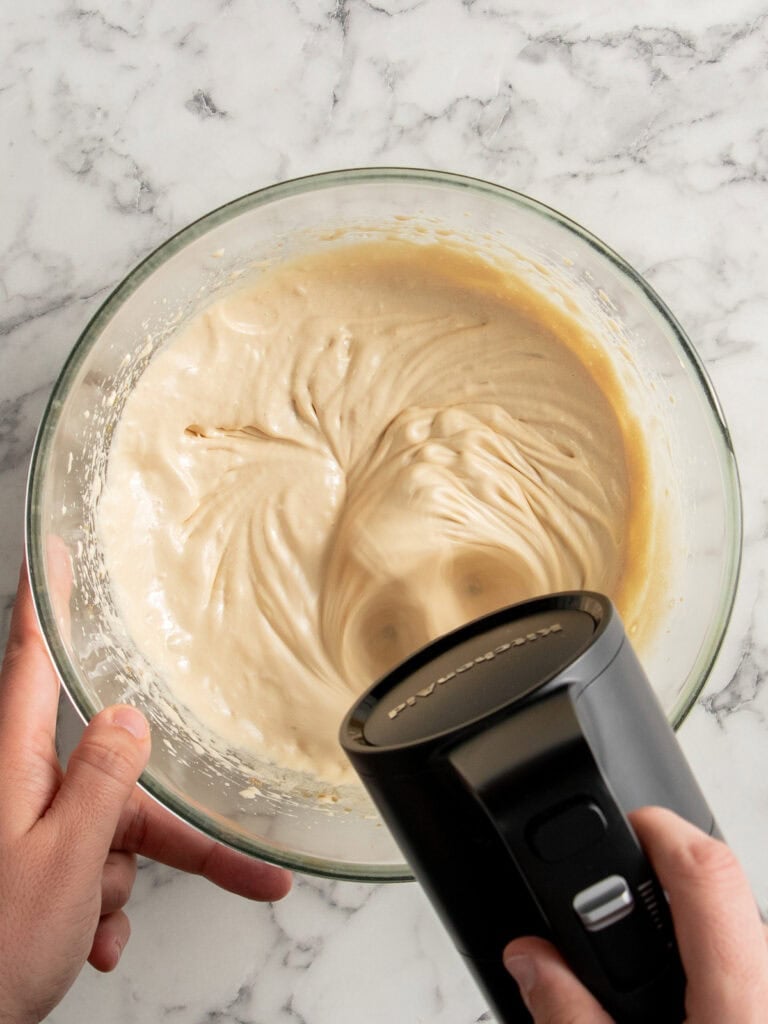
- Beat the eggs, sugars, vanilla and salt until pale and fluffy
Tip – Whisking the sugar and eggs is key for both the shiny top and a brownie that bakes evenly through without ending up undercooked in the center.

- Fold in the cooled chocolate mixture, then the flour
- Bake until the edges are set and the center is just cooked through. Let it cool completely.
Making the toffee
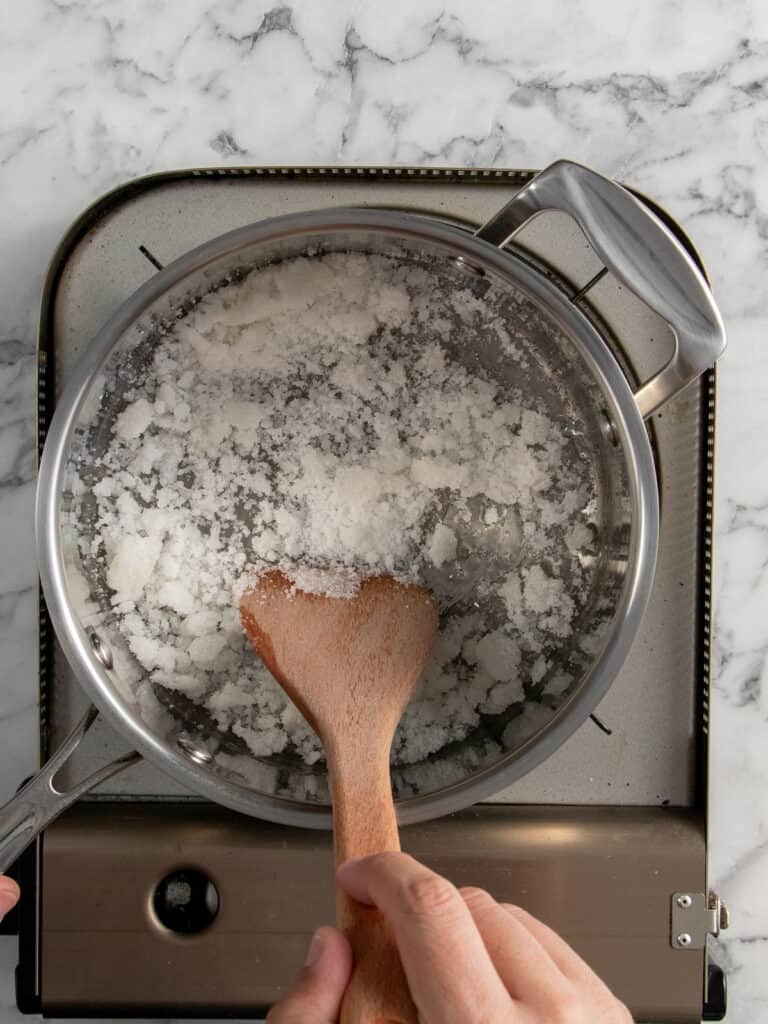
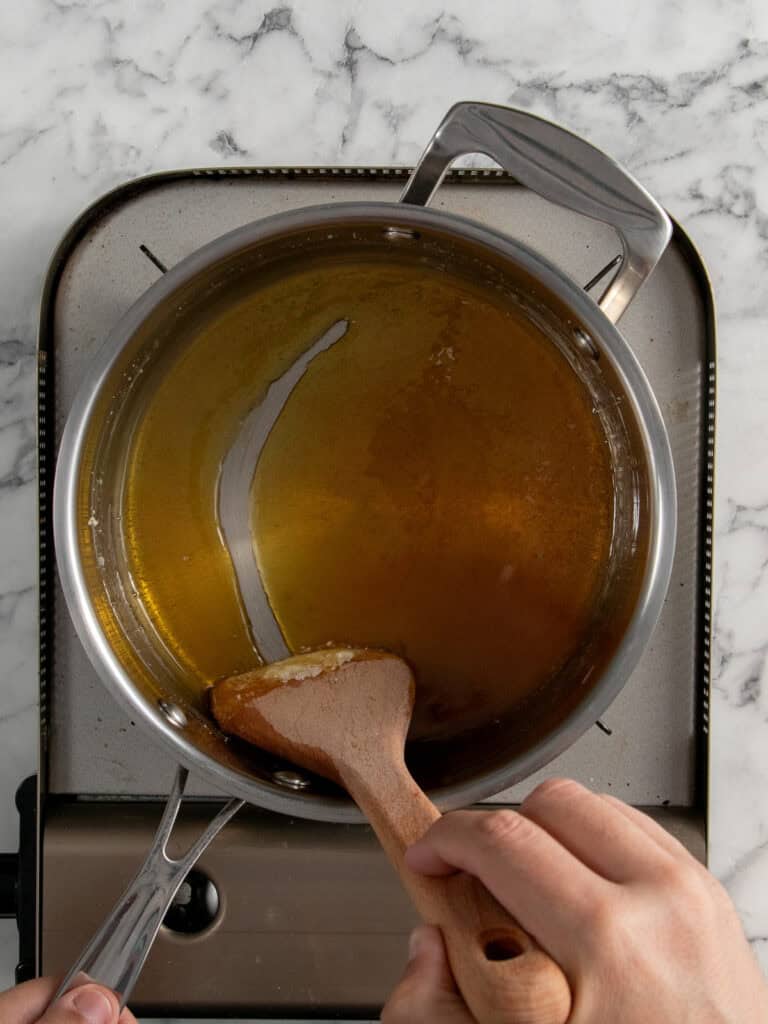
- Cook the sugar in a heavy bottomed saucepan (stainless steel not non stick!) over low to medium heat. It’ll clump up at first.
- Continue stirring until it melts and turns a light golden color.
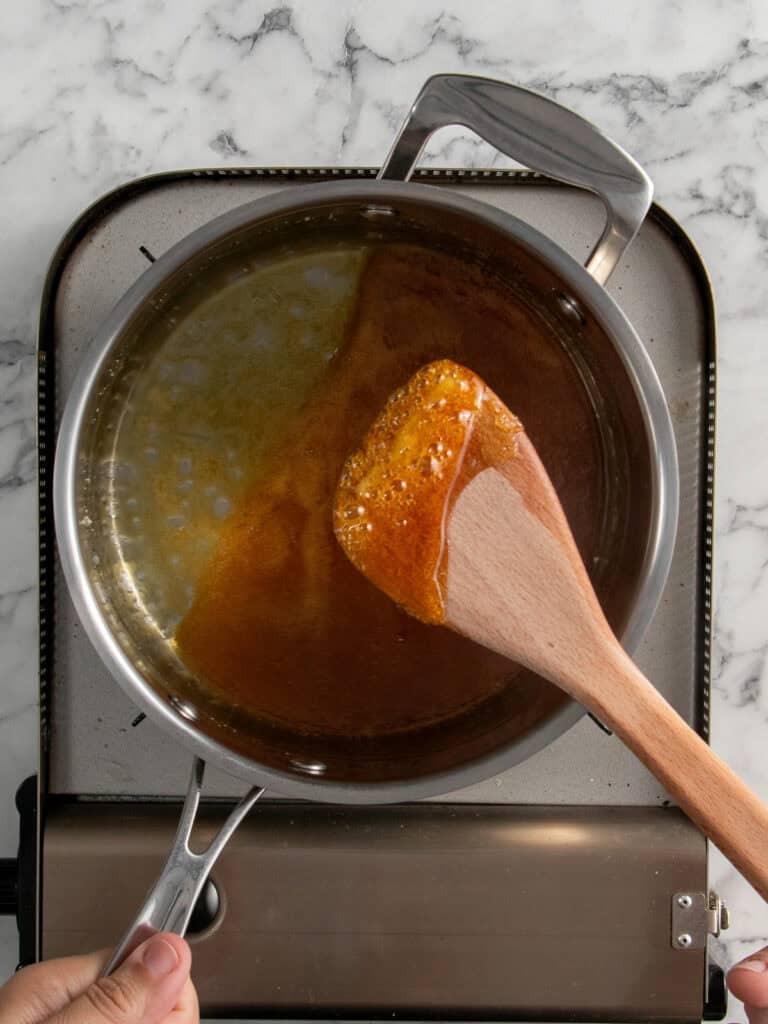
How to tell if your toffee is ready – The thing to keep in mind if you’re cooking this in a heavy bottomed pot is that it retains heat really well. So when your toffee reaches the right color, it’ll keep cooking the toffee which can lead to burning really quickly. The only way to stop it from continuing to cook (even with the heat turned off) is to add the cream.
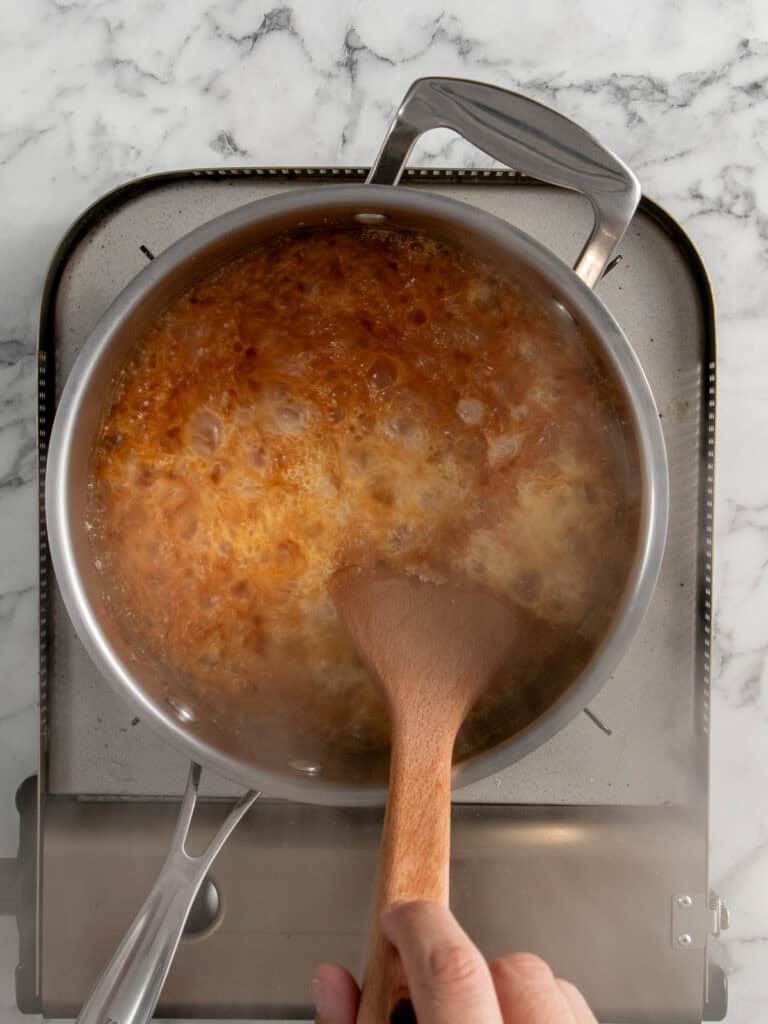
- Turn the heat off and slowly pour in the hot cream. This will stop the toffee from cooking and burning. Use your wooden spoon to stir really slowly. It will steam and bubble so take care.
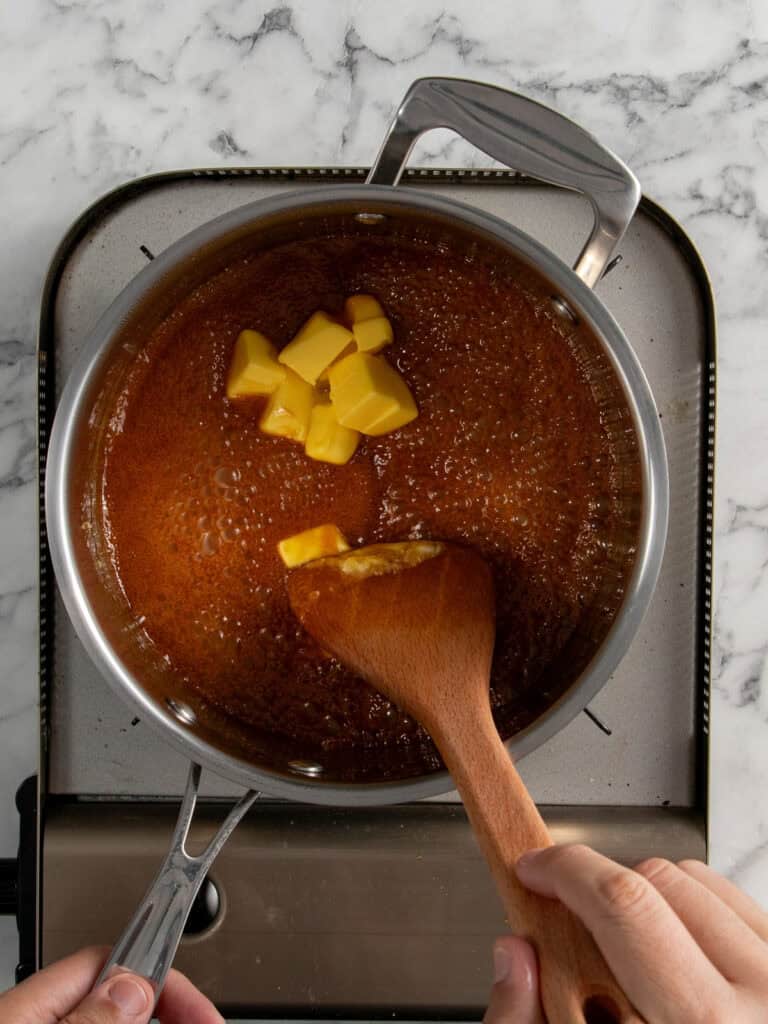
- Add the butter and stir until smooth and fully combined.
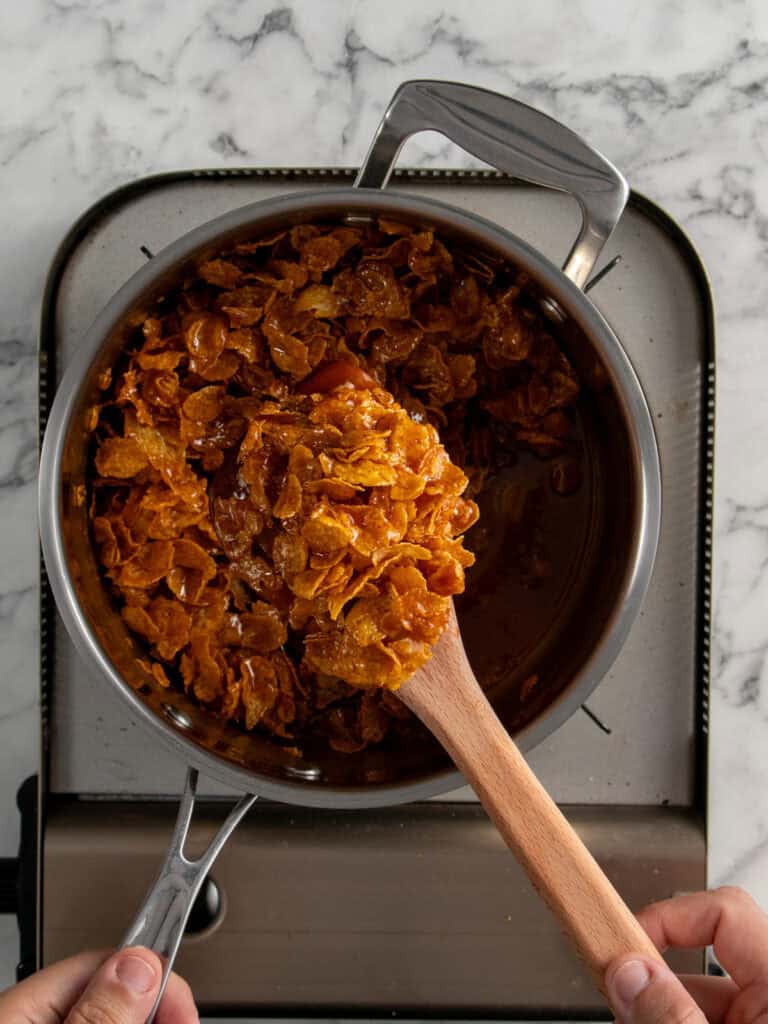
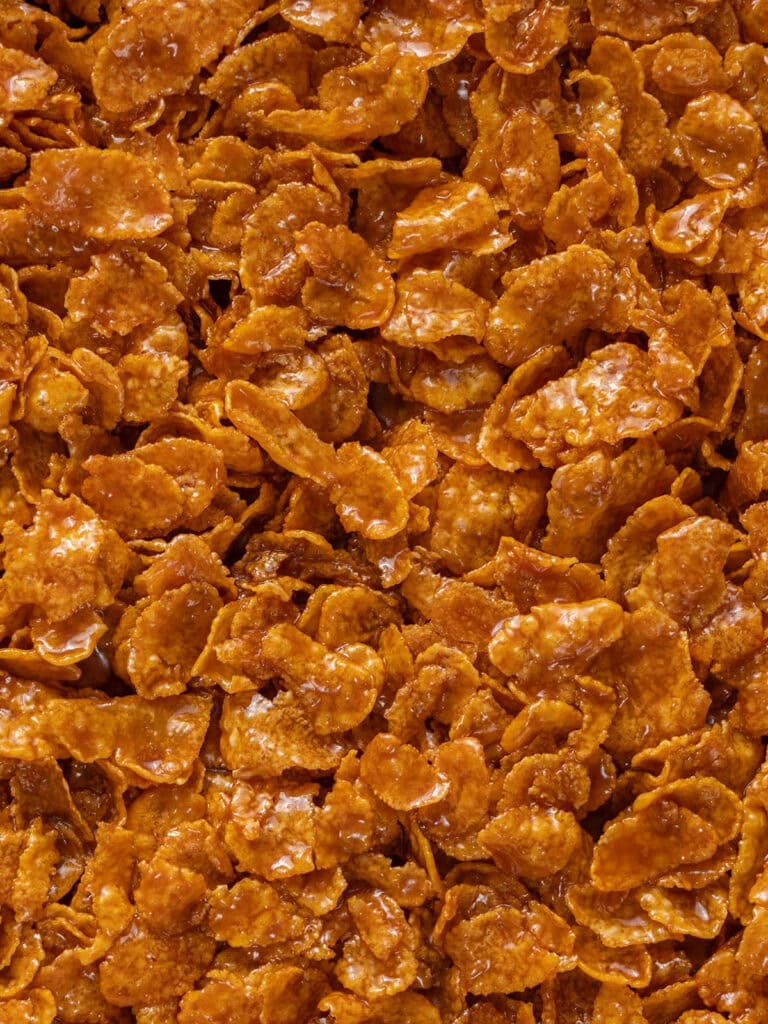
- Fold through the cornflakes until evenly coated.
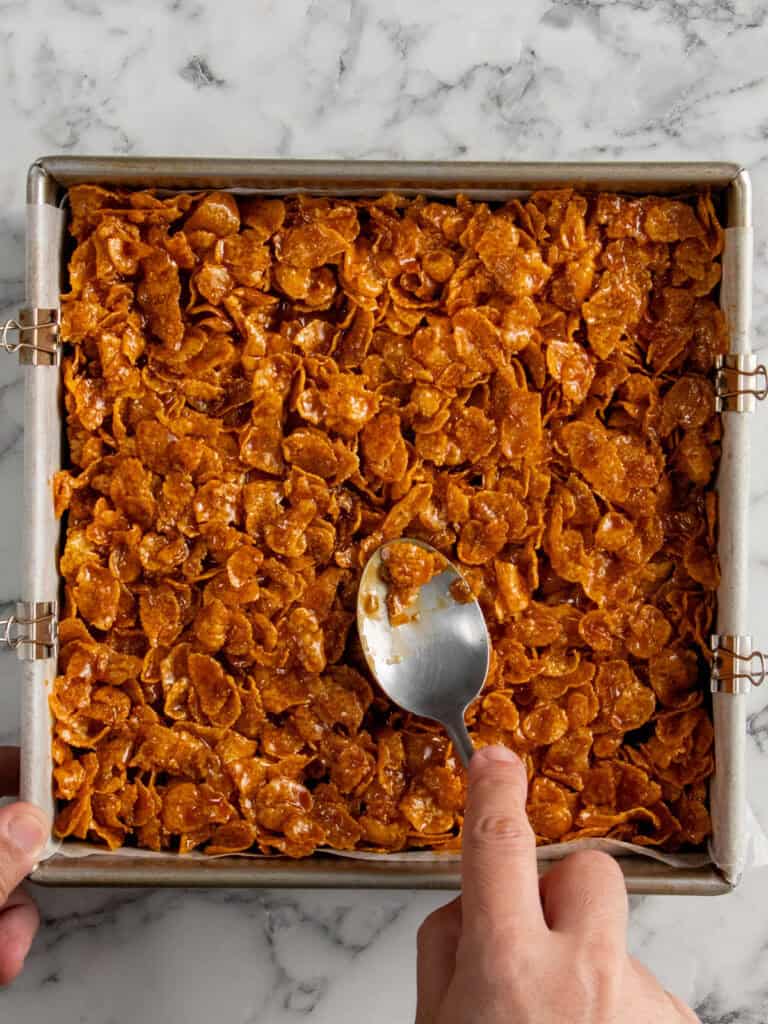
- Spread the caramel crunch evenly over the cooled brownie layer and allow it to set.
- Let it cool for 30 minutes then pop it in the fridge to set properly. It’ll take about 4 hours but I like leaving it in there (uncovered) overnight so it’s really set.
Rachel
This recipe is so easy and SO delicious! I saw it in my email inbox and decided to give it a whirl even though I usually hate caramel recipes since they burn so quickly and are a nightmare to clean. Every step of this recipe was not only easy to follow and understand, but also super easy to clean up afterwards!
How to get perfectly clean slices
Normally, I don’t like slicing into cold brownies. I don’t like the way they look (like fudge). But I make an exception for these brownies because slicing into them when theyre nice and chilled is the first step to getting clean slices.
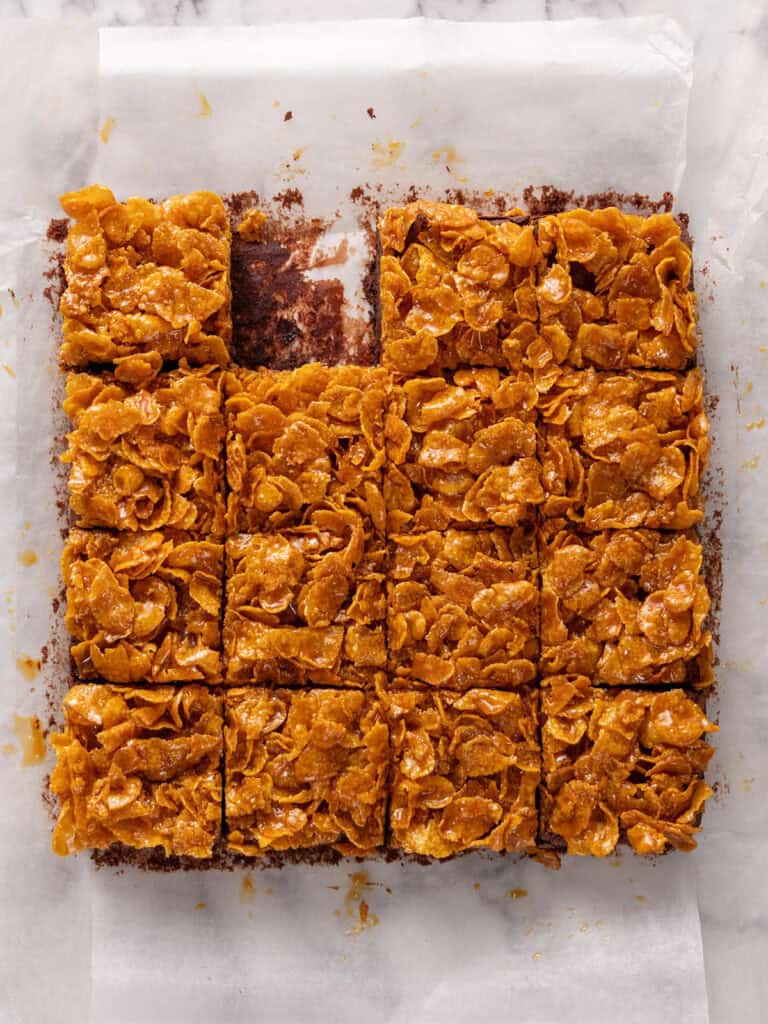
I like using a large sharp knife to make my slices. Then I wash the knife under water. Wipe it dry and make the next slice. It sounds tedious, but you’ll get bakery level slices with nice defined layers!
Loved the recipe? Let me know!
If you enjoyed this recipe, leave a star rating and comment below. It helps others find the recipe and keeps the baking community growing. Tag me on Instagram so I can see your version too!
A Quick Baking Guide
If you’re new to baking or just want to brush up on the basics, these guides are a great place to start!
Caramel Crunch Brownies (no candy thermometer)
My caramel crunch brownies are rich and fudgy with a deep chocolate base and crisp cornflake toffee topping.
Serves 12
Ingredients
Chocolate Brownies
- 125 g unsalted butter, cubed
- 180 g dark cooking chocolate, I used 70% (see notes)
- 25 g Dutch process cocoa powder, sifted (see notes)
- 3 large eggs, room temperature (55g each)
- 160 g caster sugar, superfine
- 100 g brown sugar
- 1 tsp vanilla extract
- Pinch of salt
- 75 g all-purpose flour, plain flour
Caramel Crunch Layer
- 190 g granulated sugar
- 150 g heavy cream, hot
- 75 g salted butter, cubed
- 120 g cornflakes
Instructions
Chocolate Brownies
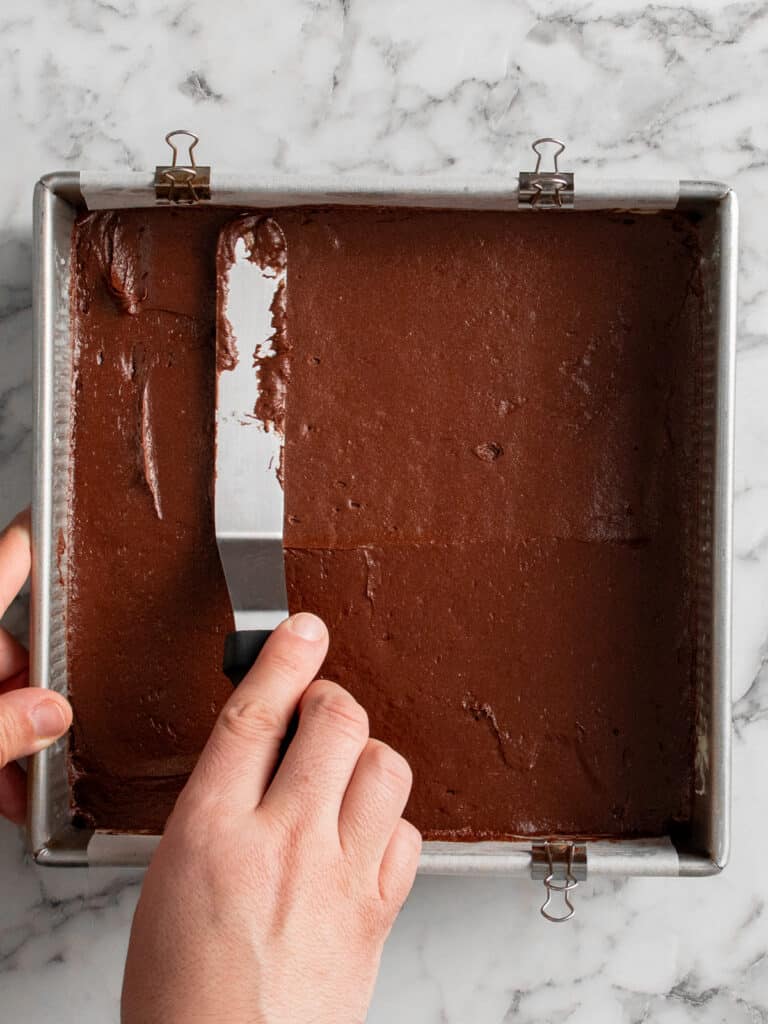
- Preheat your oven to 180C / 355F (fan off), 160C / 320F (fan on). Spray a 9-inch / 23cm square baking tin with cooking oil and line the bottom and sides with baking paper, leaving some overhang on the sides. I used bulldog clips to keep the paper in place. TIP: See notes for different baking tin sizes.
- Melt chocolate and butter – Fill a large pot a 3rd of the way with water and bring to a gentle boil. Place a heatproof glass or metal bowl on top (making sure the bottom of the bowl doesn’t touch the water). Add the chocolate and butter. Stir until melted and smooth. Alternatively, you can melt the chocolate in the microwave for 30 seconds at a time, stirring each time until smooth.
- Add cocoa powder – Turn the heat off and the sifted cocoa powder in. Use a whisk to combine until smooth. Set aside to cool to room temperature, about 10 minutes.
- Whisk eggs and sugar – To a large mixing bowl, add the eggs, both sugars, vanilla extract and salt. Use an electric hand mixer to whisk until pale, fluffy and doubled in volume, about 2-3 minutes.
- Add the chocolate mixture – Add 1/3 of the cooled chocolate mixture and whisk until well combined. Repeat with the next 1/3 until all of it has been added.
- Add dry ingredients – Add the sifted flour and fold using the spatula until no dry ingredients are showing.
- Bake – Pour the mixture into the baking tin. Bake for 20-22 minutes or until a toothpick inserted into the center comes out with moist crumbs. Take out of the oven and allow to cool at room temperature.
Caramel Crunch Layer
- Make toffee (go slow!) – Add the sugar to a large heavy bottomed saucepan and cook over low to medium heat, stirring gently with a wooden spoon. The sugar will clump first, then melt into a liquid and slowly turn golden. As soon as it reaches a light gold color, turn the heat off.
- Add cream and butter – The pan will retain heat, and the caramel will continue to cook, so slowly pour in the hot cream to stop the toffee from cooking further. You want to stir slow and take care because it will let out a lot of steam as you stir. Next, add the butter and continue stirring until well combined.
- Stir in cornflakes and top – Add the cornflakes and gently fold through until all the cereal is coated. Pour on top of the brownies and spread out. I like using a tablespoon to spread it out evenly.
- How to set – Allow the slice to set at room temperature for about 30 minutes, then place in the fridge for at least 4 hours, overnight is best for a really set slice that’s easy to cut up.
- How to get perfect slices – Use a large, sharp knife to slice into 4 x 4 squares. I like to wash and wipe my knife dry after each slice so the layers come out looking defined.
Notes
Chocolate – I used 70% dark cooking chocolate for this recipe for it’s slightly bitter chocolate flavor and because the brownies come out less sweet. Regular dark chocolate will also work, but the brownies come out sweeter.
Dutch processed cocoa powder – is an unsweetened cocoa powder which has been treated with alkaline and potassium carbonate to neutralize the acidity that is naturally found in cocoa powder. It’s darker in color and strong in chocolate flavor.
Storage – These brownies can be stored in an airtight container, in the fridge for up to three days.
Caramel – if your sugar begins to smell burned, it is. Theres no saving it, fill the pot with boiling water, bring it to a boil until the burned toffee is melted, then clean and start again.
Nutrition – is an approximate and is based on per slice. This recipe makes 9 slices.
A note on measurements – This recipe uses weight measurements for the most accurate results. Cup measurements can vary depending on where you are, which affects the precision needed for a recipe like this. Here is where you can learn more about how to measure ingredients using digital kitchen scales.
Nutrition
Calories : 456kcal
Carbonhydrates: 48g
Protein: 5g
Fat: 26g
Saturated Fat: 16g
Polyunsaturated Fat: 1g
Monounsaturated Fat : 7g
Trans Fat : 1g
Cholesterol: 97mg
Sodium: 138mg
Potassium : 118mg
Fiber: 3g
Sugar : 32g
Vitamin A: 844IU
Vitamin C: 2mg
Calcium: 31mg
Iron: 4mg
Nutrition Disclosure
Gave this recipe a go?Mention @thescranline or tag #thescranline!
previous post
16 comments
I can’t wait to try these!
Hey Janet! So excited for you to give these a go! You’re going to love the mix of fudgy brownies and crunchy caramel. Let me know how they turn out! N x
I’ve seen this very recipe on cupcake Jemma website. And why do you need my name and email address to comment!!!!!!!!!🤷🤷🤷
Yeah I know. I copied her. Please screenshot this reply and send it to her. Her first response will be that she invented this recipe and that I’ve copied her lol
Is the caramel chewy or crispy?
Hey Dala! The caramel is perfectly chewy, giving you that satisfying bite alongside the fudgy brownies and crunchy cornflakes. N x
Do the cornflakes stay crispy inside the toffee as the days go on? Or do they get stale/soggy/soft? I’m wanting to make these, but I know (I shouldn’t 🫣) go through them in a day or two and don’t like that kind of cereal texture if it doesn’t stay crispy.
Hi Lauren! I’d say these stay fairly fresh in an airtight container for about 3 days. N x
Too much toffee topping in relation to the brownie making it overly sweet for me. Next time I will make half the amount of topping and add some salt to combat the sweetness
Thanks for the feedback Lisa! N x
Do you think it would be weird if I changed the cereal? And it should be the same weight, right?
Not at all! Just be carefull with multi colored cereal which will make your batter grey in color. And yes, it would be the same weight! N x
I am so glad that a comment mentioned that Gemma Stafford has the same recipe on her site. On her site, measuring is made in cups. In America, we use cups, not grams. I gave one star rating only because it was time-consuming, figuring out the grams to cups
Hi Sharyn, thanks so much for your comment. I love Gemma’s work too, but just to clear things up, this recipe isn’t on her site. I use grams because they’re more accurate and make baking a lot more consistent. I know cups are common in the US, but most of the world uses grams so I stick with what works best.
Hello, If i was to use the condensed milk to ‘caramel’ method, how much roughly would I need? Thank you!
Hi Chloe! Hmm, difficult to say because I never tested it using the condensed milk method. Sorry! N x