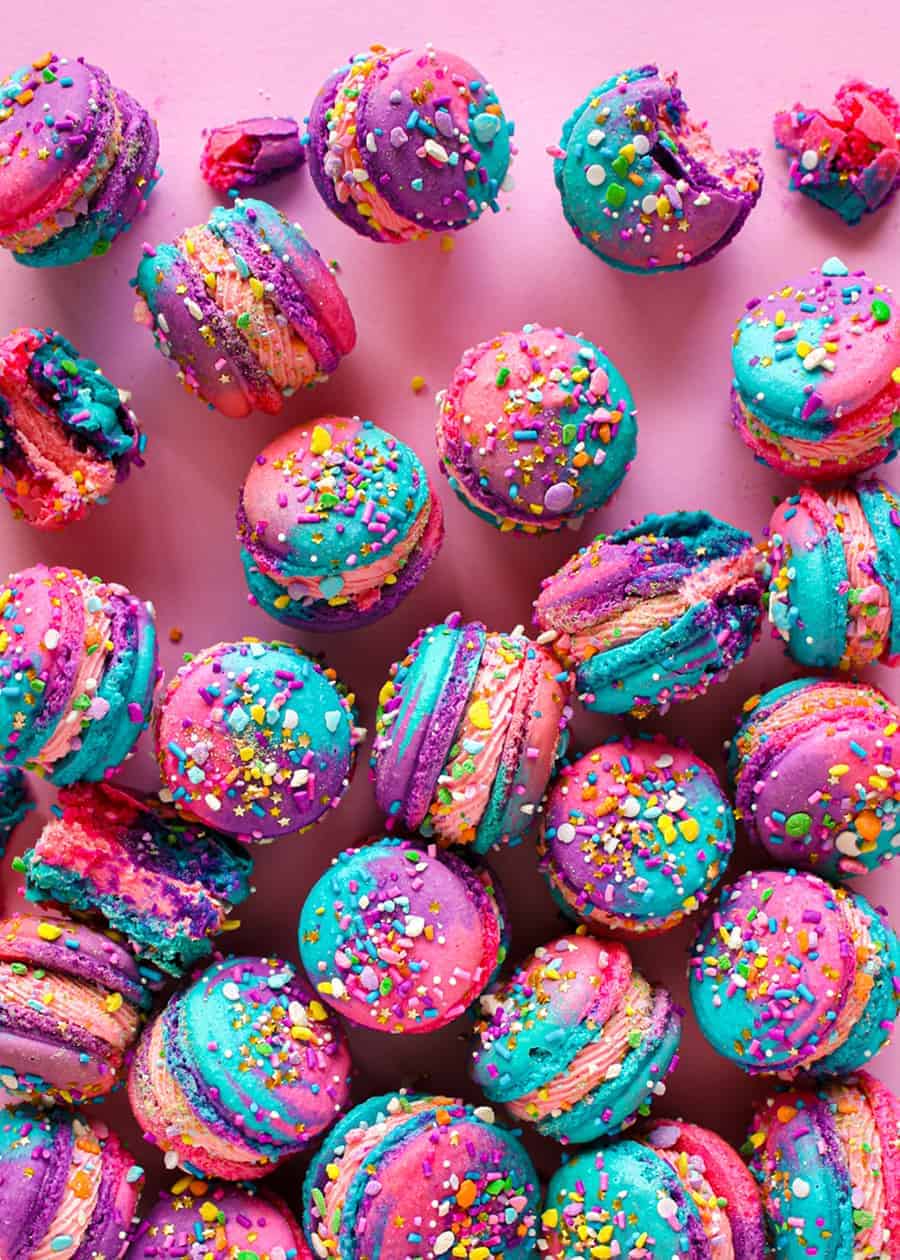
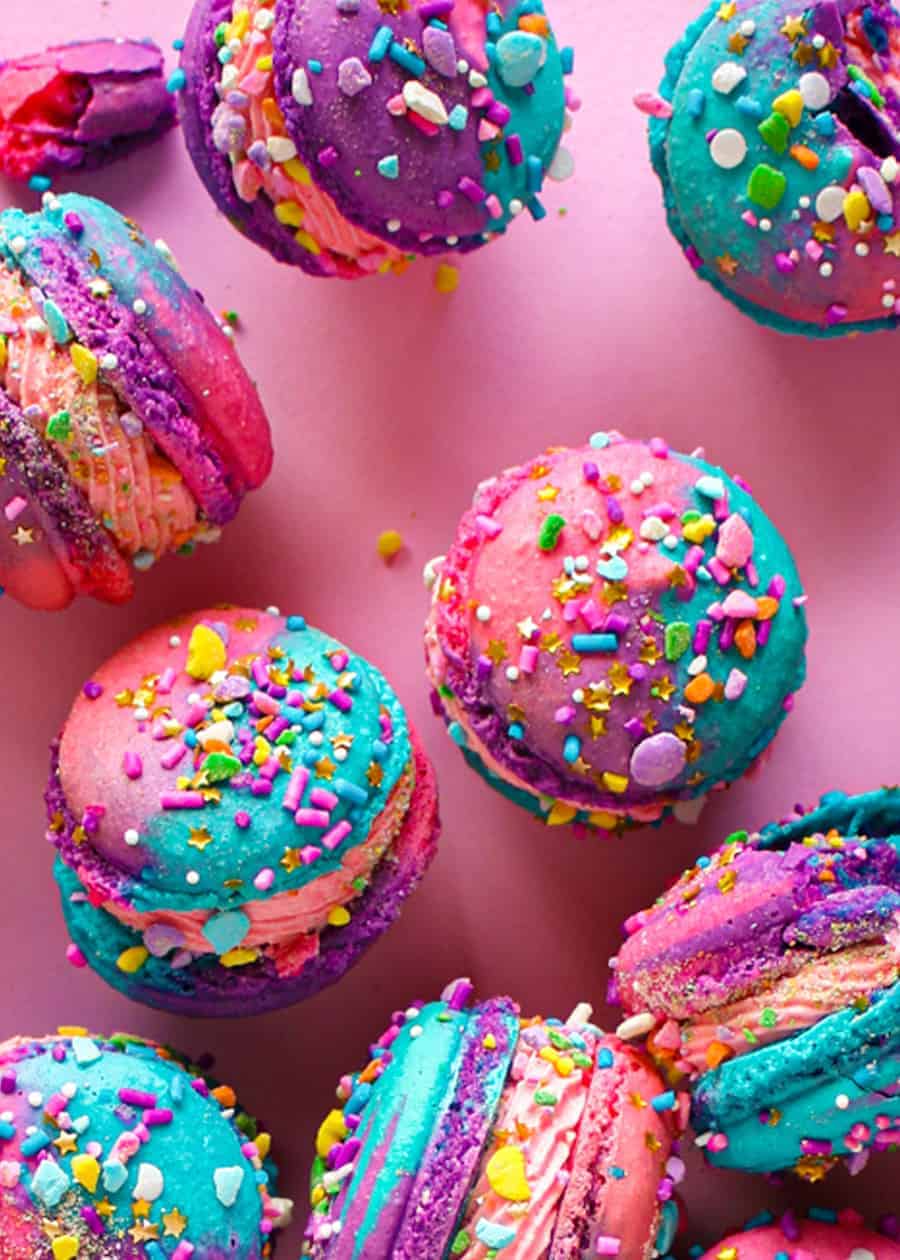
Highway Unicorn Macarons
Highway Unicorn Macarons! Continuing on with my highway unicorn gaga-inspired series, these beautifully colorful macarons are just the perfect addition to any celebration!
Nick’s favorite thing…
I adore how colorful these macarons are. They kind of look busy and chaotic but also energetic and fun at the same time!
What do Highway Unicorn Macarons taste like?
These are my classic macaron recipe which is really highly rated by you guys. They’re filled with my silky smooth buttercream and flavored with strawberry flavoring.
What are the ingredients I need for Highway Unicorn Macarons?
Almond flour – also known as almond meal. I wouldn’t recommend making your own. Store-bought is best!
Powdered sugar – also known as icing sugar.
Egg whites – make sure you don’t get any egg yolks in the whites when separating them.
Granulated sugar – caster sugar will also work.
Water – this is measured using grams too because you need to be really specific when measuring macaron ingredients.
Vanilla Extract – Always use good quality vanilla extract when baking, it makes a huge difference. I have a great recipe here for it if you’d like to try your own!
Food gel – I used ‘Chefmaster’ brand food gel.
Assorted sprinkles – (purple, rainbow and gold star sprinkles)
American Buttercream Frosting – I have a really great recipe for this that you can grab here! It’s great for cupcake, cakes and buttercream decorations!2 drops pink food gel
Strawberry flavouring – or any flavouring you like. The brand I used is called ‘Roberts’
My Top Tips!
Prepare before you start:
- Trays (lined with baking paper not grease proof paper)
- Eggs – separate egg whites from the yolks and allow them to sit in the fridge for a couple hours. These must be measured accurately.
- Sift almond and sugar together (if you don’t have a food processor)
Storage: Store in an airtight container for up to 3 days (refrigerated or unrefrigerated).
Other Recipes You Might Like!
- Hamburger Macarons
- French Macarons (French Method)
- French Macarons (Italian Method)
- American Buttercream Frosting
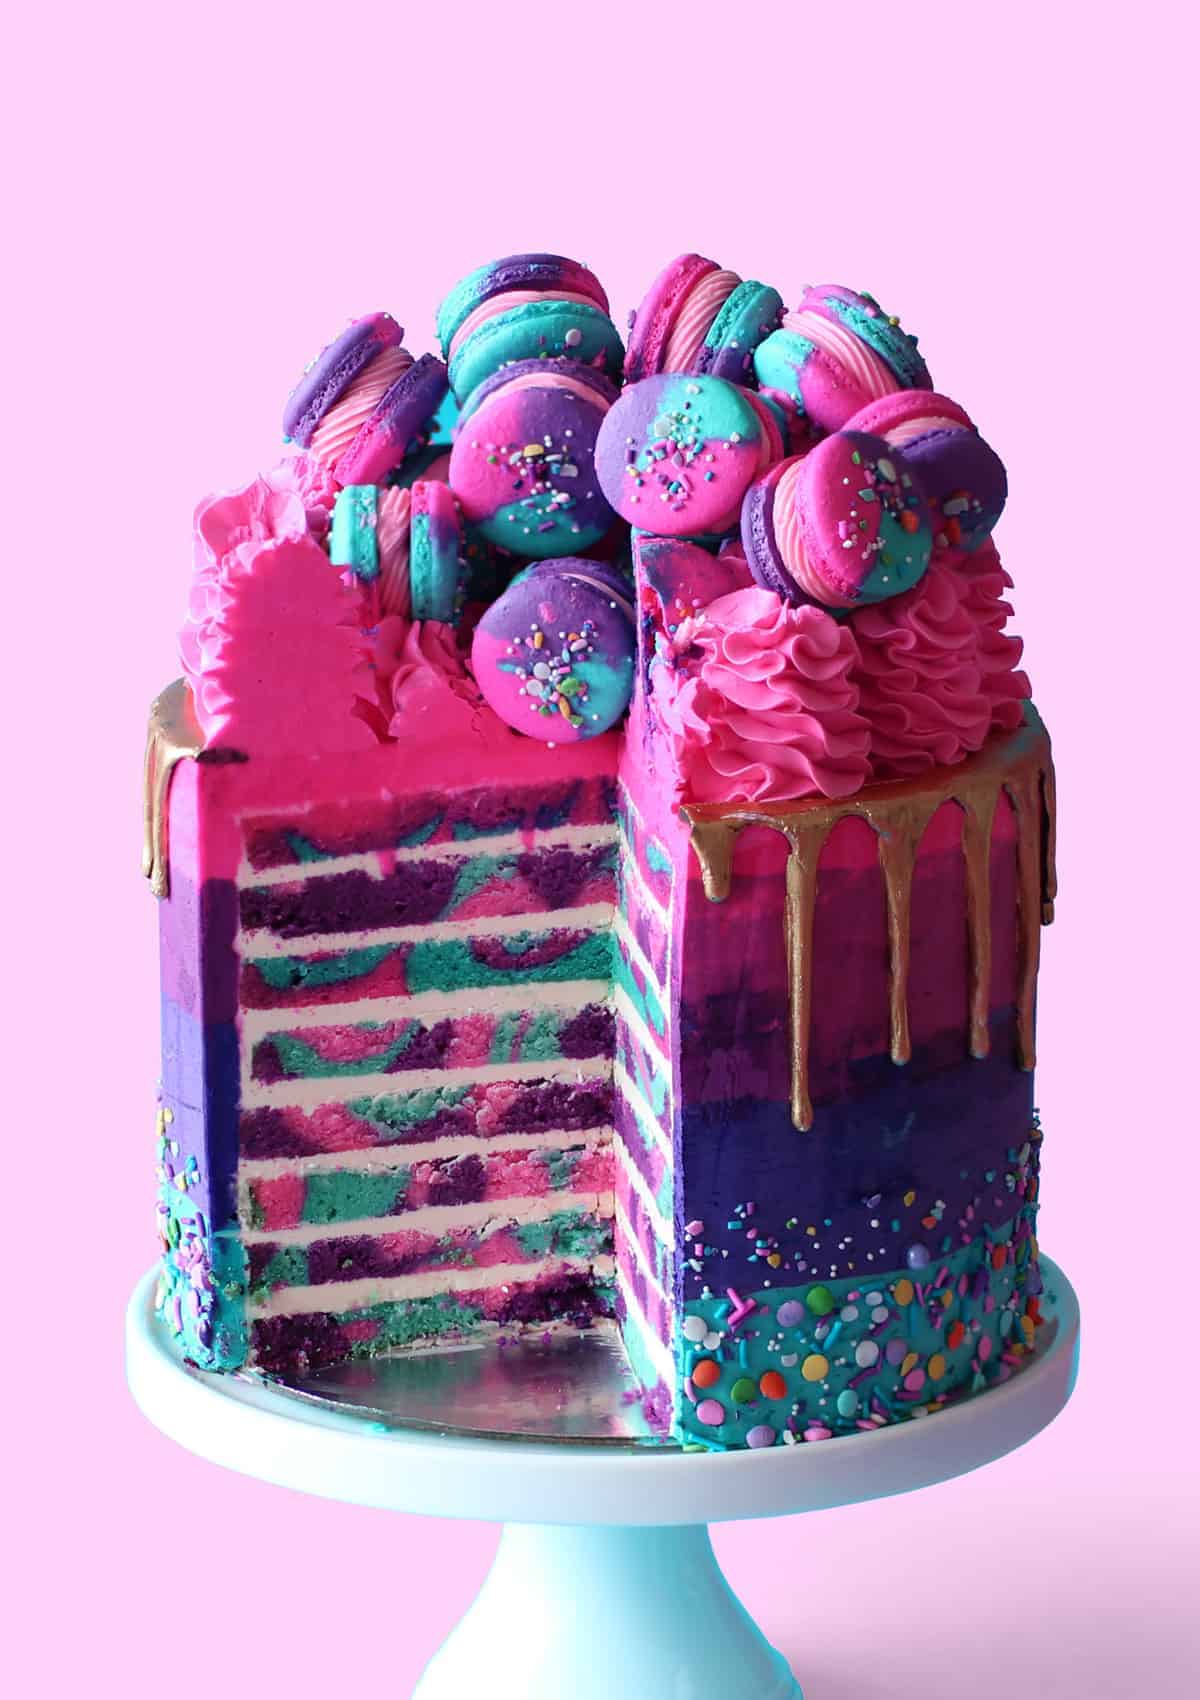
- Highway Unicorn Cake
A Quick Baking Guide
If you’re new to baking or just want to brush up on the basics, these guides are a great place to start!
Loved the recipe? Let me know!
If you enjoyed this recipe, leave a star rating and comment below. It helps others find the recipe and keeps the baking community growing. Tag me on Instagram so I can see your version too!
Highway Unicorn Macarons
Adorable unicorn inspired French macaron cookies with rainbow sprinkles and colourful frosting filling.
Serves 30
Ingredients
Macarons
- 1 1/2 cups almond flour
- 1 cup powdered sugar
- 2 large egg whites (for the almond mixture)
- 3/4 cup granulated sugar
- 37 ml water
- 2 egg whites (for the meringue)
- 1 tsp vanilla extract
- 4 drops blue food gel
- 4 drops pink food gel
- 4 drops purple food gel
- assorted sprinkles (pirple, rainbow and gold star sprinkles)
Frosting
- 1 batch American buttercream frosting
- 2 drops pink food gel
- 1 tsp strawberry flavoring
Learn How To Make it! [VIDEO]
Instructions
Frosting
- Combine flavouring a frosting together until well mixed. Set aside.
Macarons
- Add half the icing sugar and almond meal into a food processor and process until well combined. Repeat with the other half. This will help get rid of any lumps in the sugar. Alternatively, you may sift the two together. This must be done at least 3 times.
- Empty the almond mixture into a large mixing bowl, add the first portion of egg whites and mix until it forms a paste. Cover with plastic wrap and set aside.
- Add the sugar and water into a small saucepan. Give them a very gentle stir to get them mixed together. Bring to a boil on medium high heat, then turndown to a simmer. Add a candy thermometer to the pot to help you measure the temp of the syrup. As the syrup bubbles away it will splatter small bubbles of sugared water on the sides of the pot. Use a pastry brush dabbed in a little water to brush those back into the syrup. This will help prevent the syrup from crystallizing. When the syrup reaches 115C, add the second portion of egg whites to the bowl of a stand mixer and start whisking them on medium/high speed to help break them apart and get them a little frothy.
- When the syrup reaches 118C, pour it over the egg whites in a slow and steady stream. Whisk to stiff peaks for about 6 min. Add the vanilla extract at about the 3 min point, whisk into the meringue for a couple of minutes. Stop the mixer and scrape down, then whisk for an extra couple of minutes. When you can turn the bowl over and the meringue doesn’t fall out, you know you’ve reached stiff peaks.
- Grab a spatula full of the meringue and fold it into the almond-sugar mixture, mix until well combined. You want to stop mixing when it is combined well enough that the mixture is smooth.
- Separate the mixture into three separate bowls. Add blue food gel to one, purple to the second and pink to the third. Combine each colour until you reach the ribbon stage. It should be thin enough that it drips off the spatula and falls in a ribbon. It should take about 10 seconds for the ribbon to disappear into the rest of the batter. That’s when you know the batter is ready to pipe.
- Spoon about 3 tablespoons of each coloured into 3 separate piping bags.Fit another bag with a round tip. Snip off the end of the bags with the batter and place into the bag with the piping bags.
- Pipe rounds of batter about 3.5cm (1.38 inches) in diameter, spacing them 2cm apart on (flat) baking trays lined with baking parchment. Sprinkle with sprinkles.
- Gently tap the tray on the work surface covered with a kitchen cloth.Leave to stand for at least 30 minutes, until a skin forms on the shells. They shouldn’t be sticky when you touch them. It’s at this point that you can preheat a fan forced oven to 180C (360F)
- Bake for 12 minutes. If you feel your oven is causing the macarons to brown on one side (usually the side closest to the fan) turn the tray around about half way through baking. Once they’re baked, let them cool completely.
- Fit the end of a piping bag with a Wilton #32 piping tip and frosting in a swirl and place another cookie on top.
- Finish off by sprinkling the frosting with coloured sprinkles.
Notes
Notes
Macarons can be stored in an airtight container for up to three days.
Prepping ahead of time
Please make sure you have everything prepared before beginning the recipe.
Serving
Macarons are best served the day after they’re frosted because the frosting soften the cookie and makes it chewy.
Nutrition
Calories : 68kcal
Carbonhydrates: 10g
Protein: 1g
Fat: 3g
Saturated Fat: 1g
Polyunsaturated Fat: 1g
Monounsaturated Fat : 1g
Sodium: 1mg
Potassium : 1mg
Fiber: 1g
Sugar : 9g
Vitamin C: 1mg
Calcium: 12mg
Iron: 1mg
Nutrition Disclosure
Gave this recipe a go?Mention @thescranline or tag #thescranline!
previous post
4 comments
Hello Nick! You used to have so many recipes of macarons on the old website. They were also in grams and not cups (you had even explained how crucial it is to weigh everything). Was wondering if you could upload all those recipes back? And put them in grams instead of cups? Thank you so much!
My macarons keep cracking in the oven although I leave them enough time to dry 🙁
Hi Chris! I still have those recipes. Unfortunately a good chunk of them won’t be coming to the website. Mostly because of time. My focus is on the new recipes. Feel free to email me and I’ll be happy to send through the recipe you would like!
Hi Nick
This is the page for Unicorn Macarons, you talk about the ingredients and tips but then give the Unicorn Cake recipe?
Are you able to frix this?
Thanks – have already made the cake and decided to venture into maracons but…not recipe 🙁
Hi David! Sorry about that, have just updated the recipe card! Thanks for letting me know! N x