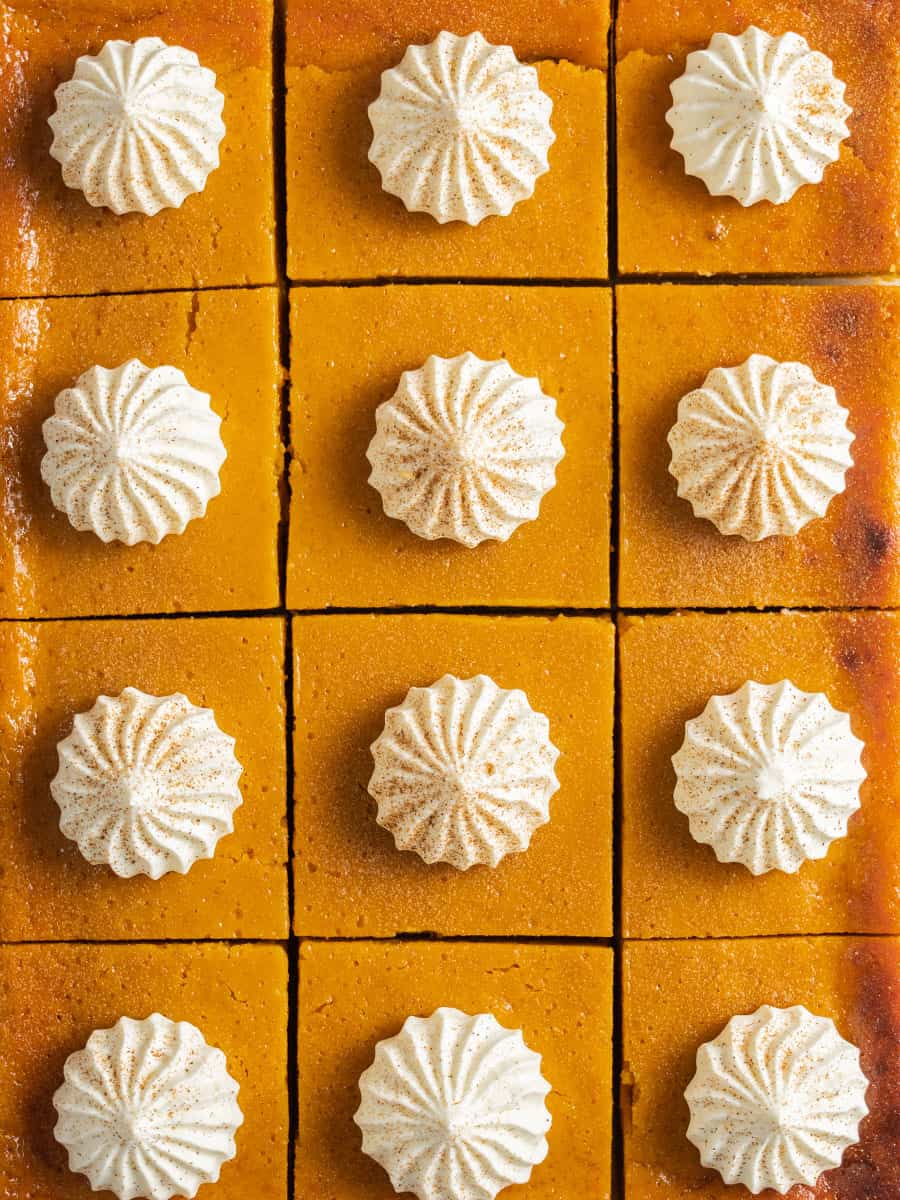
Pumpkin Pie Bars
These great tasting Pumpkin Pie Bars are silky smooth, creamy and so much easier to make and serve than the traditional version.
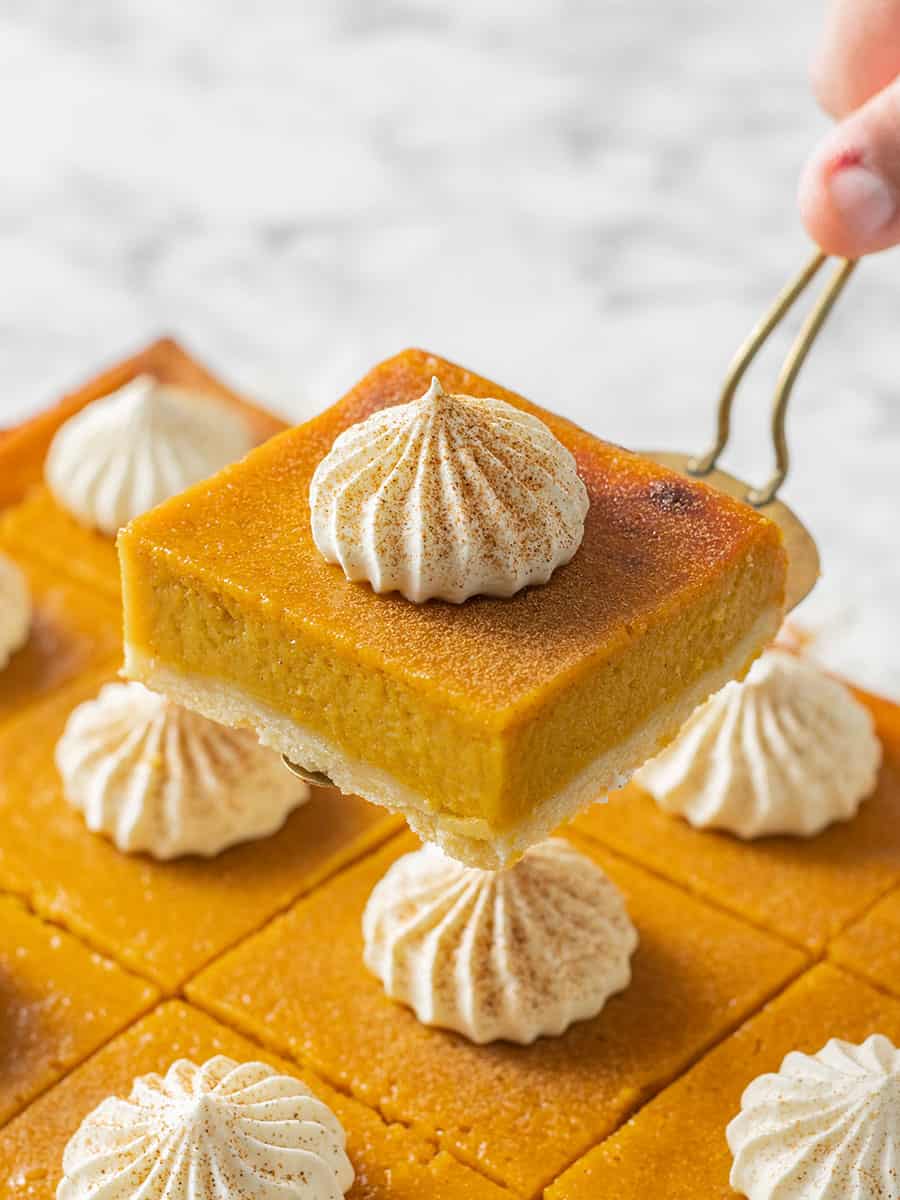
It’s starts off with an incredibly easy to make short crust biscuit base. You don’t even need to bake it, because once you spend a couple minutes making the one-bowl pumpkin pie filling, it all goes in the oven together and bakes perfectly!
The result is a buttery crust with a creamy pumpkin filling that is soft and silky smooth. And it’s not a heavy dessert either which makes it the perfect ending to a holiday meal!
By the way, if you’re looking for an easy Pumpkin puree recipe, I have a great one here!


What makes Pumpkin Pie Bars so good?
So many things to love about this incredibly silky and easy to make dessert!
- Short crust base – it’s so buttery and it comes together with only a few ingredients. What’s even better is that it doesn’t need to be pre-baked!
- Pumpkin pie filling – all made in one bowl using my pumpkin puree, then poured into the baking dish.
- Whipped cream – so easy to make. I typically don’t sweeten my cream but you can add 1 tsp of caster sugar if you like.
Ingredients You Need To Make Pumpkin Pie Bars
Note: the whole recipe, including the ingredient quantities, can be found at the bottom of this page – just scroll down to the bottom, or click the ‘Jump to Recipe’ button at the top of this post.
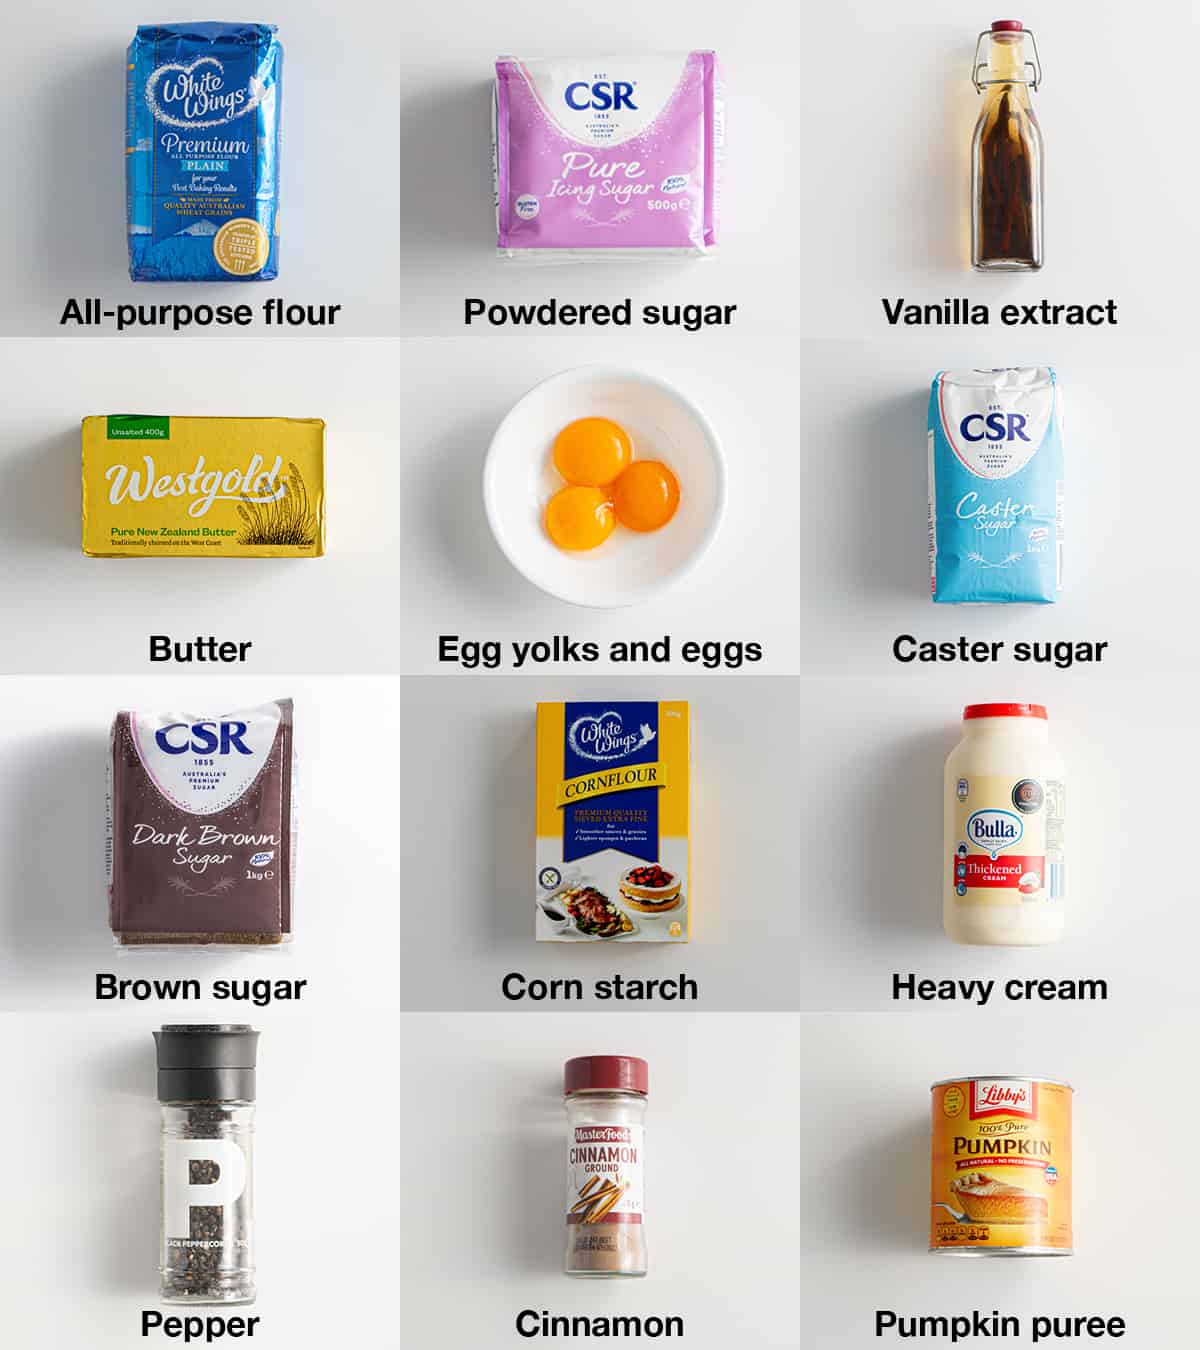
- All-purpose flour – also known as plain flour.
- Powdered sugar – also known as icing sugar, helps keep the short crust pastry nice and fine.
- Vanilla Extract – Always use good quality vanilla extract when baking, it makes a huge difference. I have a great recipe here for it if you’d like to try your own!
- Butter – I used unsalted butter. You want to make sure your butter is cold.
- Egg yolks – you only need the egg yolks for the short crust base. It helps it come together and makes it rich. You’ll use whole eggs for the filling.
- Pumpkin Puree – You can use canned pumpkin puree for this recipe, not to be confused with pumpkin pie filling. Alternatively, you can make your own which is really easy using my recipe! Click here for all the tips and tricks to making your own pumpkin puree!
- Caster sugar – also known as superfine sugar, you can use granulated sugar too.
- Brown sugar – this gives the filling a nice rich flavor.
- Corn starch – also known as corn flour – this helps give the filling some structure and keeps it together.
- Heavy cream – is used to make the filling creamy and rich.
- White pepper – optional but helps give the filling a gentle warmth.
- Cinnamon – I used ground cinnamon powder.
- Salt -I used fine salt.
How to make Pumpkin Pie Bars!
Crust

- Prepare 9×13 inch baking tin
- Combine flour, sugar and vanilla in a food processor

- Add the butter and pulse until pea sized
- Add the egg yolks until dough begins forming

- Add to baking tin and spread evenly.
Filling
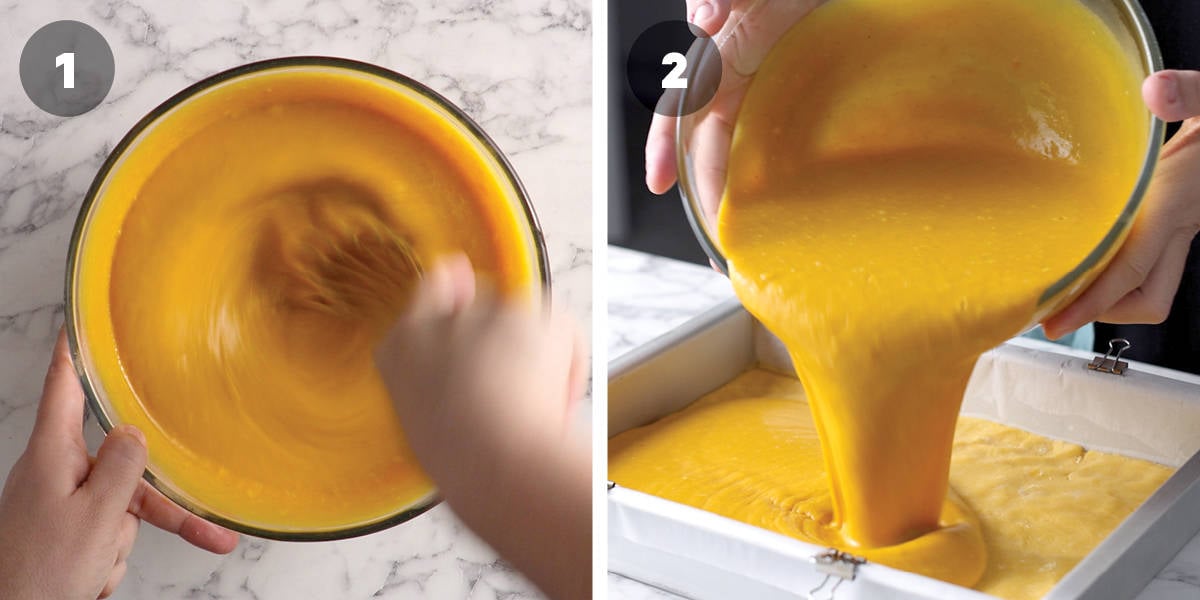
- Add all ingredients to a bowl and mix
- Pour into baking dish and bake for 40 minutes.

- Allow to cool, slice and serve for cream

Tips and Tricks For Recipe Success!
- Take care not to overmix the pumpkin pie filling as it can cause cracking in the oven as it bakes.
- Adding some food safe clips at the top of your baking tin to hold down the baking paper will prevent it from flying around in the oven.
- Once baked, carefully run a knife around the sides to help release the pie as it cools and prevent it from cracking.
- These bars are easier to slice and serve when they’re cold from the fridge, and frankly really yum when they’re cold.
Frequently Asked Questions about Pumpkin Pie Bars
What does it taste like?
SO delicious! If you’ve never had a pumpkin pie before, especially if you’re in a country like Australia like I am, then you want to give these a go! The base is buttery, the filling creamy and the entire thing like all round delicious!
How do I store this?
These can be stored in an airtight container in the fridge for up to three days.
Can I make the short crust base by hand?
Yep! Combine the dry ingredients in a large mixing bowl with the vanilla extract, then add the cold butter and smoosh together into the butter until it looks like fingernail sized pieces of flakes. Then add the egg yolks and mix in with your hands. Take care not to over mix the dough otherwise it will be tough.

Other great Pumpkin Desserts
Chocolate Chip Pumpkin Bread
No-Bake Pumpkin Cheesecake
Chewy Chocolate Chip Pumpkin Cookies
How to Make Pumpkin Puree for Baking
Pumpkin Chiffon Tart
A Quick Baking Guide
If you’re new to baking or just want to brush up on the basics, these guides are a great place to start!
Loved the recipe? Let me know!
If you enjoyed this recipe, leave a star rating and comment below. It helps others find the recipe and keeps the baking community growing. Tag me on Instagram so I can see your version too!
Easy Pumpkin Pie Bars
These easy Pumpkin Pie Bars are the easy, crowd-pleasing alternative to the classic Pumpkin Pie! Silky smooth, irresistible and creamy!
Serves 12
Ingredients
Shortbread Crust
- 225 g all-purpose flour, plain flour
- 75 g powdered sugar, icing sugar
- 7 g vanilla extract
- 110 g unsalted butter, cold
- 4 egg yolks, from large eggs
Pumpkin Filling
- 820 g pumpkin puree, see notes
- 210 g caster sugar, superfine sugar
- 200 g brown sugar
- 4 large eggs, 55g each
- 375 g heavy cream, for whipping
- 25 g corn starch
- 1 Pinch of white pepper, optional
- 1 tsp cinnamon
- 1/2 tsp salt
- 250 g heavy cream, whipped while cold, to decorate
Learn How To Make it! [VIDEO]
Instructions
Shortbread crust
- Prepare baking tin – Spray the bottom and sides of a 9 x 13-inch baking tin oil spray and line with baking paper, leaving some to overhang.
- Form shortbread dough – Add the flour, powdered sugar and vanilla extract to the bowl of a food processor and blitz for 20 seconds to combine. Add the butter and pulse until you reach lentil sized pieces. Add the egg yolks and blitz until small clumps of dough form.
- Shape into tin and chill – Turn the crumbly mixture out into your baking tin and use your hands to press firmly and evenly into the bottom of the tin. Set aside in the fridge.
Pumpkin Filling
- Preheat your oven to 180C / 355F (fan off), 160C / 320F (fan on).
- Mix all ingredients together – To a large mixing bowl add the pumpkin puree, caster sugar, brown sugar, eggs, heavy cream, corn starch, pepper, cinnamon, salt and cream. Mix using a hand whisk until well combined. Take care not to overmix, we don’t want to add air to the mixture.
- Bake – Pour into the chilled tart tin and bake for 20 minutes. Then turn the oven down to 160C / 320F (fan off), 140C / 285F (fan on) and bake for a final 20 minutes or until slightly jiggy in the center. Once baked, take out of the oven and allow to cool to room temperature before chilling in the fridge for at least 2 hours or overnight. Slice and serve with whipped cream and a light sprinkle of cinnamon.
Notes
- Pumpkin Puree – You can use canned pumpkin puree for this recipe, not to be confused with pumpkin pie filling. Alternatively, you can make your own which is really easy using my recipe! Click here for all the tips and tricks to making your own pumpkin puree!
- Storage – These Pumpkin Pie Bars can be stored in an airtight container for up to three days.
- Nutrition – is based on per slice.
- A note on measurements – all ingredients in this recipe are offered in Australian cup measurements and weight measurements. Weight measurements are created by me, in my kitchen here in Melbourne Australia. The best way to get recipe success is to measure ingredients by weight, using kitchen scales. To access weight measurements, click on the ‘metric’ button in the recipe card located under the list of ingredients.
Nutrition
Calories : 504kcal
Carbonhydrates: 45g
Protein: 7g
Fat: 29g
Saturated Fat: 18g
Polyunsaturated Fat: 2g
Monounsaturated Fat : 8g
Trans Fat : 0.3g
Cholesterol: 197mg
Sodium: 146mg
Potassium : 272mg
Fiber: 2g
Sugar : 29g
Vitamin A: 10680IU
Vitamin C: 3mg
Calcium: 89mg
Iron: 2mg
Nutrition Disclosure
Gave this recipe a go?Mention @thescranline or tag #thescranline!
previous post
7 comments
Hope you guys get to try this recipe and enjoy it! N x
Hi Nick! I just baked the pumpkin pie bars but I notice in the written instructions it says to reduce the temp to 300 after 20 min but in the video it says to bake at 355 for the entire 40 minutes . Which is correct? I went with the written. Mine is jiggly in the center but it looks somewhat undercooked. Thanks in advance.
Hi Rema! It’ll be what’s in the written recipe. I come back to the recipes and make adjustments sometimes based on feedback or my own re-testing. It should only be slightly jiggly in the centre. Don’t forget it still cooks as its cooling, so it will set completely once cooled. Hope that helps! Come back and tell me how it went! N x
I would like to add, that if you are not baking in a convection oven, you will need to adjust temp and time. There are conversion charts for this. It usually means hotter and longer in a conventional over.
Thanks Stefanie, great point! I’ve included both fan-forced and conventional oven temps in the recipe, and while the bake time stays the same, every oven can be a bit different. That’s why I’ve also added visual cues so you’ll know exactly when it’s done. Hope you love the bars! N x
These were amazing. Have now made them twice and made some tweaks the second time based on my observations and personal preference from the first go. Will be keeping this one in the recipe stable!
Thanks so much! I’m glad you enjoyed them. Personally I was shocked how yum they were the first time I made them. Glad to hear it was special enough for you to keep! N x