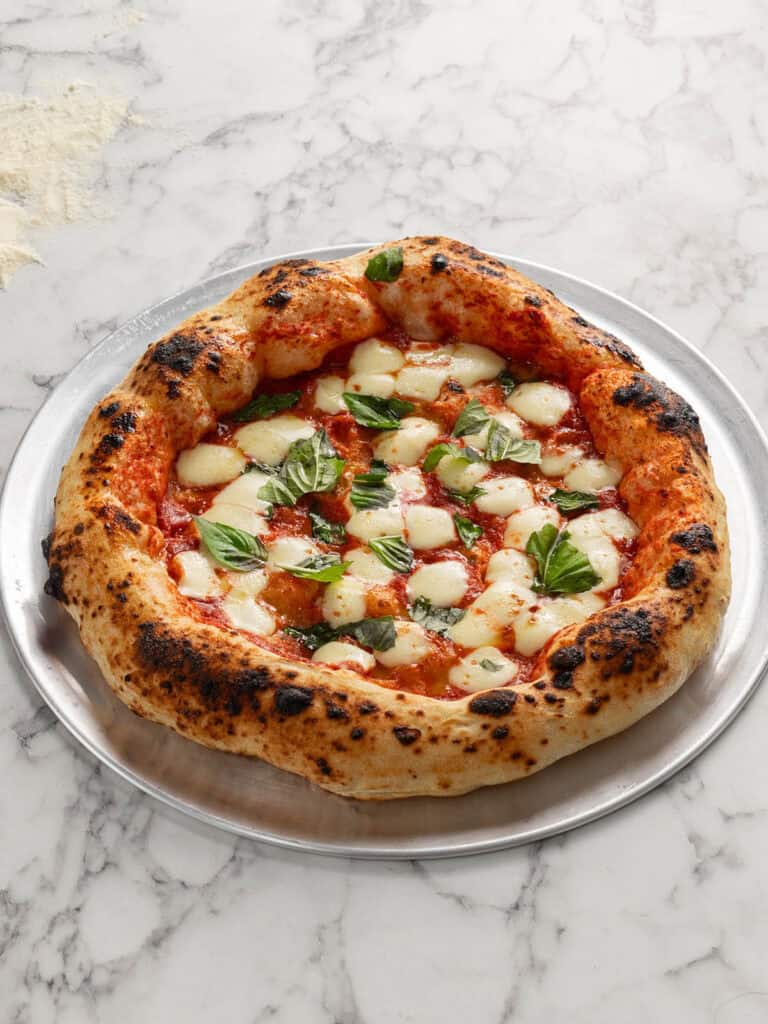
Chewy Neapolitan Style Pizza (Beginners guide)
We’re about to to a deep dive into my soft and chewy Neapolitan Style Pizza dough recipe which I’ve been perfecting for a year. I’m talking crispy, chewy crust with a deep flavor you only get from a slow ferment. The only thing I’m leaving to you is which toppings to add (I’ll share my favorites in the post) but the rest I’m going to walk you through with step-by-step photos so you can make gob smacking good pizza at home. Like seriously, your jaw will hit the floor.
Hey team, Nick here. There’s only one style of pizza that touches my nooks and crannies: Neapolitan pizza. I mean, give me a slice of crusty, crispy, chewy, bubbly, puffy crust pizza any day. Mouthful to read, but so darn tasty!

The recipe I’m sharing today uses the poolish dough method which needs 2-5 days of (hands off) time to slow ferment in the fridge. It’s where it gets all its chew and flavor from. And you know what? I think it’s ok to plan ahead of time for a home pizza night. Good pizza takes time. Ask the chefs at your favorite pizza joint.
Do you need a pizza oven to make this at home? Nope! My dough is designed to work in a home oven AND outdoor pizza oven. Both will give you a nice puffy crust. That’s because this dough has a hydration of 70% (that’s pretty high) which means you get a soft, open puff with big chewy bubbles, even in an oven!
Can I just add one more thing? Zoe (currently 4 and a pizza snob) eats the crusts of this pizza recipe. That’s how bloody good the crusts are. She never used to eat them before. I’m just saying, ok?
Table of contents
- The flour you use matters.
- My workflow
- Making the poolish (24 hours)
- Kneading the dough with a mixer (20 min)
- What slow fermentation does to your dough (1-3 days)
- This recipe makes 3 pizzas
- Letting your dough have a final rise (2-3 hours)
- Stretching and shaping your pizza
- Adding your toppings (Margherita)
- Getting the pizza on the pizza peel
- Baking it in an oven
- Baking in a pizza oven
- My favorite pizza flavors
The flour you use matters.
Theres only one ingredient I want to highlight and that’s the flour. No other ingredient in the dough matters more than the flour. We’ll talk toppings later (obvious those matter too!).
I tested this dough with plain flour, regular bread flour and regular 00 flour. Those won’t work as well as using a flour designed for pizza with a high gluten percentage. And luckily, pizza flour isn’t too hard to find these days.
The flour you want to use for this recipe is a 00 flour designed for a slow ferment pizza dough. I love using the Caputo “00” Pizzeria Flour.
So what does that mean?
- A flour that is high enough in gluten. It’ll allow for enough elasticity so that your dough is strong enough to trap air. That gives you those puffy Neapolitan edges!
- It’ll make stretching the dough easier = no tearing.
- A slow ferment flour will allow the dough to sit in the fridge to develop flavor and elasticity without losing strength. A regular 00 flour won’t do that and trust me, I tested it. The dough turned to liquid in the fridge.
My workflow
- Make the poolish (day 1)
- Knead the dough (day 2)
- Rest the dough in the fridge (2-3 days)
- Portion, rest and bake (day 3-5)
Making the poolish (24 hours)
A poolish is a pre-fermented paste. It’s how your pizza starts and it’s where it gets most of its flavor from. It’s equal parts flour and water with a bit of yeast and sugar, or in this case, honey (better flavor).
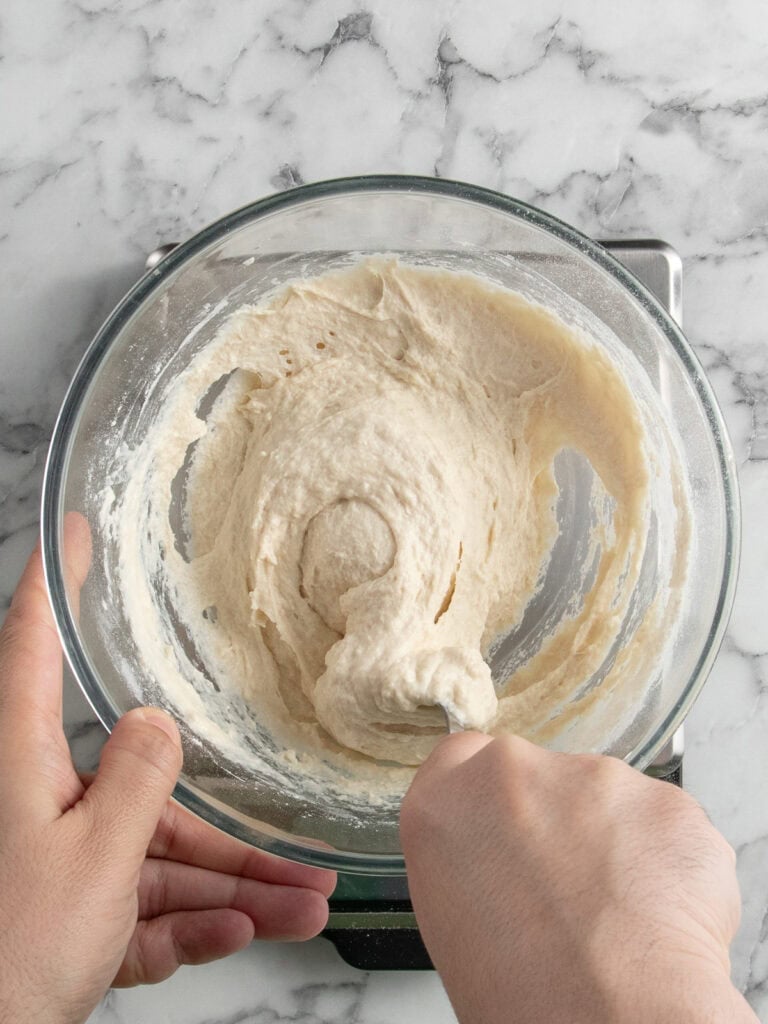
- Mix the flour and yeast in a medium sized mixing bowl, then add the water and honey and mix to form a paste. Cover with plastic wrap. Pop it in the fridge overnight. 12-24 hours. No longer than that otherwise your poolish will lose it’s elasticity!
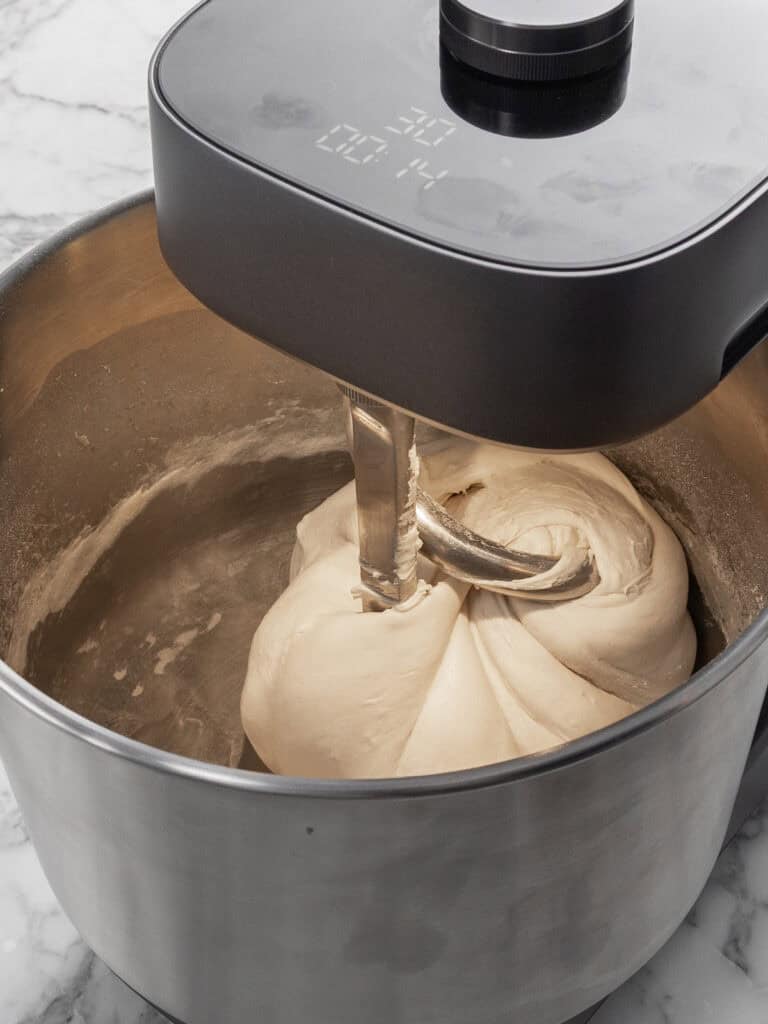
Kneading the dough with a mixer (20 min)
I used a stand mixer to knead the dough. Specifically, the Ooni Halo Pro and the Kenwood Chef Sense with a dough hook. I prefer the Ooni because it kneads better and quicker. I’ll walk you through the textures to look out for so you can make this with any mixer. I haven’t tested this recipe by hand (yet). I’ll update the post when I do.
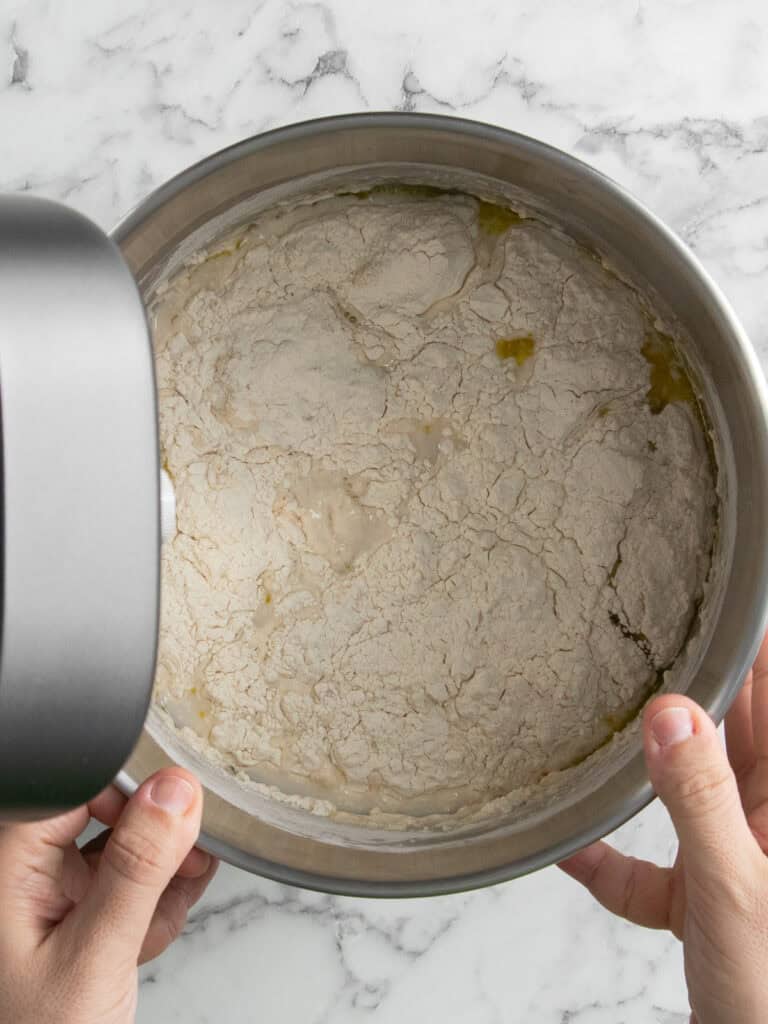
- First Knead (5 min) – Add the poolish (cold straight from the fridge), flour, water, salt and oil to the bowl of your mixer and knead for 5 minutes. It’ll look scraggly.
- Rest for 10 minutes (10 min) – This is going to let the gluten rest. It results in a smoother more elastic dough.
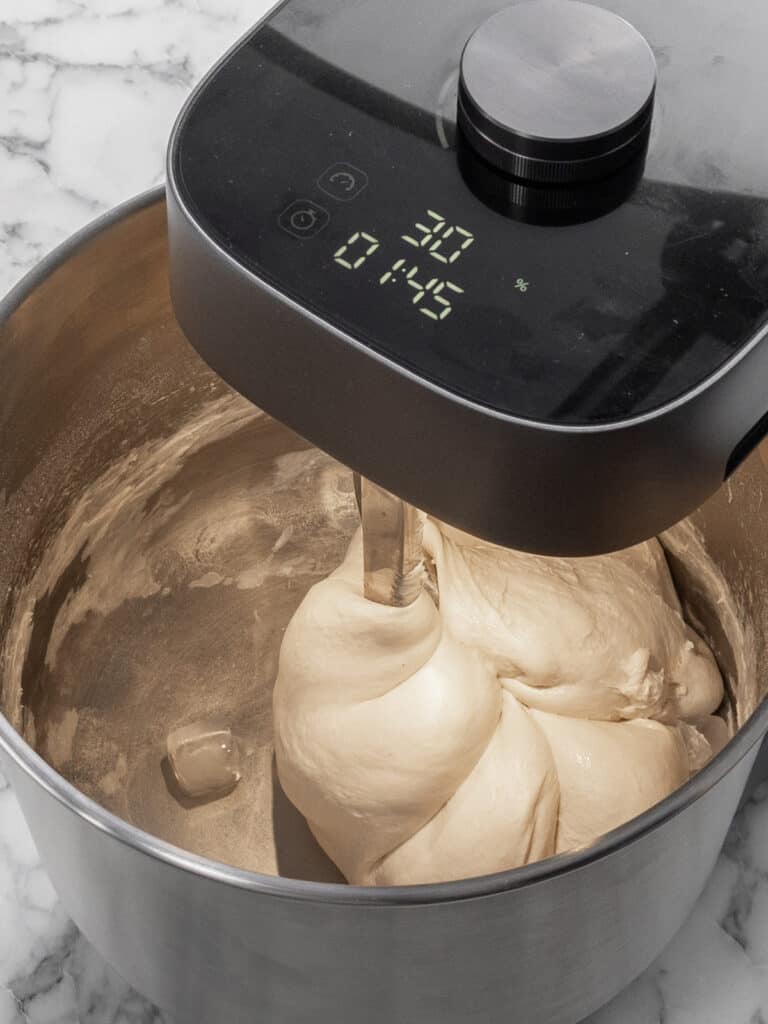
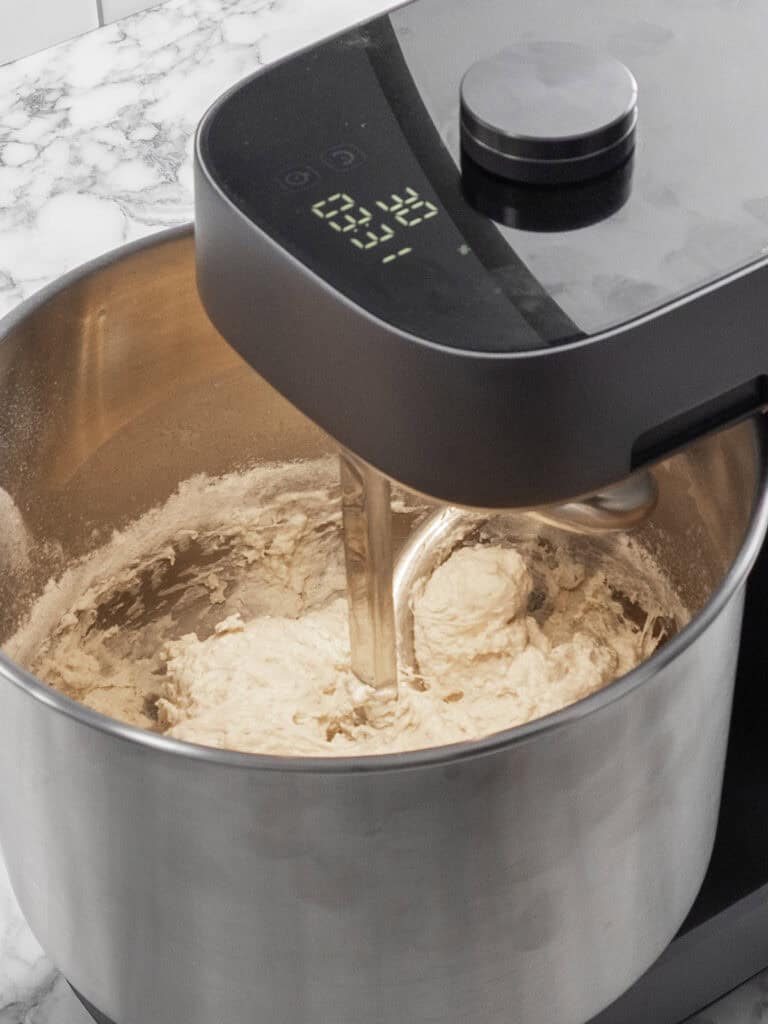
- Second knead (10-15 minutes) Knead for 10-12 minutes. Toward the end the dough will look really smooth, and it’ll come away from the side of the bowl.
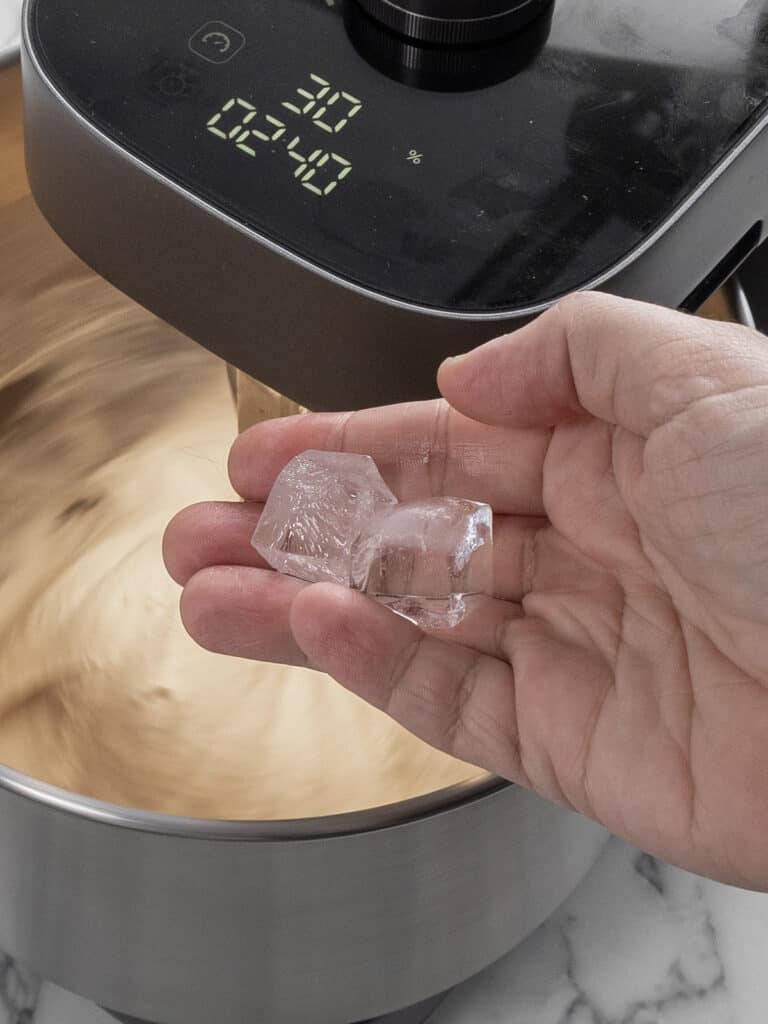
- Add 1-2 ice cubes in the final 3 minutes of kneading. It lowers the temperature of your dough. Some mixers, specifically the Halo can cause a lot of friction as they knead and warm up your dough. You want to make sure your dough stays at least room temp. It’ll also slow down yeast growth which makes your dough smoother and stretchier.
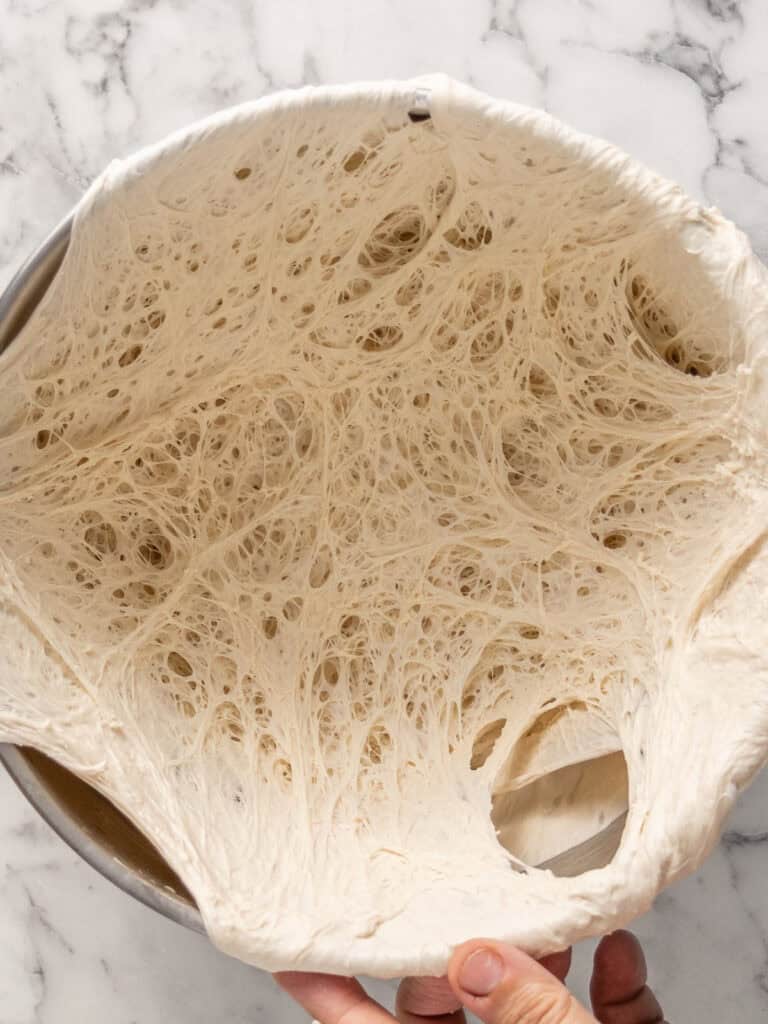
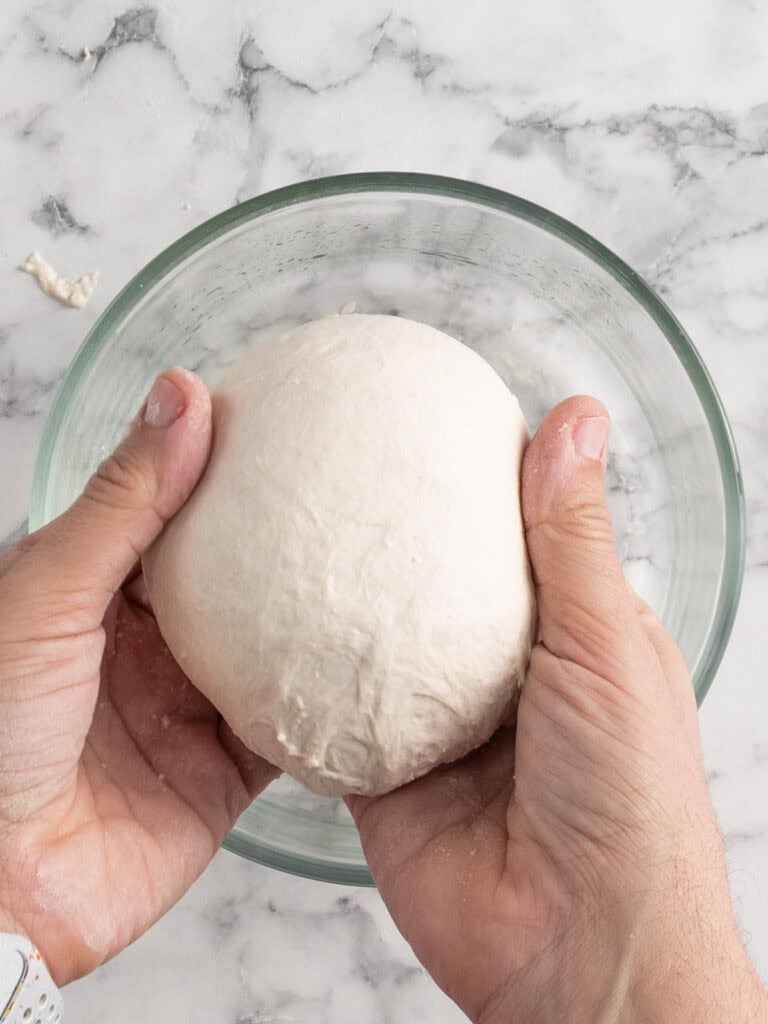
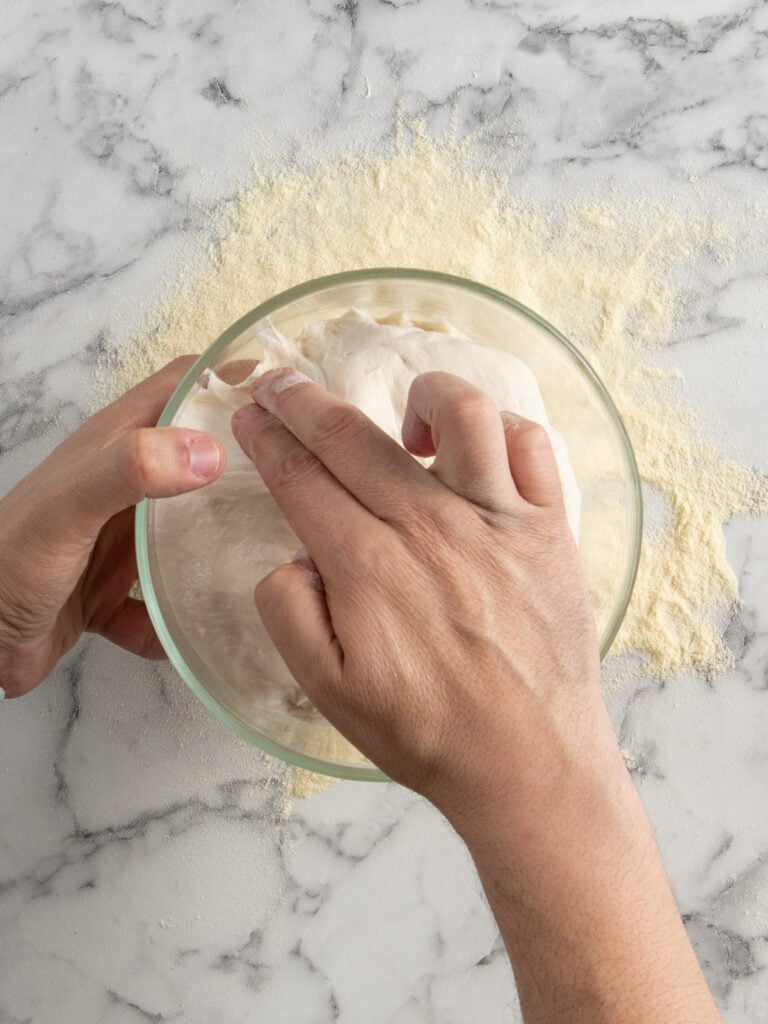
How to do the windowpane test
Take a small piece of dough and gently stretch it between your fingers. If it becomes thin enough to see light through without tearing, the gluten is developed enough. If it tears, knead for a few more minutes.
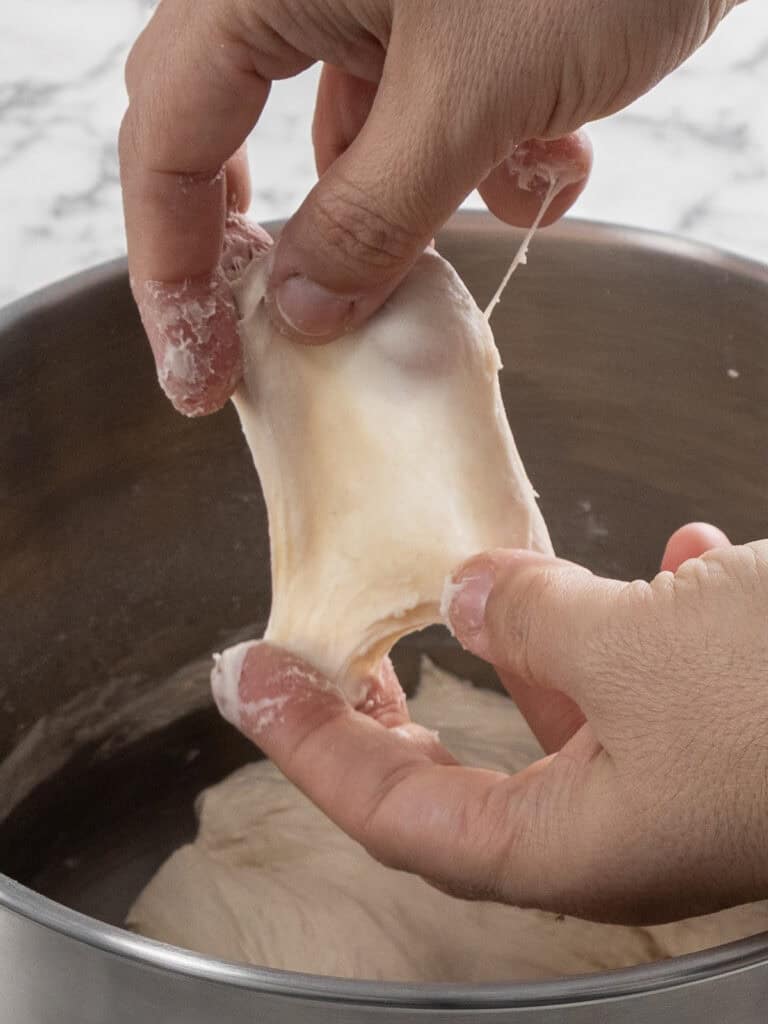
Some people don’t bother with this which is ok for their recipes but I reckon it’s a good indication of knowing this dough is ready so don’t skip it unless you’ve made this loads of times!
A note on kneading speed – the speed you knead your dough at will depend on your mixer. You’ll only knead it one speed throughout the entire process. I knead on 30% with the Ooni Halo, I knead on speed 3 in my Kenwood chef sense.
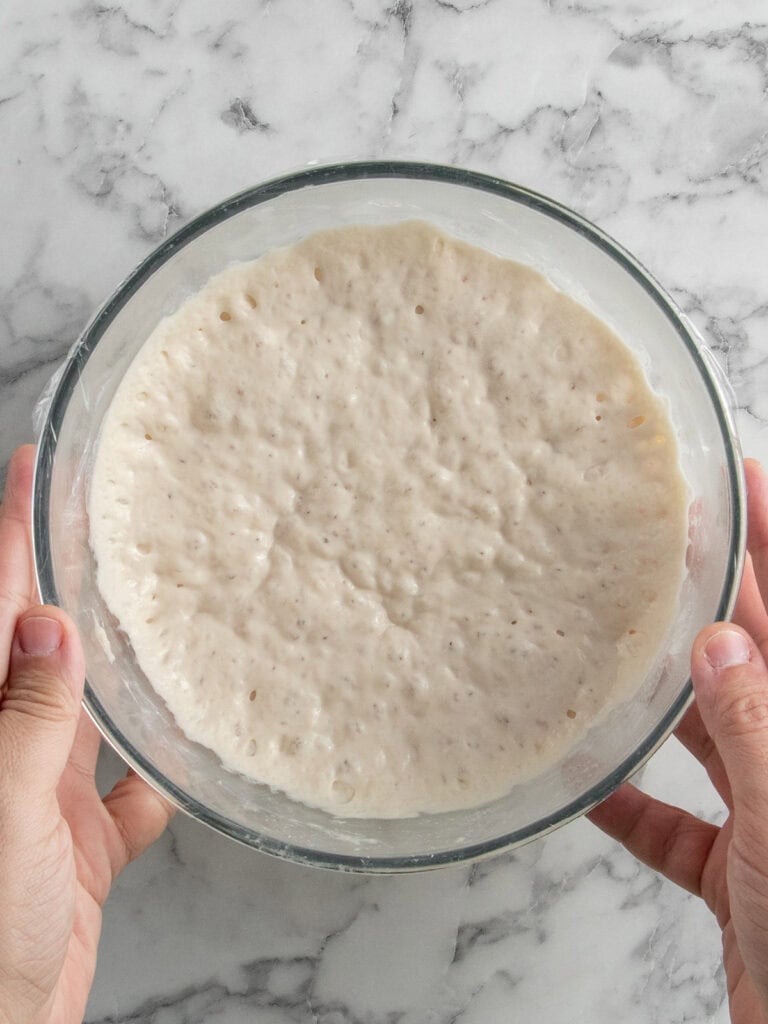
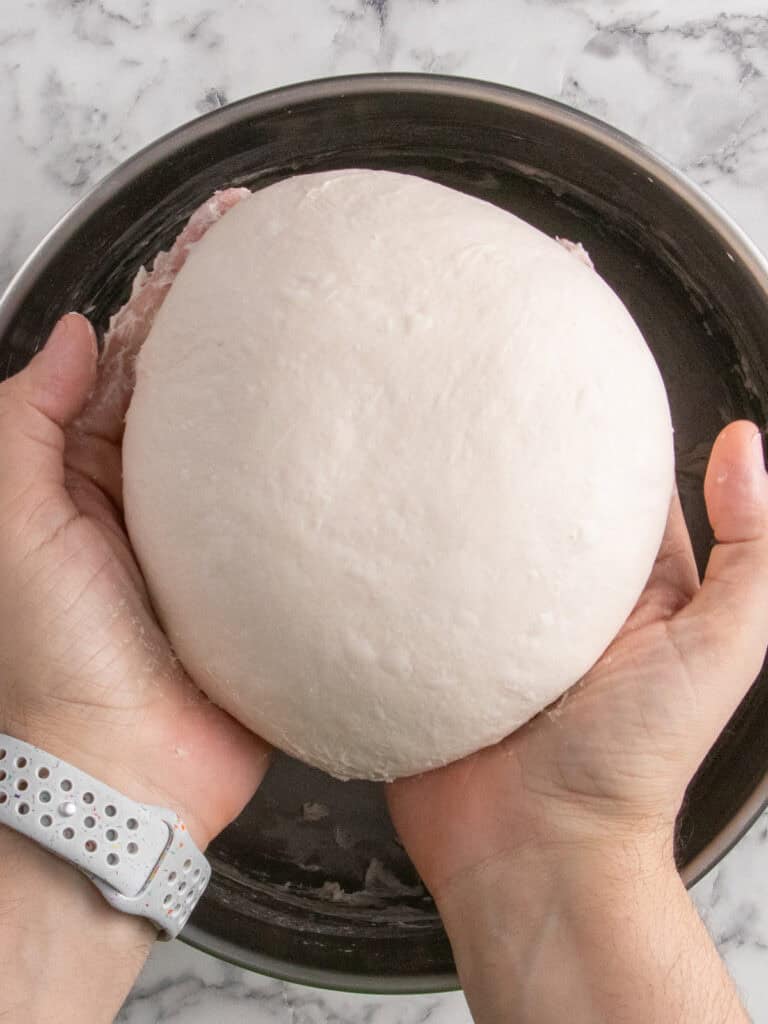
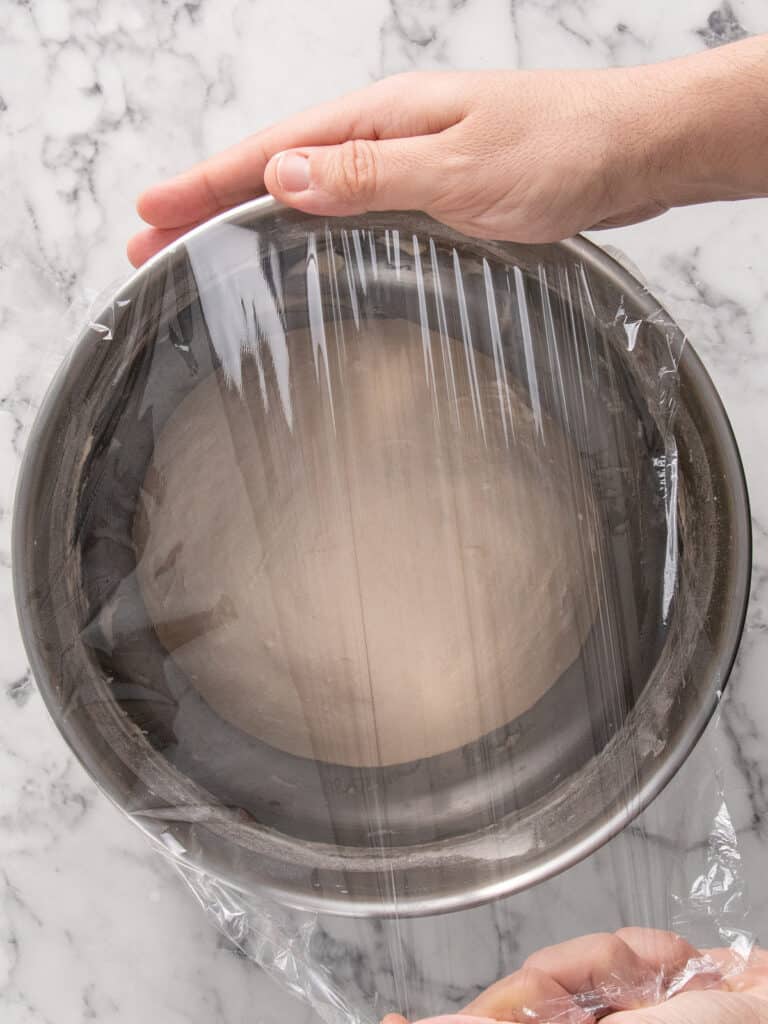
What slow fermentation does to your dough (1-3 days)
Once your dough is done, pop it into a large bowl, cover tightly with plastic wrap and pop it in the fridge to slow ferment for 1-3 days. 1 full day is the absolute minimum. I aim for 2 days.
Slow fermentation is where the magic happens.
- Dough develops deep flavor. It’s bloody delicious, trust me.
- Strengthens gluten structure = stretchier dough that doesn’t break. Plus, a good chew!
- Gluten traps air which means big bubbly outer edges!

This recipe makes 3 pizzas
The easiest way to get nice even sized pizzas is to place your cold dough on your kitchen scales and divide that number by 3. If you live fast and loose, just eyeball it. I’m not reckless with my life, so I weigh the dough.
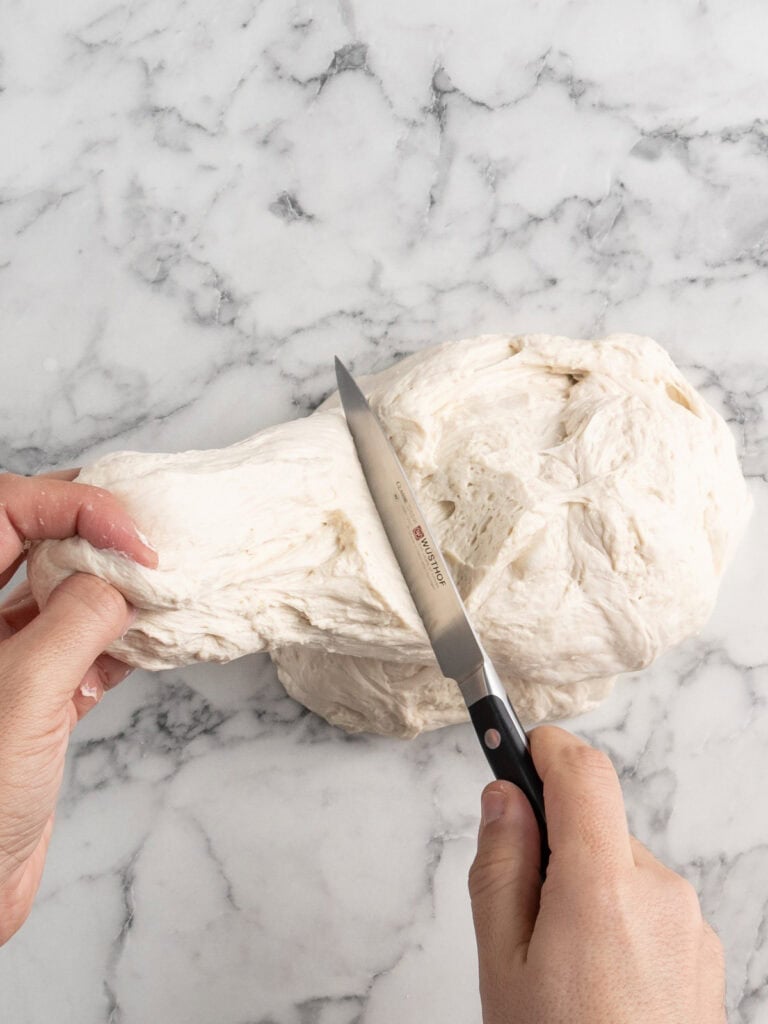
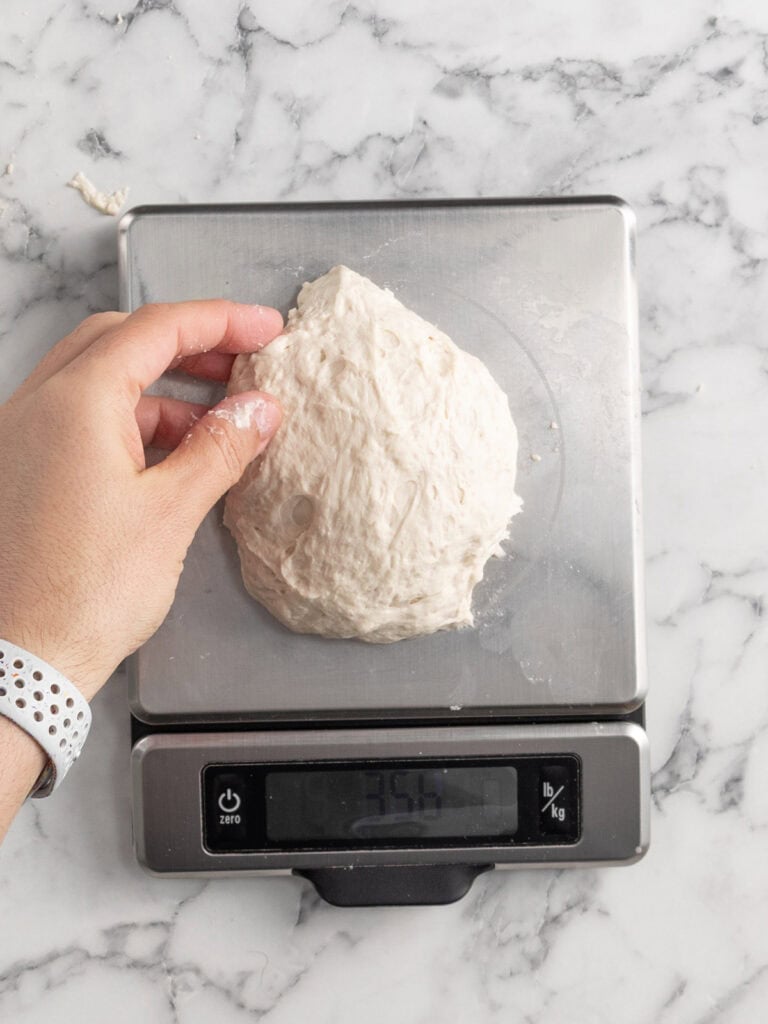
- Portion the dough into 3 pieces.
- Shape into balls by running the bottom of each dough piece between the heel of two hands to tighten the seal under each dough ball and smoothen out the top.
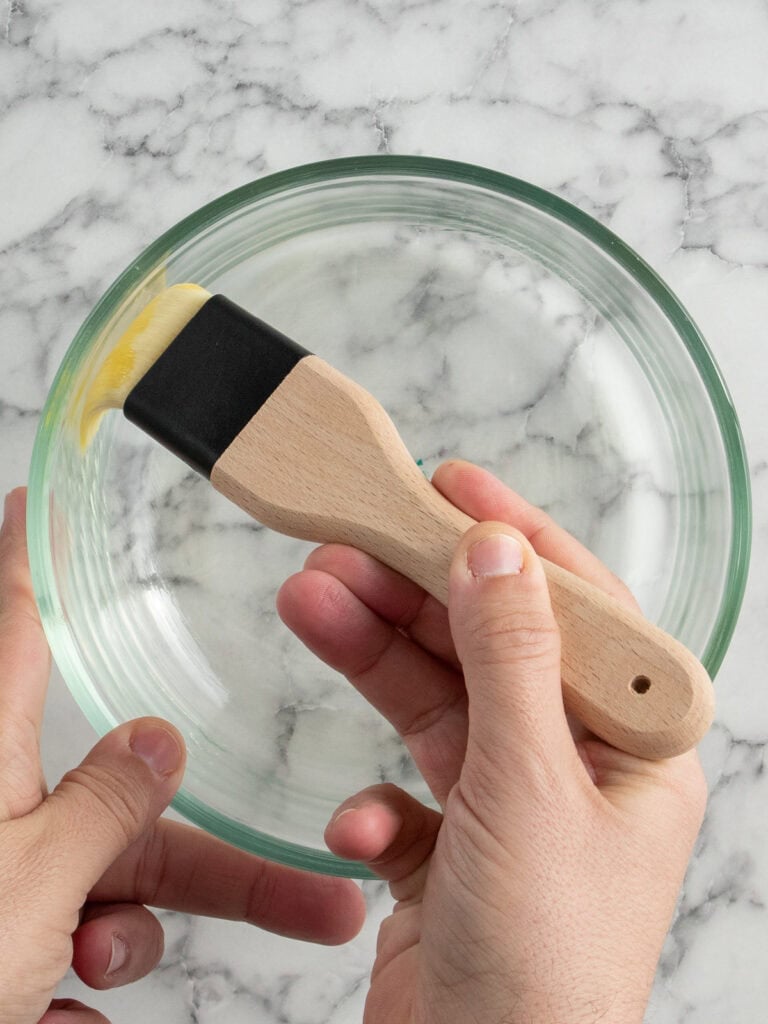
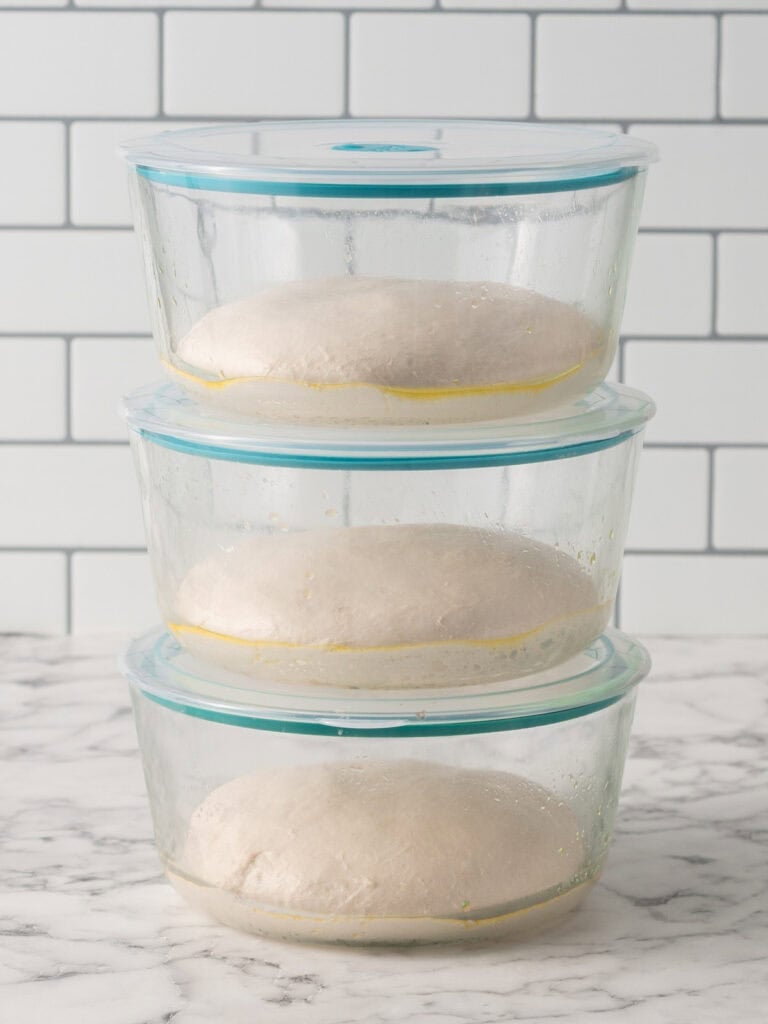
- Drizzle a small amount of olive oil in three large, lidded containers (glass is preferable). Large is important because the dough needs space to rise. Brush to spread a very thin coating.
- Place the dough into your containers with the pinched side facing down. That pinched side is the bottom of your pizza, the smooth bit facing upward is the top of your pizza.
Letting your dough have a final rise (2-3 hours)
Once you’ve got those dough balls in the containers, pop the lids on, and let them do their final rise. They’ll double in size over about 2-3 hours. It could be sooner than that if it’s a warm day, it could take longer than that if it’s cold.
Reminder – This is the final rise guys. It’s where the pizza makes it final batch of bubbles. Keep in mind, the bottom of the dough is the bottom of the pizza, the top of the dough is the top of the pizza.
Stretching and shaping your pizza
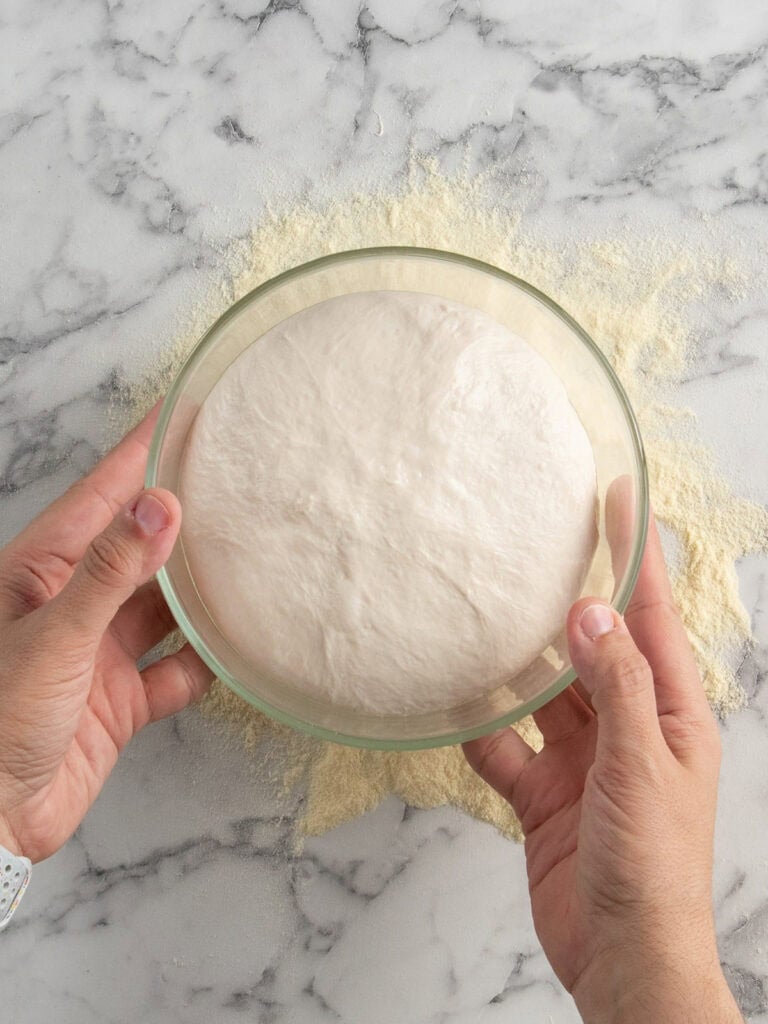
Your dough is puffy. Once your oven of choice is ready, it’s time to shape and decorate!
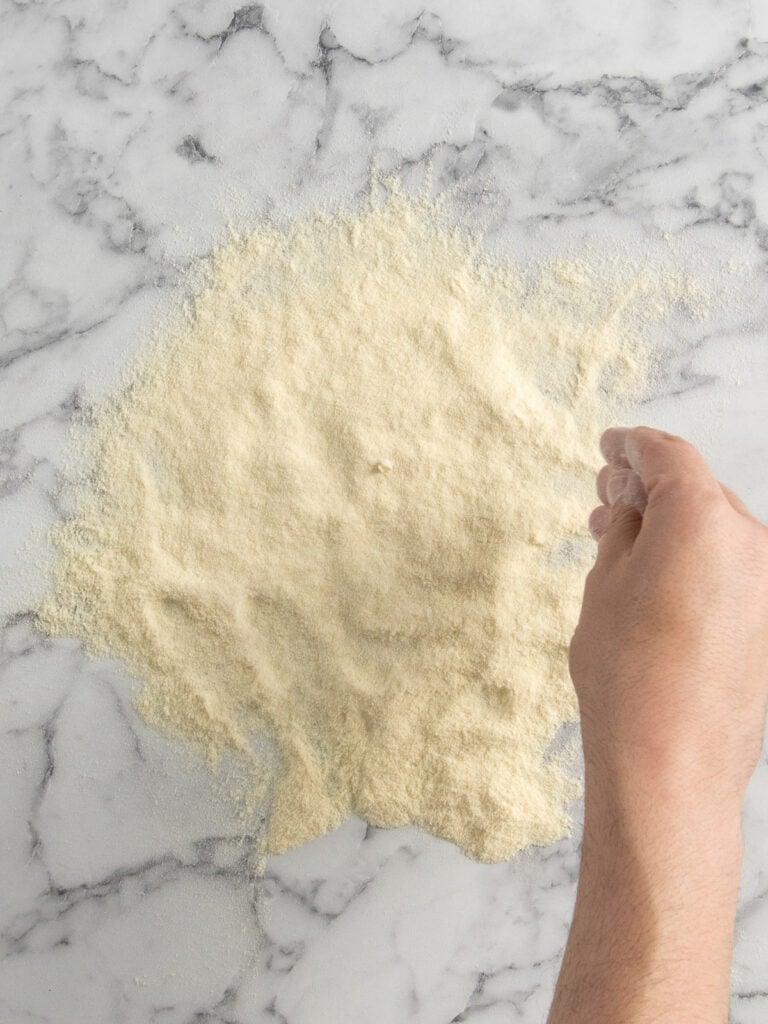
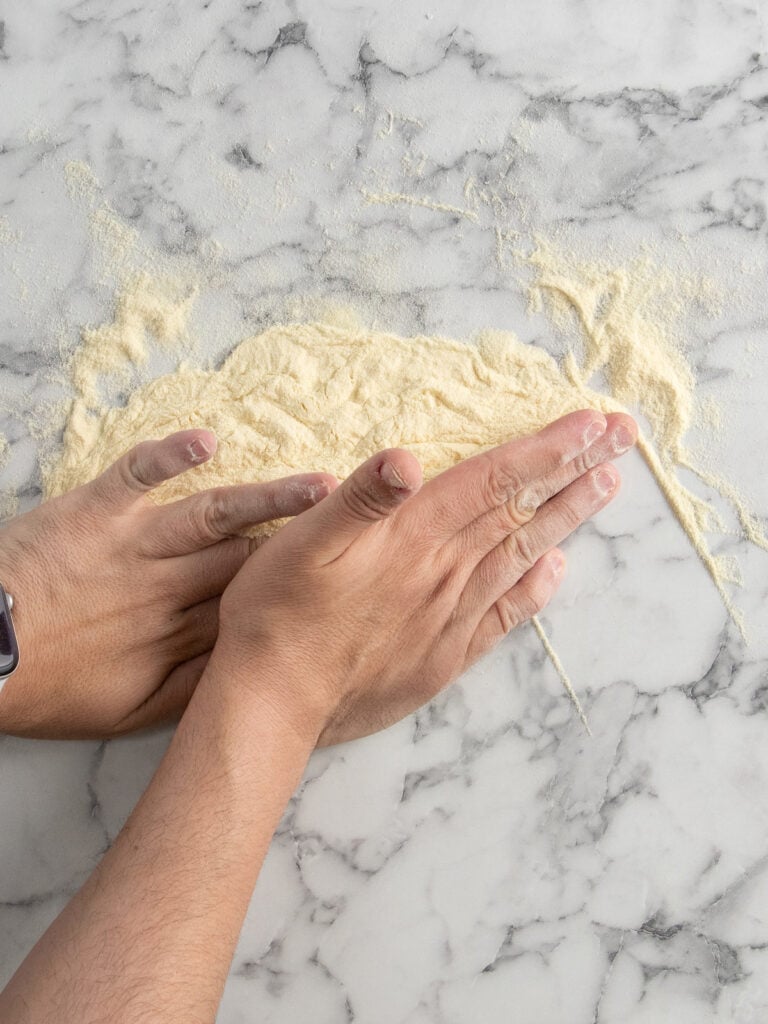
- Dust a generous amount of either fine semolina (the type used for pasta) or flour (any type) on your workbench. And I mean generous.
- Use your fingers to loosen the sides of the puffy dough from the container. Just be gentle and quick. You don’t want to deflate your dough.
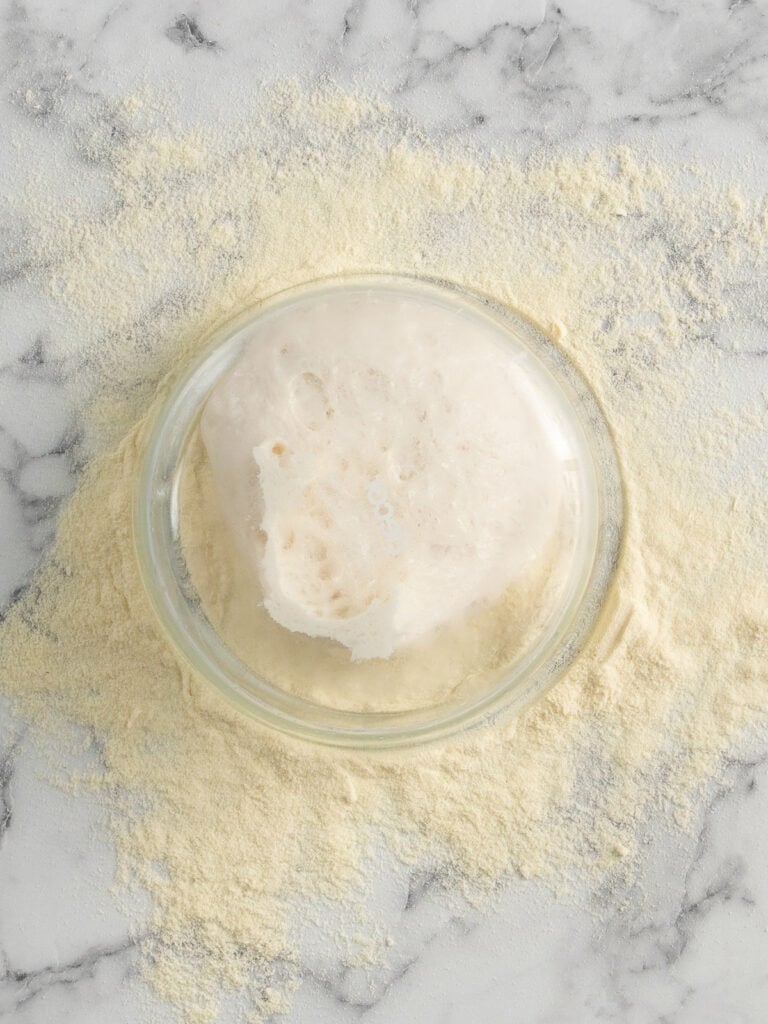

- Turn the container upside down on top of your dusted workbench and let the dough slowly fall out on its own. I usually walk away and keep getting things ready.
- Once it’s fallen out, carefully take the container away. What you’re looking at now is the bottom of your pizza. Dust a generous amount of flour or semolina on top of the dough.
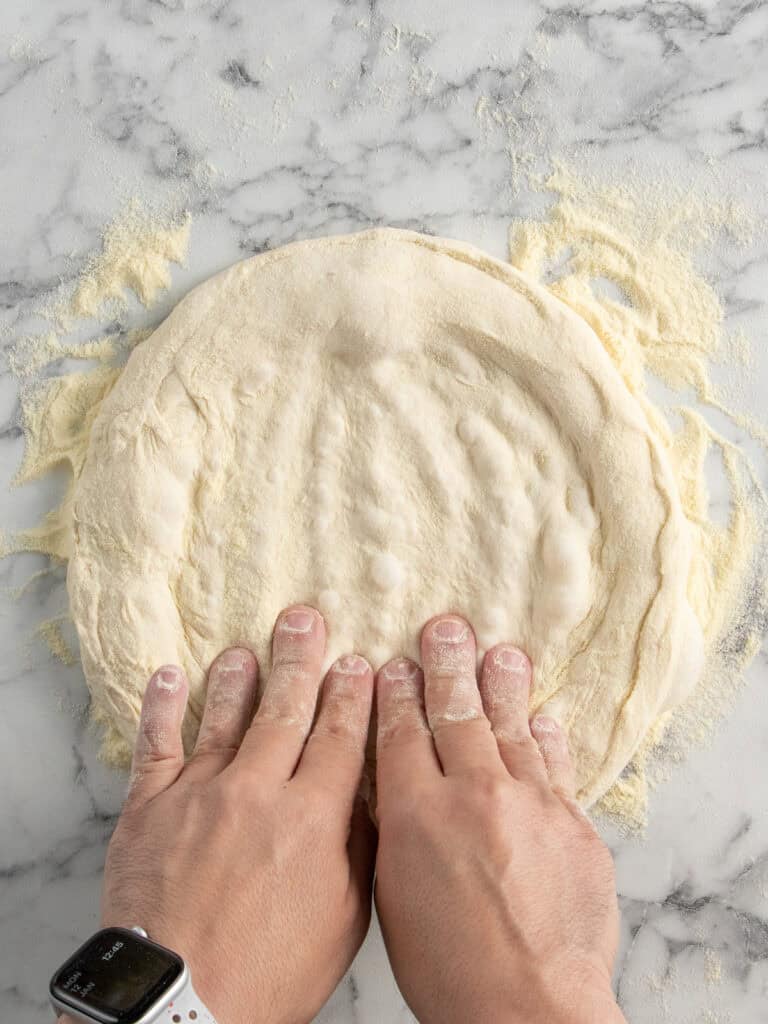
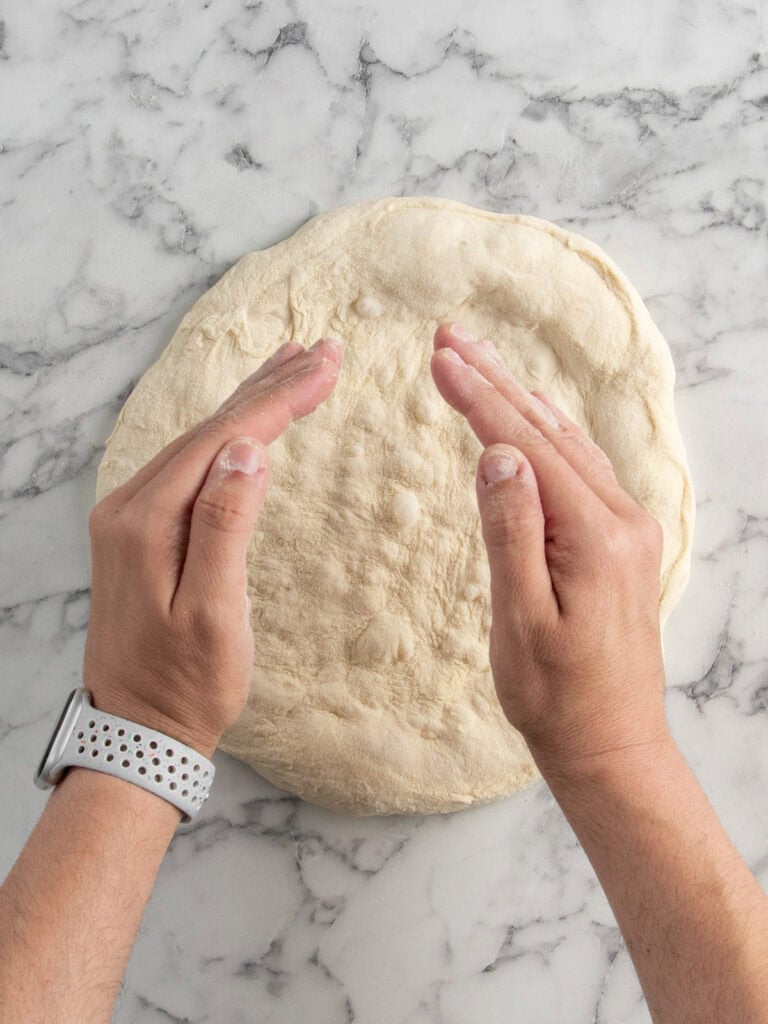
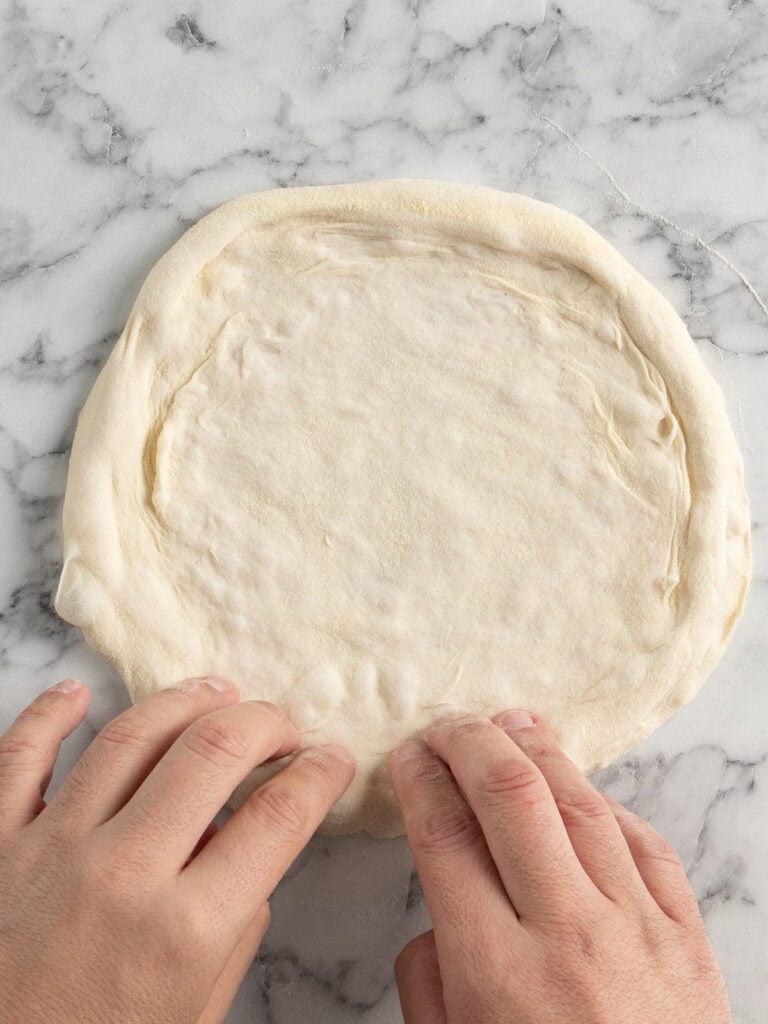
- Use three fingers on each hand to press in the middle of dough starting at the top, working your way to bottom, making sure you leave a good 2cm of puffy dough around the perimeter of the dough (your pizza edge).
- Gently flip the dough over (you’re looking at the top of your pizza now) and repeat the indenting technique again.
- Carefully lift your dough up and shuffle it onto the side of your workbench. Get rid of the dusted flour or semolina.
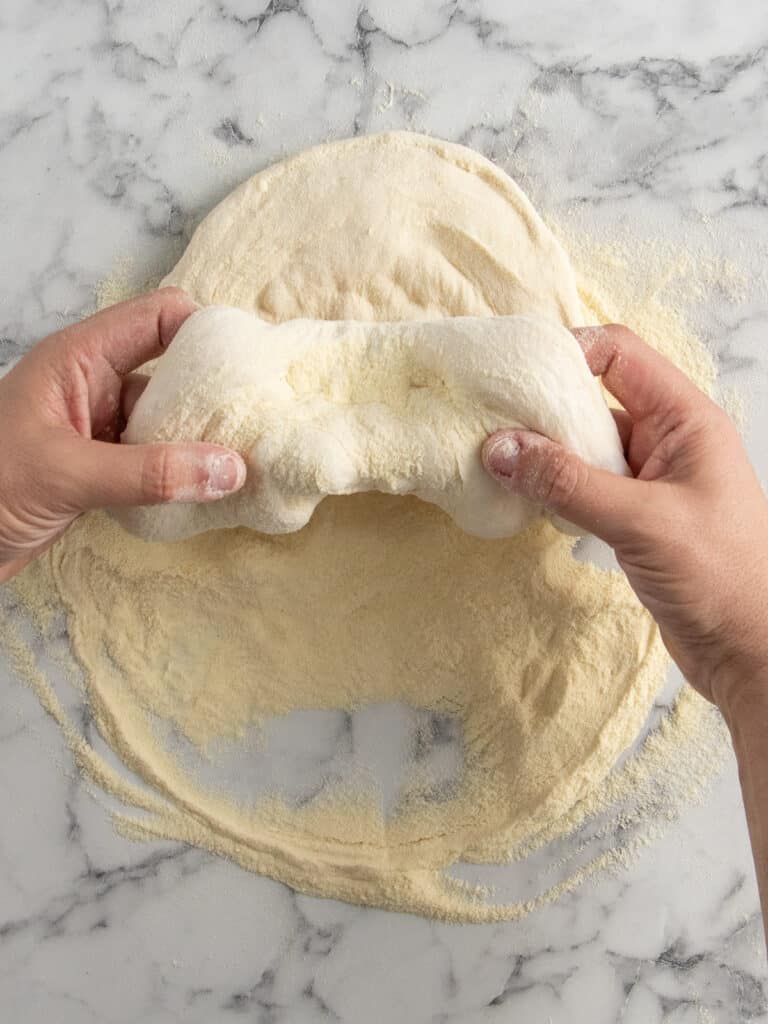
- Bring the dough back in front of you and begin stretching by curving your fingers and hands on each side.

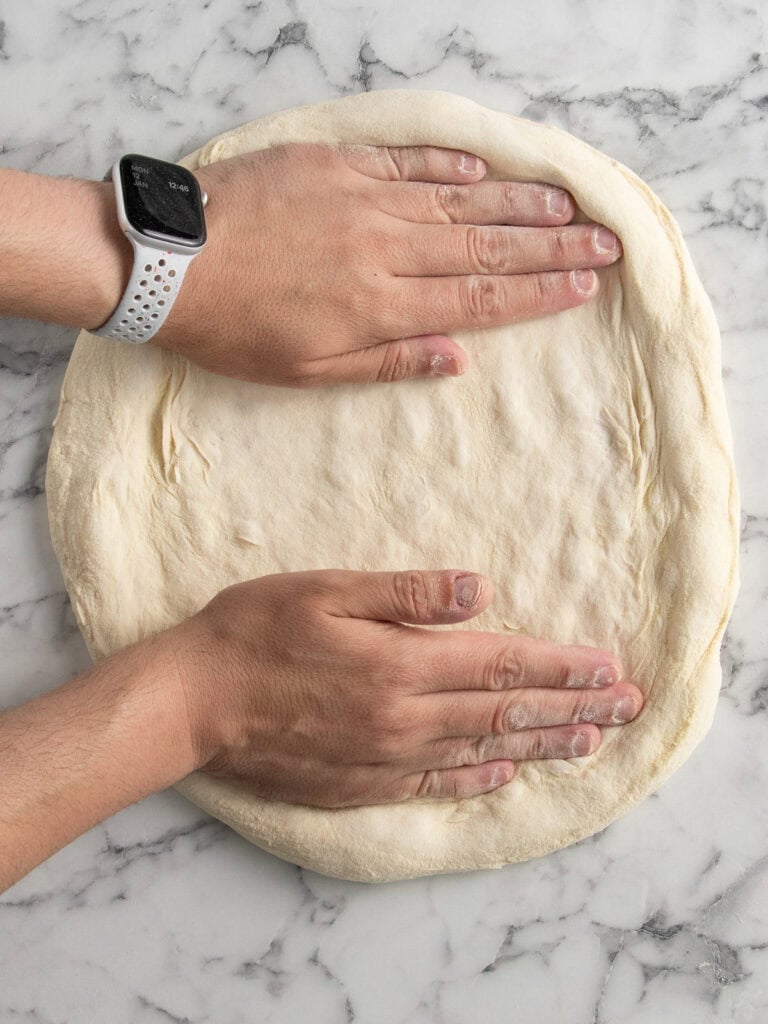
- Stretch the dough from the edges, outward, until you feel resistance (you don’t want to tear it) and take care not to deflate the outer edges.
- Rotate the dough 90 degrees and stretch again. Continue doing that until you get a nice round shape that’s about 30-40cm in size.
Stretching your dough takes practice! – My first pizza was an embarrassment shape wise, but it tasted bloody amazing. Do your best and keep practicing. It really does make perfect.
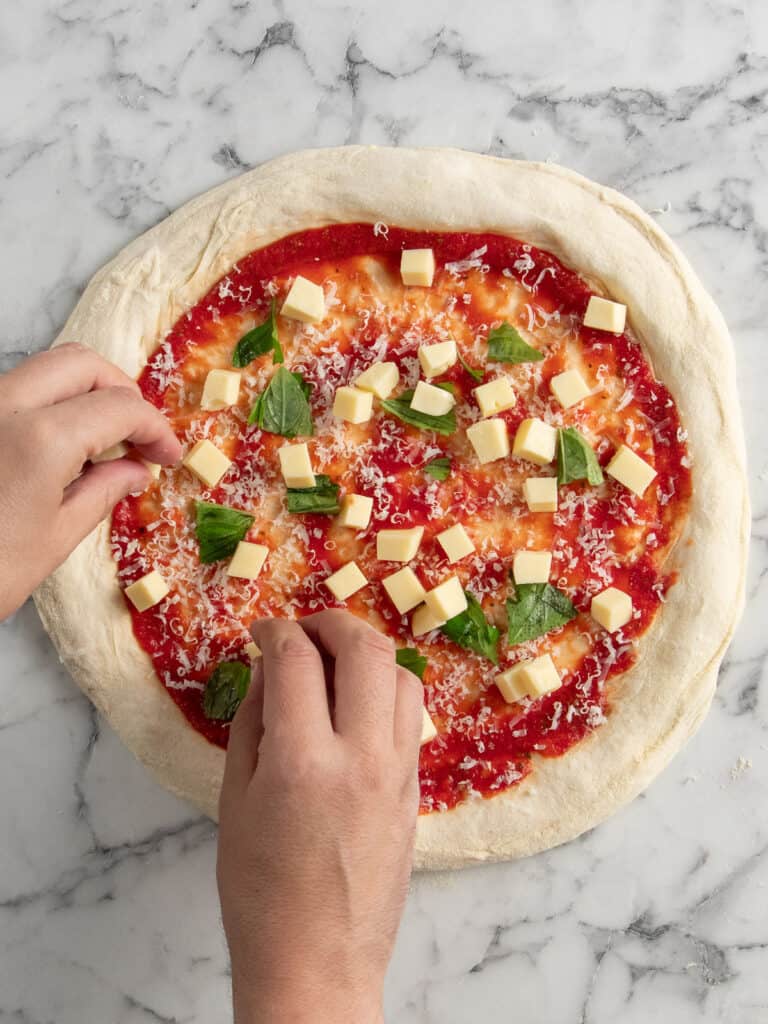
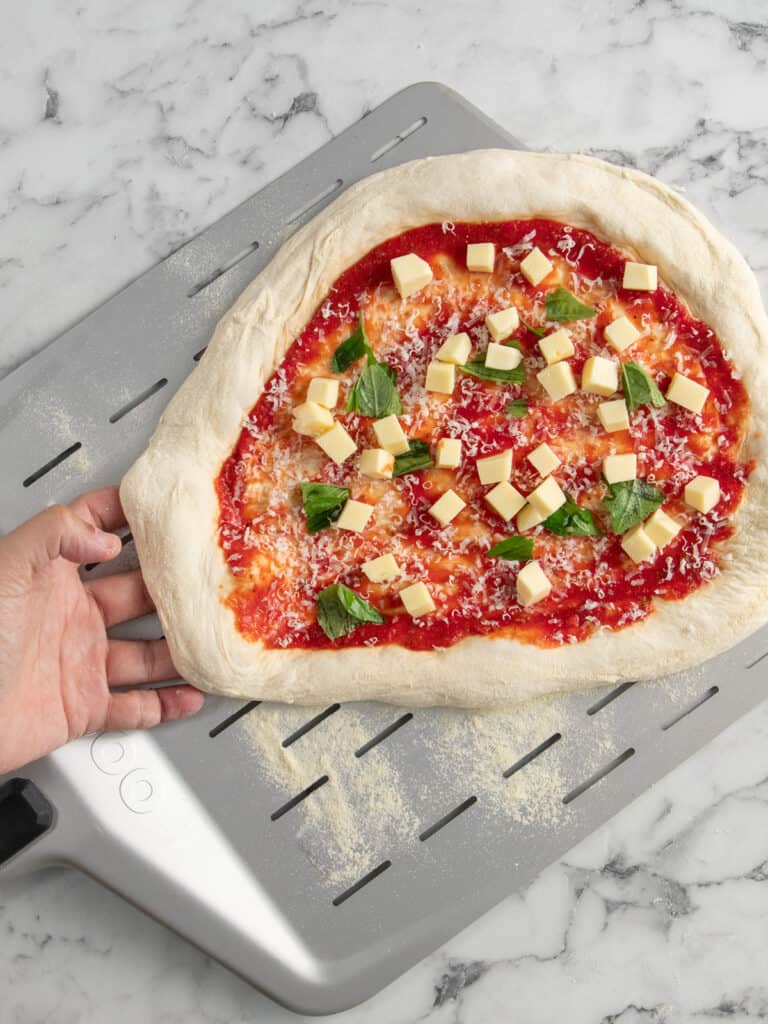
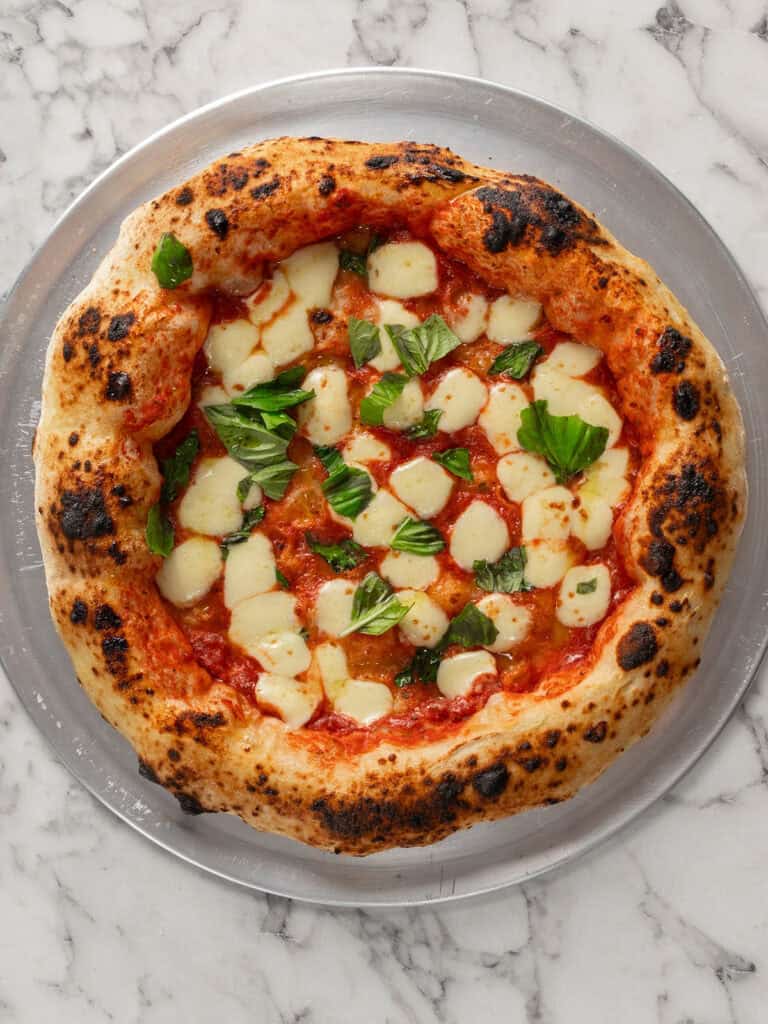
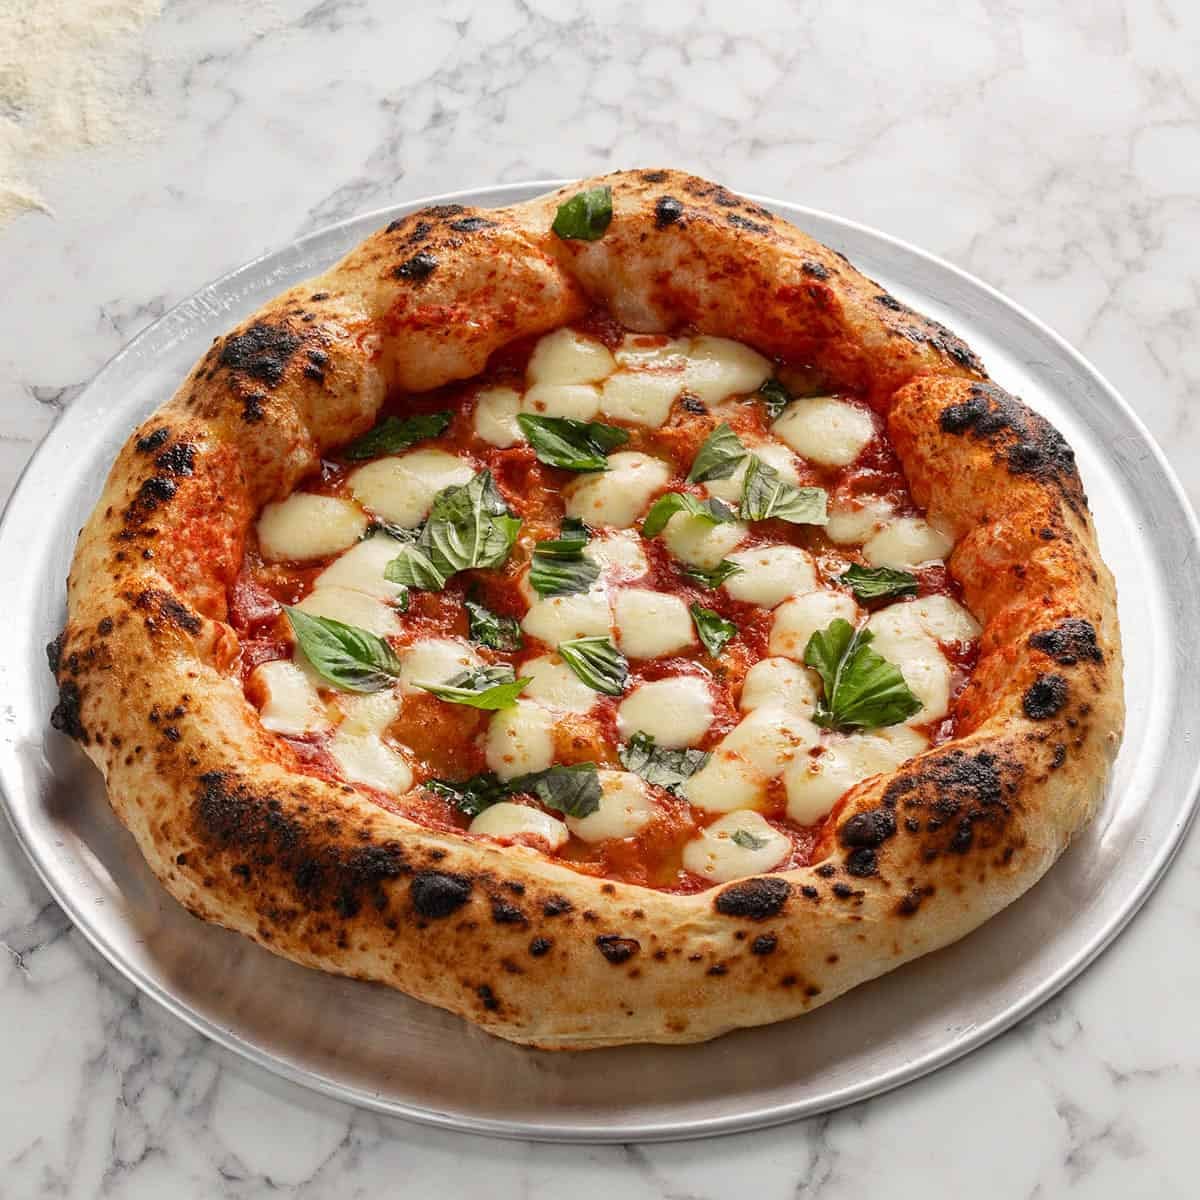
Adding your toppings (Margherita)
A Neapolitan style pizza is allergic to too many toppings especially ones with too much moisture. Go light so you can keep that thin bottom crisp. I’ve got ingredients brands and notes on my toppings in the recipe card.
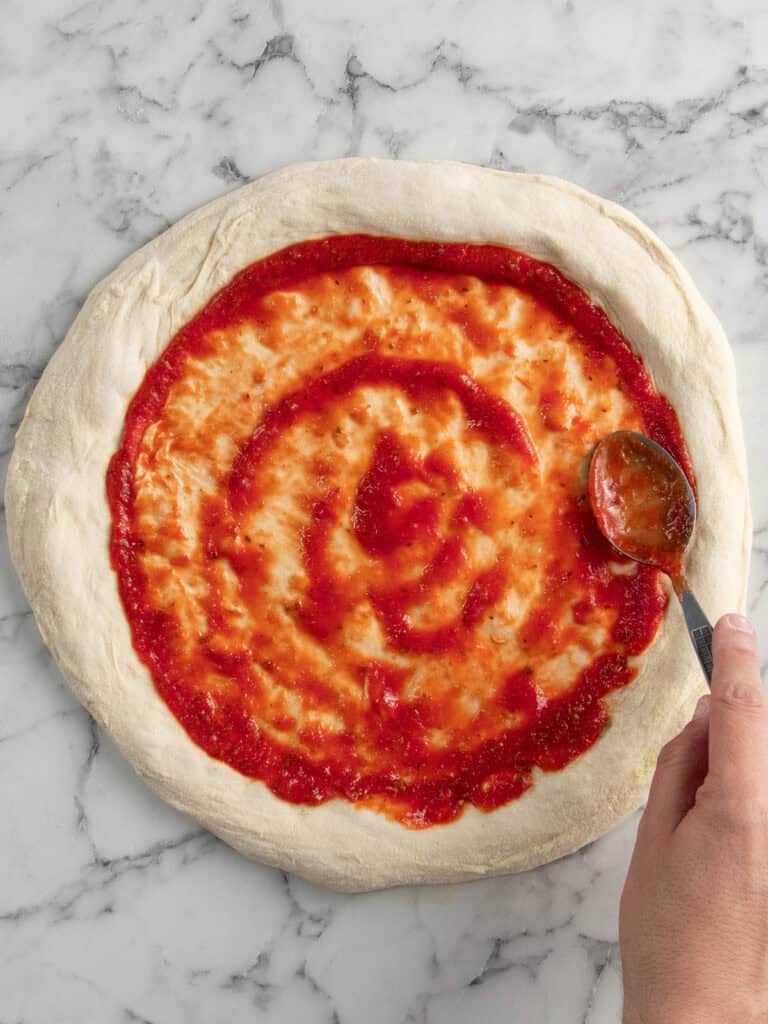
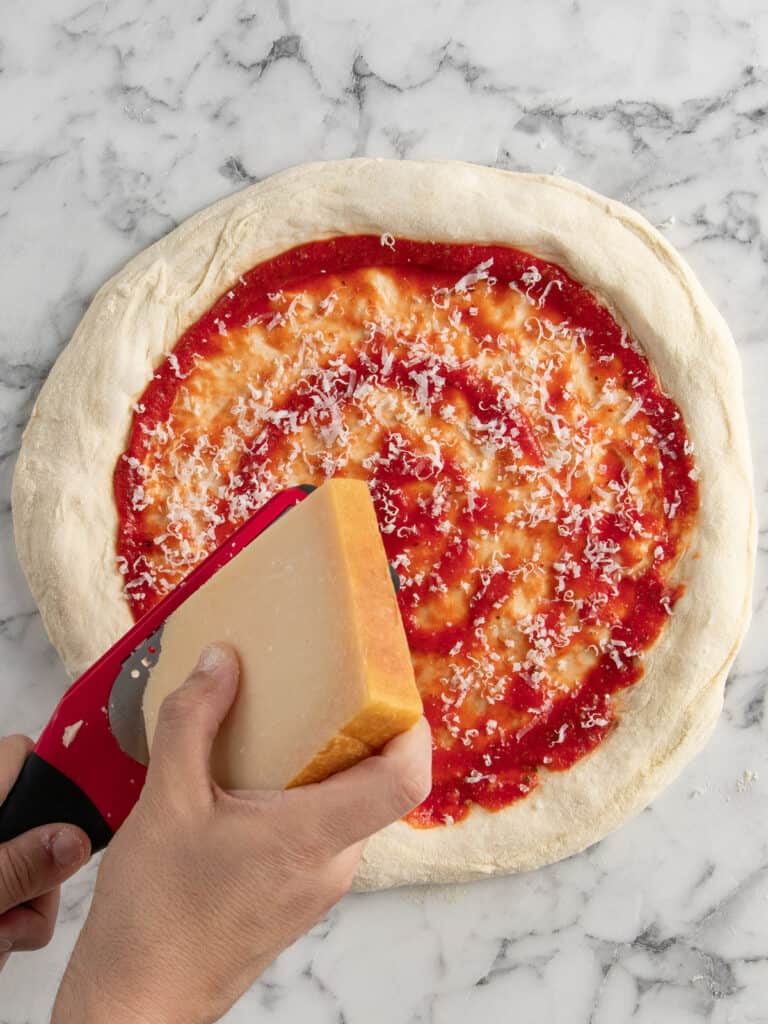
- Add about 3 heaps tbps of sauce on top and spread it on evenly leaving the outer edges clear.
- Generous sprinkle of basil. Just tear it up with your hands.
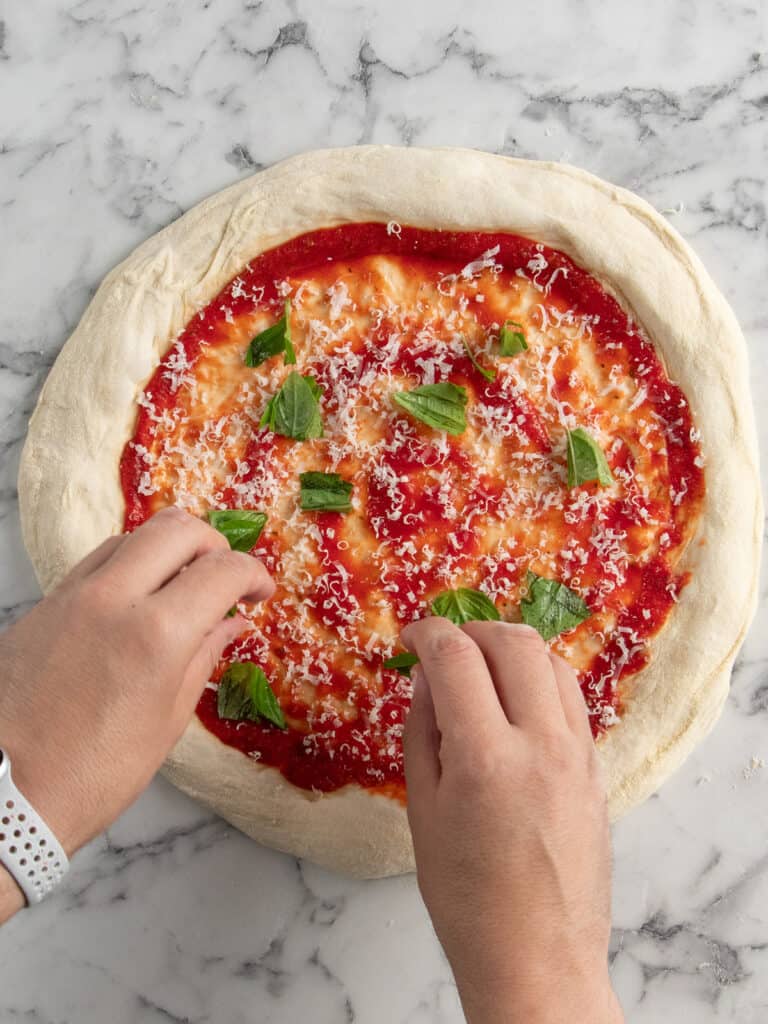
- Grate some fresh parmesan cheese on top. Fresh! Not pre-grated.
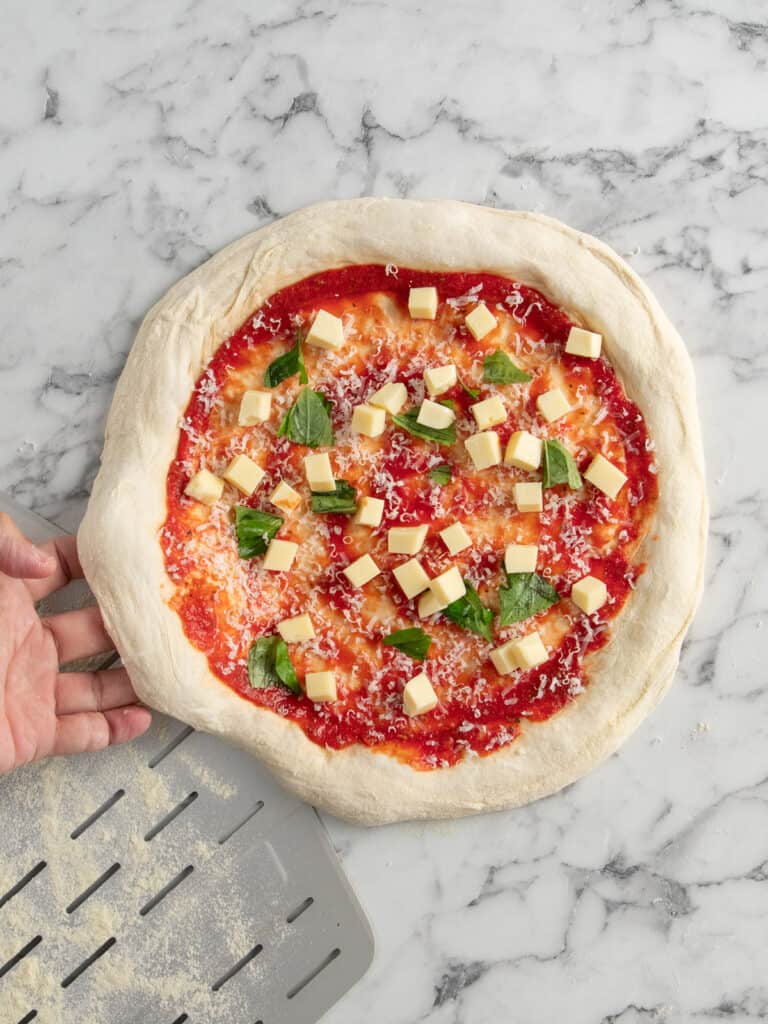
- Add a good sprinkle of mozzarella. Drizzle oil and its ready to bake!
Getting the pizza on the pizza peel
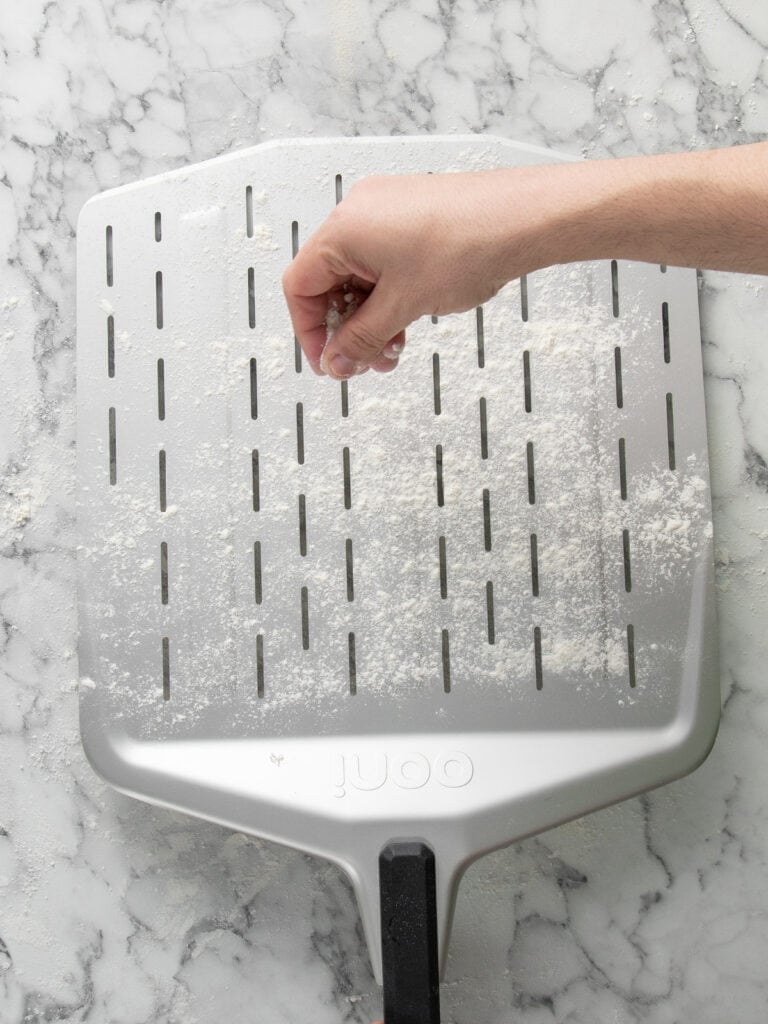
- First of all, you want to make sure you dust your peel with flour. Without that dusting, your pizza will stick. But go light.
- Then use one hand to lift up some of the pizza at the end.
BRACE YOURSELF: You want to do the next thing with confidence. It seems scary but trust the process.
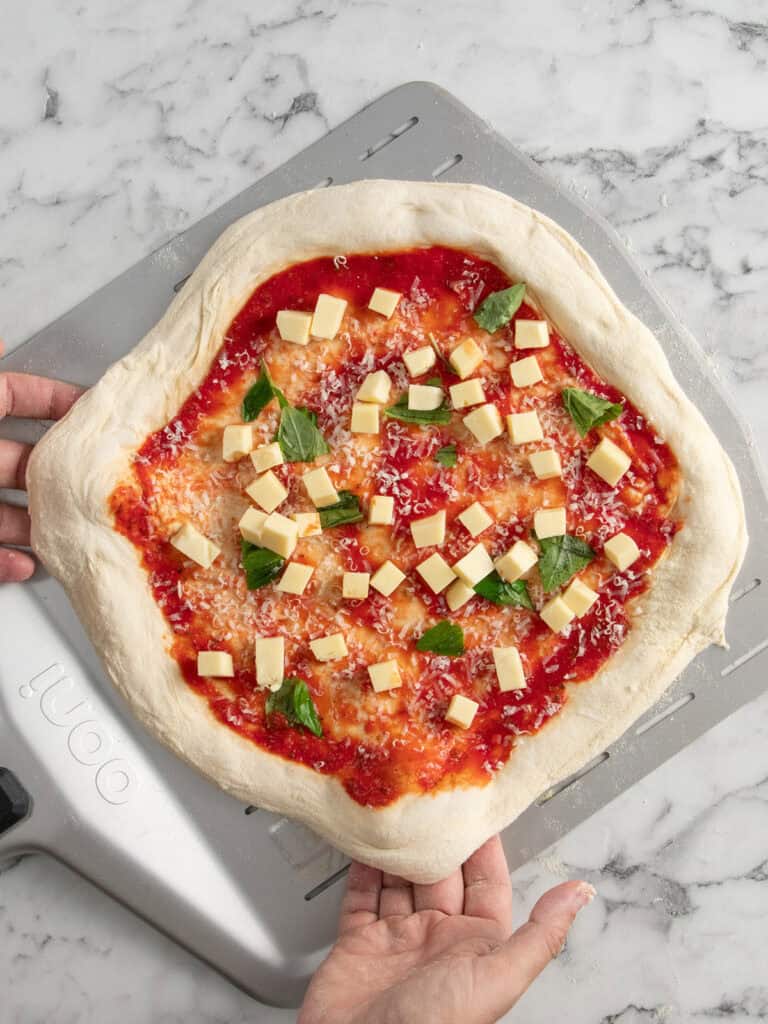
- Do a quick slide under the pizza. I’m talking quicker than you think. One quick motion to get the pizza on top od the pizza peel.
- Even if some of the pizza doesn’t make it on the peel, that’s ok, just gently lift it onto the peel and then do your best to adjust the pizza into a round shape onto the pizza.
Baking it in an oven
First off, you’ll get a great Neapolitan in your home oven. Big bubbles, light chewy dough. But, because there isn’t any fire, you won’t get that charring. Some people call them ‘leopard spots’ or ‘leapording’. It’ll still be crispy on top and underneath.

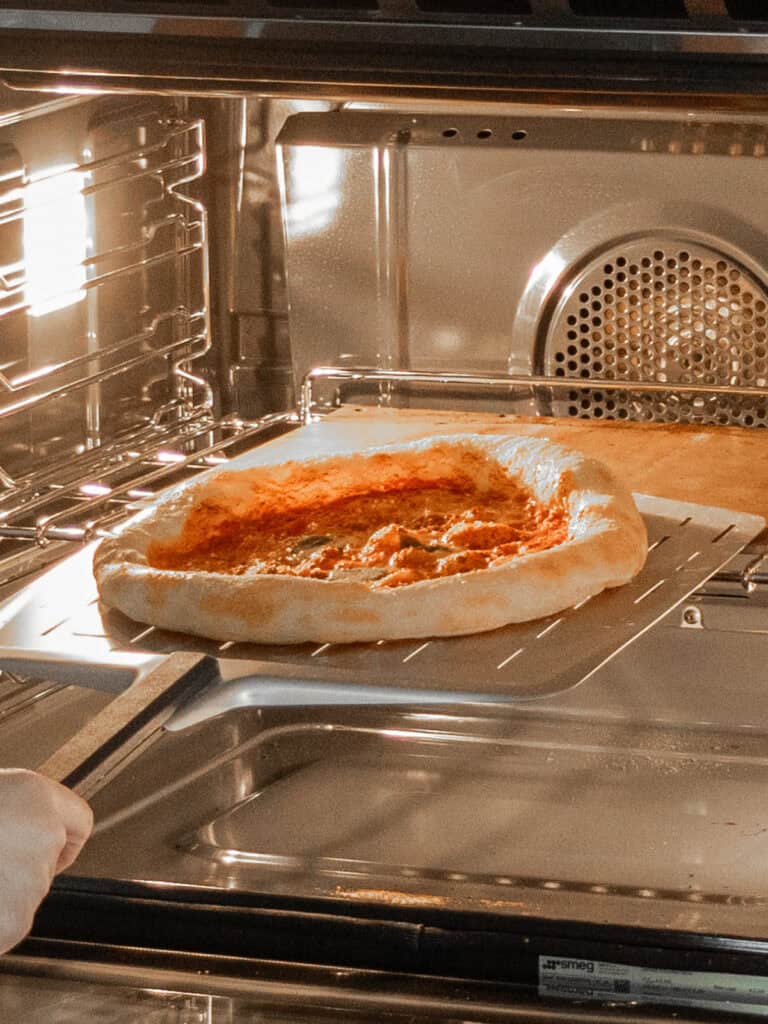
- Start by adding your pizza steel in the middle rack of your oven. If you have telescopic rails, take those off. You don’t want a heavy pizza steel moving around in your oven.
- Preheat the oven on the highest setting possible. My oven goes all the way up to 280C / 535F. The higher the temperature the bigger the bubbles. Preheat for a good 30-40 minutes with the pizza steel in the oven before you turn it on.
- Shuffle the pizza on top of the pizza peel starting from the front (facing the back of the oven), jiggle back and forth to encourage the rest of it to fall onto the pizza steel as you pull the peel away.
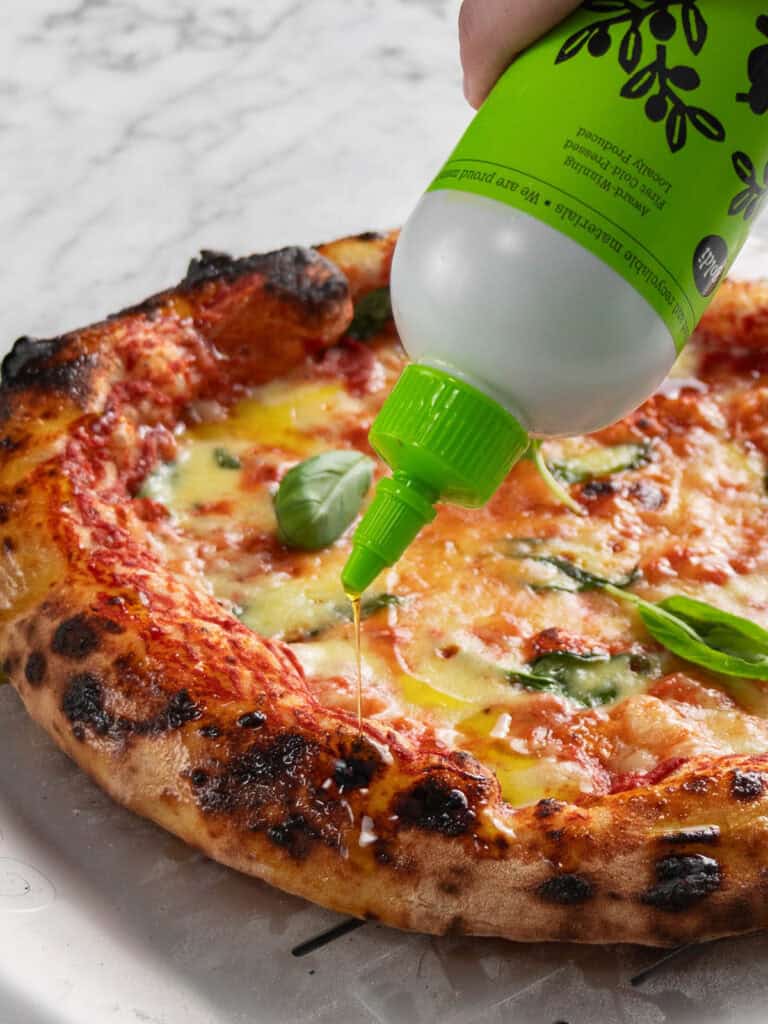
- Bake for 10 minutes then take it out by sliding the peel underneath. Sprinkle some more basil and a drizzle of olive oil. Let it cool for a couple minutes before serving
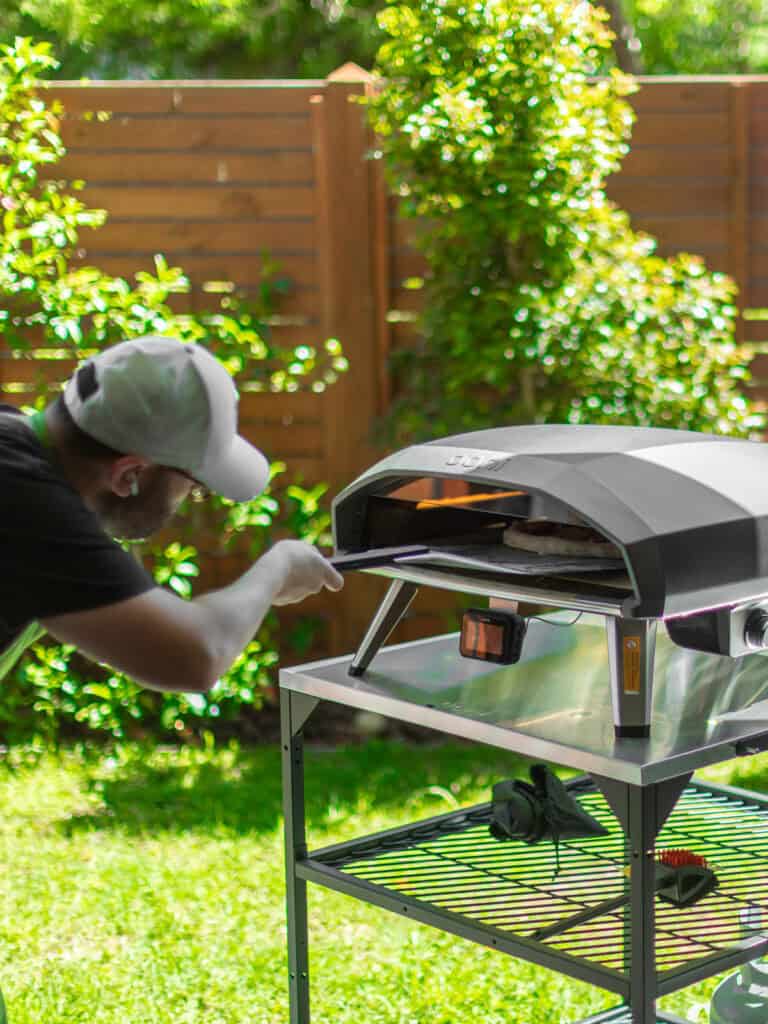
Baking in a pizza oven
The pizza oven I use
I use the Ooni Koda 2 which Ooni generously gifted me so I can test this recipe. But I assume your oven would work similar to mine.
How I preheat my pizza oven
Preheat it way ahead of time. Like 30-40 minutes until it’s piping hot, about 400C / 750F. I use a thermometer gun to help me find the hottest spot in the oven (usually the sides). These days, I know that on the highest heat setting, I get a properly preheated oven in 30 minutes.
- Shuffle the pizza on top of the pizza stone in your oven starting from the front (facing the back of the oven), jiggle back and forth to encourage the rest of it to fall onto the pizza stone as you pull the peel away.
IMPORTANT! Turn the oven down to medium/low, otherwise your pizza will burn easily. This is especially important if you’re just getting the hang of using a pizza oven.
- Use a pizza turner (paddle) to lift one side of the pizza and encourage the pizza to turn 90 degrees. Continue repeating that the entire time the pizza is in there. You’ll know it’s done when the pizza has some charred spots around the sides. The bottom will have them too.
- Use the peel to take it out of the oven. Sprinkle torn basil, drizzle of olive oil. Wait 5 minutes before serving

My favorite pizza flavors
I’ll update this part of the post as I continue to experiment with flavors.
Salmon Pizza

Add the same toppings as the Margherita and bake. Then top with the rocket (aragula) and 100g of the absolute highest quality smoked salmon you can. I like using a beetroot and vodka one that I get from LaManna in Essendon. Then I just add a couple dollops of my lemon dill yogurt sauce (I make a batch of this stuff in the fridge every week). Trust me, this pizza will turn heads.
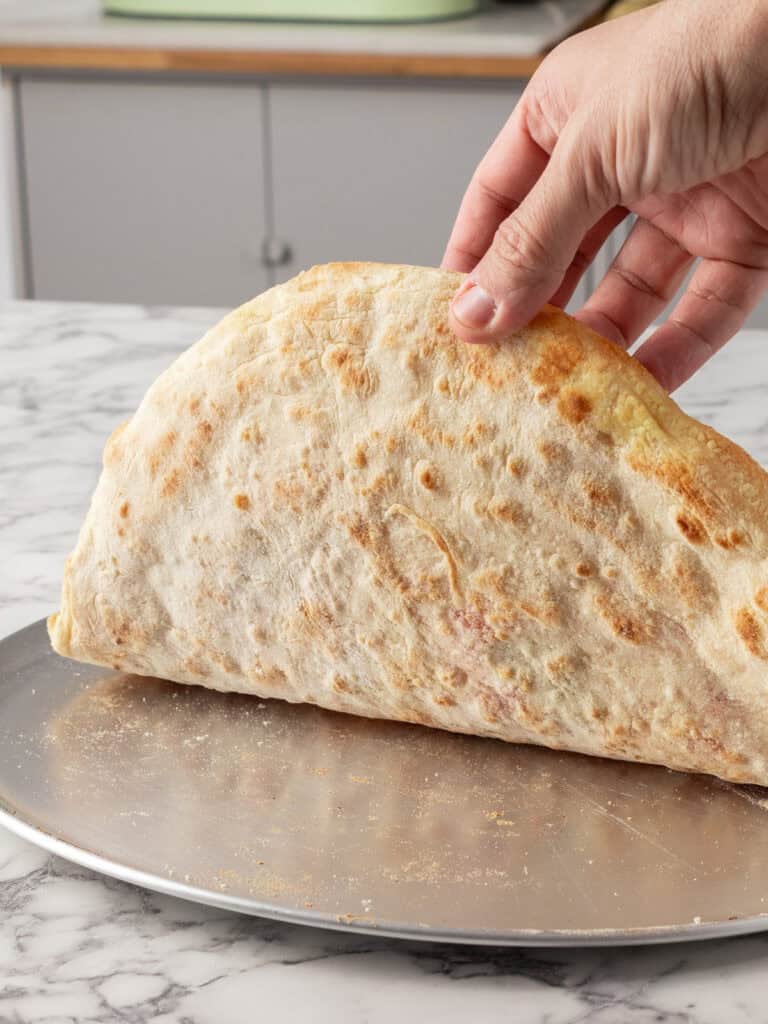
Calzone (pizza oven only)
Each batch of my dough recipe makes 3 pizzas. To make the calzone, split 1/3 of the pizza in 3 smaller balls of dough and proof as normal.
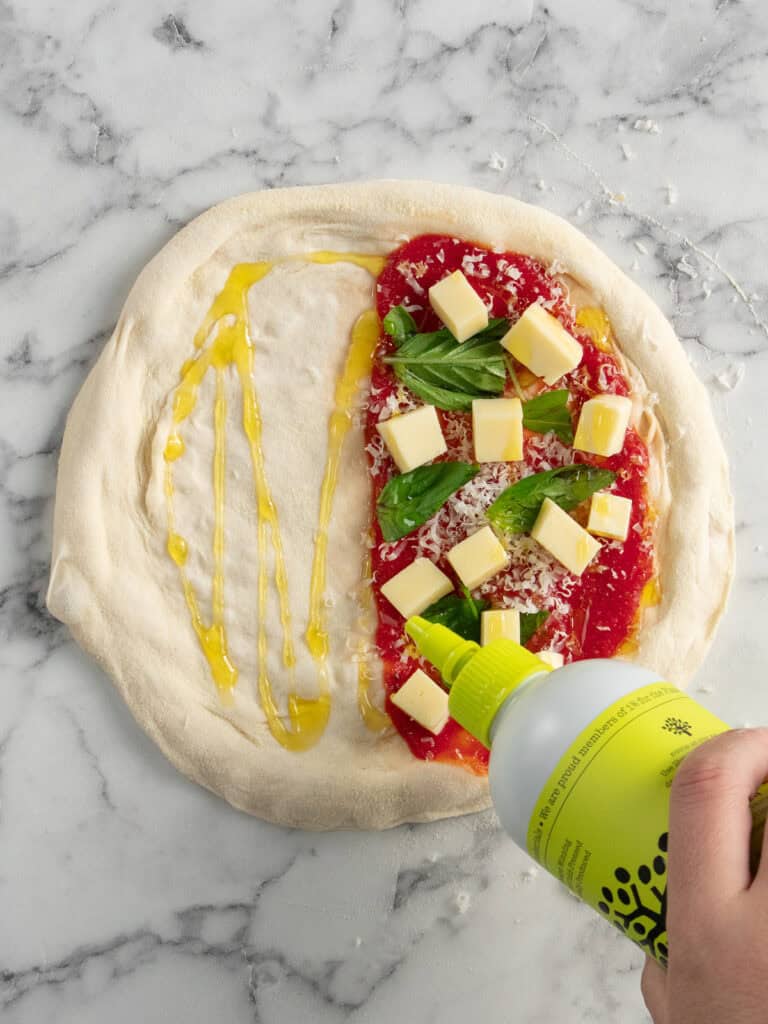
- Stretch out to about 15cm.
- Add 2 tbsp of sauce on one half of the pizza and spread. Add cheese and basil and a generous drizzle of olive oil
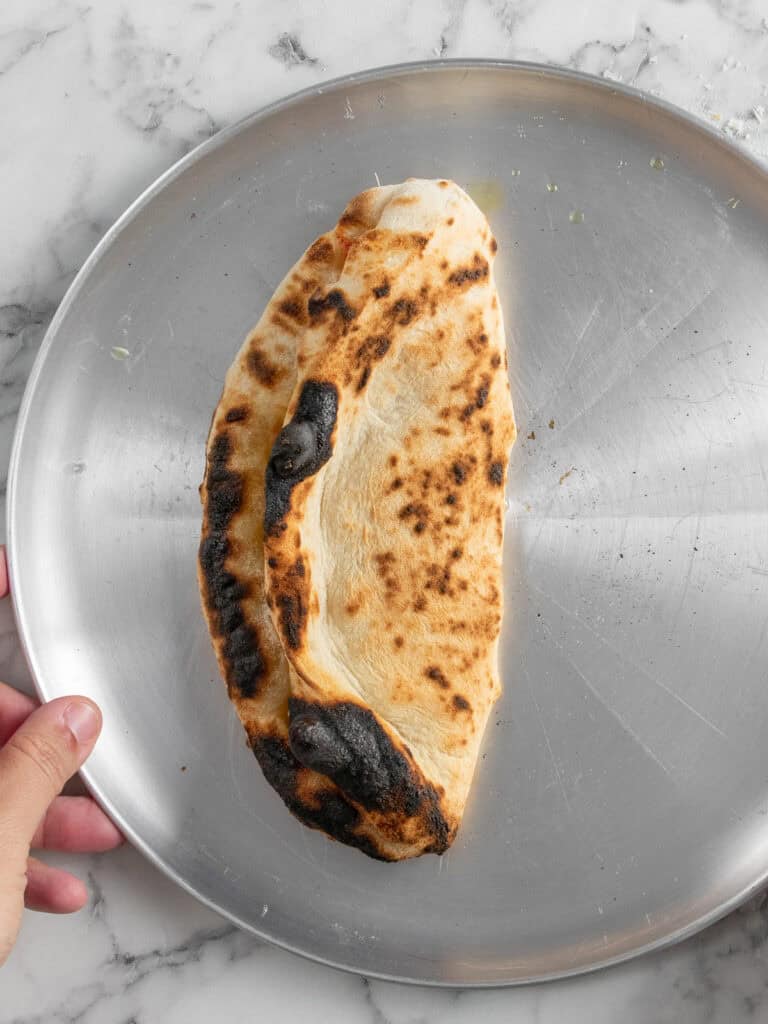
- Fold over and bake the same way you’d bake a regular pizza, making sure you’re using a paddle to turn the pizza around as it bakes until some charr baubles appear all over.
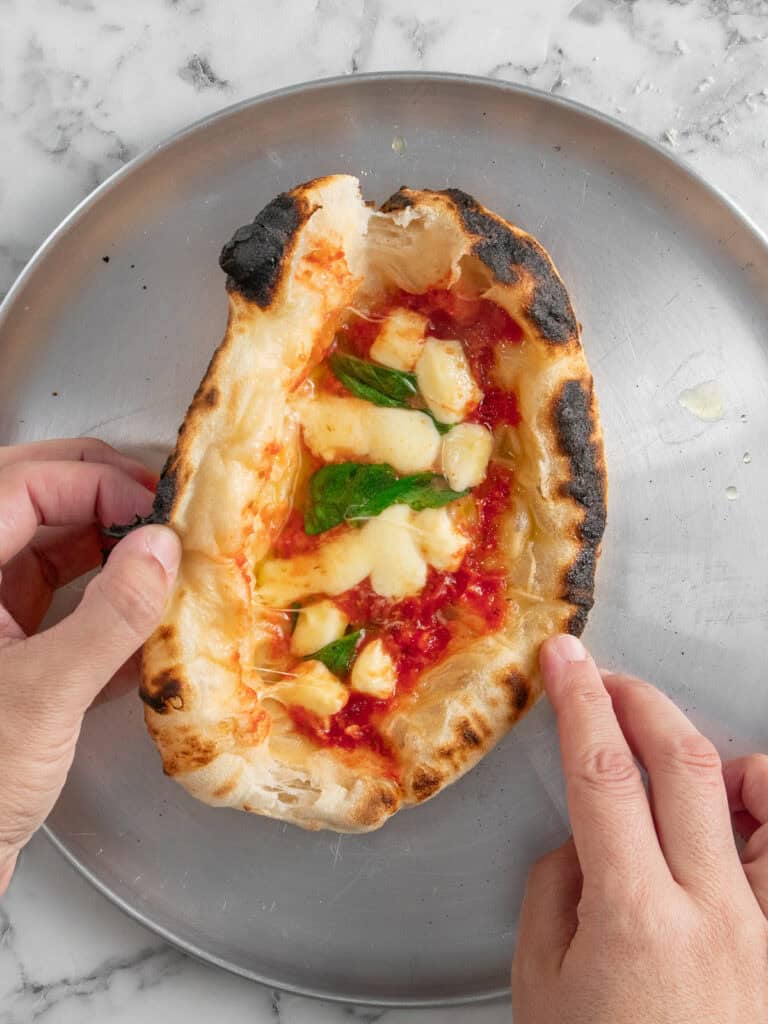
- Once it comes out of the oven, give it 30 seconds to cool before opening it up as lfat as you can get it. There’ll be steam so be careful.
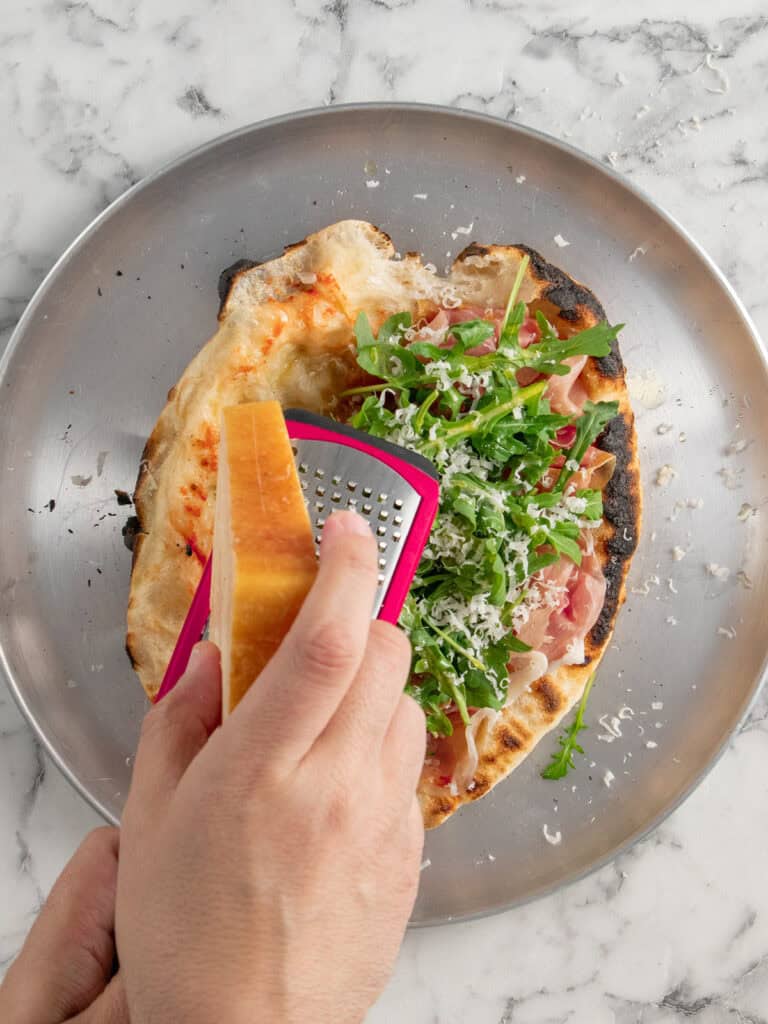
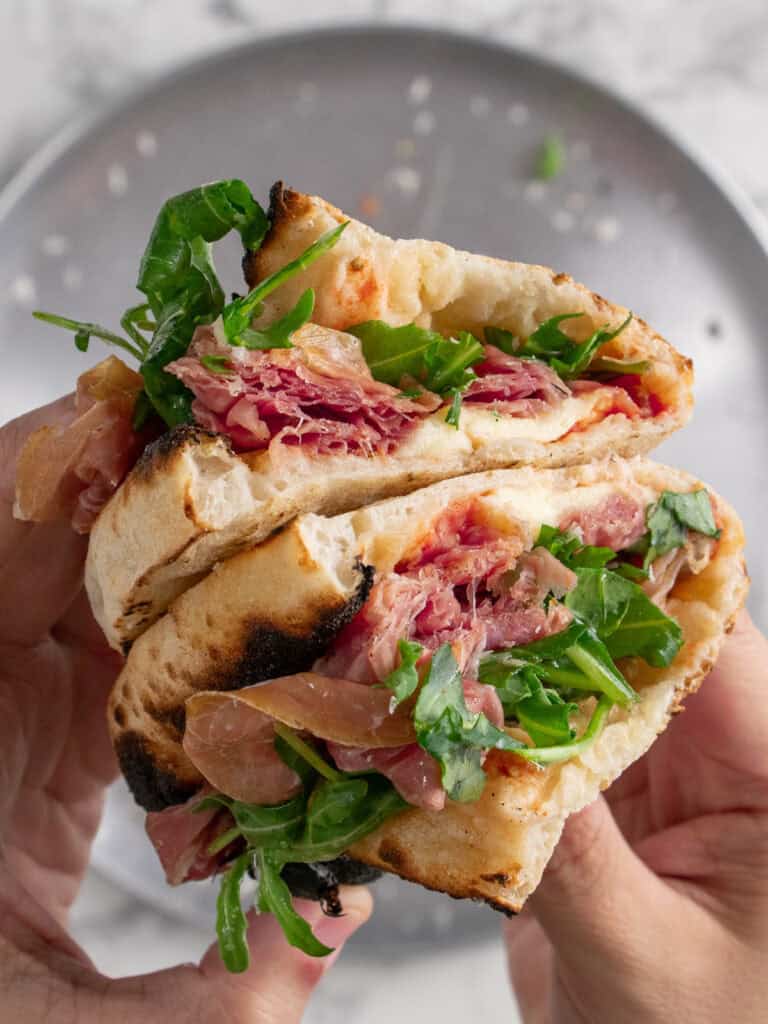
- I love adding some torn rocket (arugula) and ribbons of prosciutto.
A Quick Baking Guide
If you’re new to baking or just want to brush up on the basics, these guides are a great place to start!
Loved the recipe? Let me know!
If you enjoyed this recipe, leave a star rating and comment below. It helps others find the recipe and keeps the baking community growing. Tag me on Instagram so I can see your version too!
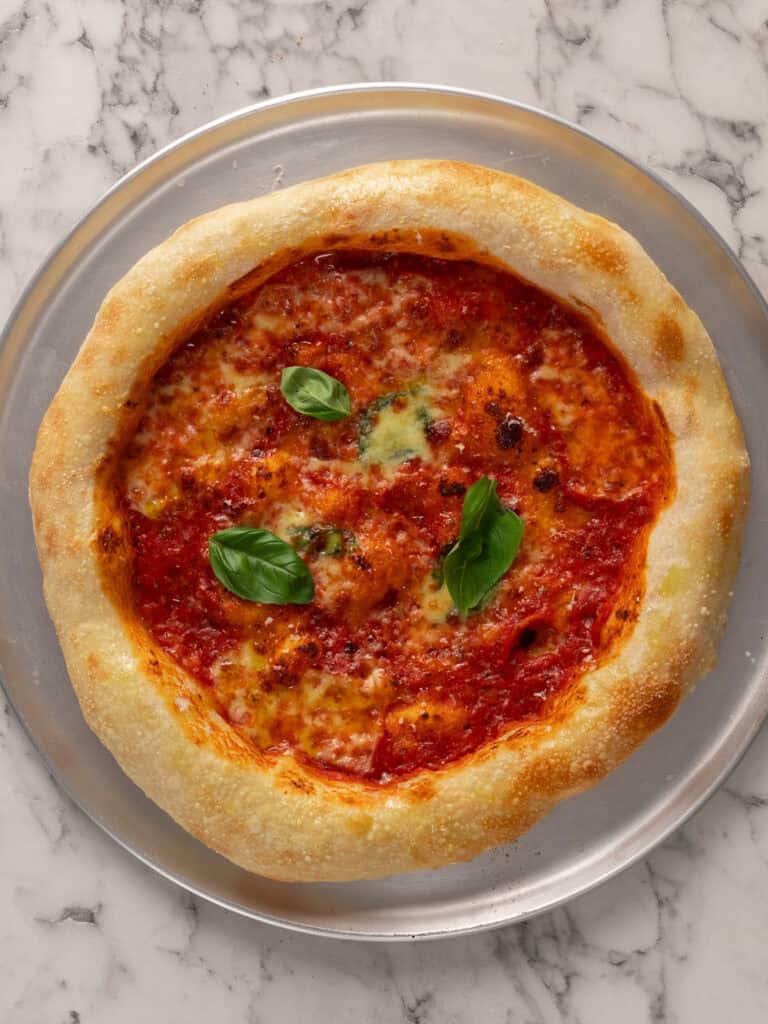
Chewy Neapolitan Style Pizza at home (Beginners guide)
My soft and chewy Neapolitan style pizza is chewy, puffy and has been tested to work in a home oven or pizza oven for an authentic pizza.
Serves 3
Ingredients
Poolish (pre-ferment)
- 200 g water, room temperature/cold
- 5 g instant dry yeast, see notes
- 5 g honey
- 200 g Tipo 00 bread flour, see notes
Pizza Dough
- 265 g water, room temperature/cold
- 465 g Tipo 00 bread flour
- 15 g fine salt
- 8 g olive oil
Pizza sauce
- 200 g passata, I use the Mutti brand
- 1 tbsp dried oregano
- 1/4 clove garlic freshly minced, a little goes a long way!
- 1 tsp olive oil
- Good pinch of fine salt.
Cheese
- Low moisture mozzarella, IMPORTANT: see notes!
Instructions
Poolish (Pre-ferment)
- Mixing Poolish – Add the flour and yeast to a medium bowl or lidded container and stir with a spoon until combined. Then add the water and honey and mix until a paste forms. The mixture should look like a thick, sticky paste.
- Rise #1 (24 hours) – Cover with plastic wrap and place in the fridge to rise for 24 hours.
Pizza Dough (Stand mixer: KitchenAid /Kenwood/Ooni)
- A note on kneading speed – You will only ever knead this mixture on medium-low speed, about speed 1 or 2 on a stand mixer or 30% on a spiral mixer like the Ooni Halo Pro. This prevents the dough from overheating.
- First knead (5 min) – Add the poolish mixture, water, flour, salt, and oil to the bowl. Knead until a rough, shaggy dough forms, about 5 minutes.
- First rest (10 min) – First rest (10 min) – Turn the mixer off and allow to rest for 10 minutes for the gluten to rest and strengthen.
- Second knead (10-15 minutes) – Turn the mixer back on and knead for 10–15 minutes until the dough is smooth, tacky, and pulls away from the bowl. Add 1 or 2 ice cubes in the final 3 minutes of kneading to keep the dough cool and develop better texture and flavor. It slows yeast growth and makes the dough smoother and stretchier.
- Second rise (2-3 days) – Cover the bowl tightly with plastic wrap to seal it, then refrigerate for 2–3 days (3 is the maximum!). This slow cold ferment develops flavor and a light, chewy texture.
- Shaping the dough balls – Take the cold dough out of the fridge and split into three even sized pieces. Shape into ball shapes by running the bottom of each dough piece between the heel of two hands to tighten the seal under each dough ball and smoothen out the top. You can also pinch the bottom together until it looks like a ball and is smooth on top.
- Third rest (2-4 hours) – Lightly oil three lidded containers using your hands or a brush. Place a dough ball in each, cover, and rest at room temperature for 2–4 hours. The dough will spread and relax and will more than double in size. You’ll know its ready when you touch it and it feels room temperature and soft but bounces back after being pressed with a finger. It shouldn’t feel fridge cold.
Preheating your home oven
- Preheat home oven – Place a pizza steel or stone on the top third shelf of your home oven. Preheat to the highest possible temperature on a fan setting an hour before baking. The higher the temp, the puffier your pizza. That’s 280C / 536F for my own oven.
- Note: Don’t use telescopic shelves if you have them. Take them off before you preheat so that the shelf stays secure as you’re transferring your pizza.
Preheating a pizza oven
- Preheat your oven on the highest possible temperature for a good 30-40 minutes until it reads about 400C / 750F. I use a temperature gun.
Preparing the sauce and cheese
- Sauce – The sauce is easy. No cooking required, just throw all the ingredients into a bowl and mix with a spoon. You can prep it a couple days in advance and just pop it in the fridge.
- Cheese – I like to cut mine into 1cm cubes using a sharp knife. A little bit bigger is ok. If you buy it in bulk, it’s cheaper and then you can just pop it into zip lock bags and freeze it to have ready when you need it.
Shaping/stretching your pizza
- Coating the dough – Add a good amount of flour or fine semolina to your workbench. Turn the container upside down close to the dish and let the dough gently fall out. What your seeing now is the bottom of the pizza. The top of the pizza is on the workbench. Use three fingers on each hand to press from the center outwards, leaving a 2.5cm / 1-inch border for the crust to puff up. Flip the dough, repeat the pressing, and make sure both sides are coated before shaping out a little more. The dough disc will be about 15cm in size.
- How to stretch your pizza – I’ve tested all the methods. The easiest way to stretch is to use the outer heel of your hands to
- Dust your bench – Dust with a thick layer of semolina or flour. Use your fingers to gently loosen the edges of the sticky dough from the container, then tip the dough onto the bench so the top is facing down. Dust the exposed side of the dough with more semolina.
- First shaping – Use three fingers from each hand to press into the center of the dough, leaving a 2cm border. Work up and down, then rotate the dough 90 degrees and repeat. Flip the dough over and repeat the pressing again. The dough should now be about 12-15cm / 5-inches wide.
- Stretching out the pizza – Place the outer heels of your hands just inside the border and gently stretch the dough outward. Keep your hands arched to avoid flattening the rim. Rotate the dough and repeat until it reaches about 20cm / 8-inches in size.
- Transfer to a floured pizza peel – I do this by just lifting half of it first onto the pizza peel and then transferring the rest. It’ll misshape, just reshape it into a round shape again by lifting the edges until it’s round again.
- Add toppings – Add your favorite toppings. Just make sure you don’t overdo it with the sauce. Less is more with a Neapolitan style pizza.
- Baking in the oven – Bake for 5 minutes, then use tongs to turn the pizza around so it bakes evenly. Once baked, use tongs to transfer onto a baking tray placed in front of the oven shelf. Let the pizza rest for 5 minutes. Slice and serve!
- Baking in a pizza oven – Slide the pizza peel in with the pizza on top and let it sit on the hot surface for about 10 seconds, then carefully shuffle the peel back and forth to encourage the pizza to begin shuffling onto the pizza oven floor as you pull the peel away. Turn the oven temperature down to medium. Allow it to bake until you see some color forming on the crust. Then use the peel to shuffle the pizza around by lifting one edge of the pizza up and shuffling it around so the pizza cooks evenly. This takes practice! I burned my first and second pizzas during my testing. Once the pizza is baked, slide the peel underneath and remove. Let the pizza cool for a minute before serving. Turn the pizza oven temp back to the highest temp while you make your next pizza. Repeat.
Notes
Yeast – I used Instant Dry Yeast for this recipe. It’s great because doesn’t need to be activated before using and can be added straight to your dry ingredients. Alternatively, you can use active dry yeast, but that will need to be activated in lukewarm water or milk before using. When left to rest it becomes frothy so that you know it’s active.
Flour – I use the Caputo brand Pizzeria flour. It’s not designed to be a slow fermentation flour, but it seems to do the job well. Plain flour and bread flour will not work for this recipe. They will not develop gluten in the way you want to give you a nice chewy, puffy crust. The flour you use is the single most important ingredient in this recipe. If Caputo is not available to you, opt in for a local flour that is designed for pizza and can be used for slow fermentation. Slow fermentation meaning, a slow rise in the fridge where the gluten and flavor develop for a pizza shop worthy pizza at home. I can not stress enough how important the type of flour you use is and that it’s the correct flour.
Storage – Pizza is famous for being great fresh and straight out of the fridge the next morning. If there’s any left over it can be stored in an airtight container, in the fridge for up to three days.
Nutrition – is an approximate and is based on per pizza. Each pizza makes about 6 generous slices. This would feed three hungry hungry hippos.
A note on measurements – This recipe uses weight measurements for the most accurate results. Cup measurements can vary depending on where you are, which affects the precision needed for a recipe like this. Here is where you can learn more about how to measure ingredients using digital kitchen scales.
Nutrition
Calories : 876kcal
Carbonhydrates: 170g
Protein: 29g
Fat: 8g
Saturated Fat: 1g
Polyunsaturated Fat: 2g
Monounsaturated Fat : 3g
Sodium: 1970mg
Potassium : 554mg
Fiber: 8g
Sugar : 5g
Vitamin A: 373IU
Vitamin C: 7mg
Calcium: 79mg
Iron: 4mg
Nutrition Disclosure
Gave this recipe a go?Mention @thescranline or tag #thescranline!
previous post
8 comments
I like pizza.
Yes… Same… lol
Hi Nick, thanks so much for doing this. We’ve had a Gozney for about a year and been slinging some really decent pizzas, but think my dough can do with some work to take them to the next level. Hoping yours will be a revelation so have kicked off this long weekend to giving it a go. Quick question at the Dough Making post Poolish. Did you intend for the 265g water to be added with the Poolish, flour, oil & salt for the first knead? That is when I added it and it doesn’t say it should be added after the first 10 minute rest but my dough hasn’t really became shaggy, so thought maybe you intended it to go in at step 4. I’m sure it will be ok either way, but wanted to understand how you did it so I can change it up next time if needed. Thanks again, love your work 🙂
Hi Lauren! Sorry about that. Someone else actually caught it too! Yep so 265g in the polish and then 465g in the main dough. I hope I’m not too late and you need to start again! Hope that helps for future tries! N x
Hello! I will definitely try this pizza dough recipe!!! One question though , in the ingredients for the dough you mentioned water but I can’t see adding it in the method instructions. Didn’t I get something right?
Hi Loanna! Good spot! I just went in and added it. Sorry about that. Thanks for letting me know. Hope you love it as much as I do! N x
Looks amazing. Can’t wait to try it. Have you experimented at all using sourdough starter in this recipe?
Hi Katie! Hope you love it! Actually I havent it and I’m kind of freaking out about sourdough. I find it intimidating. In fact, I had started a sourdough starter a year ago and then when it died I ditched it and started working on this recipe haha. But it’s on my 2026 recipe to do list! N x