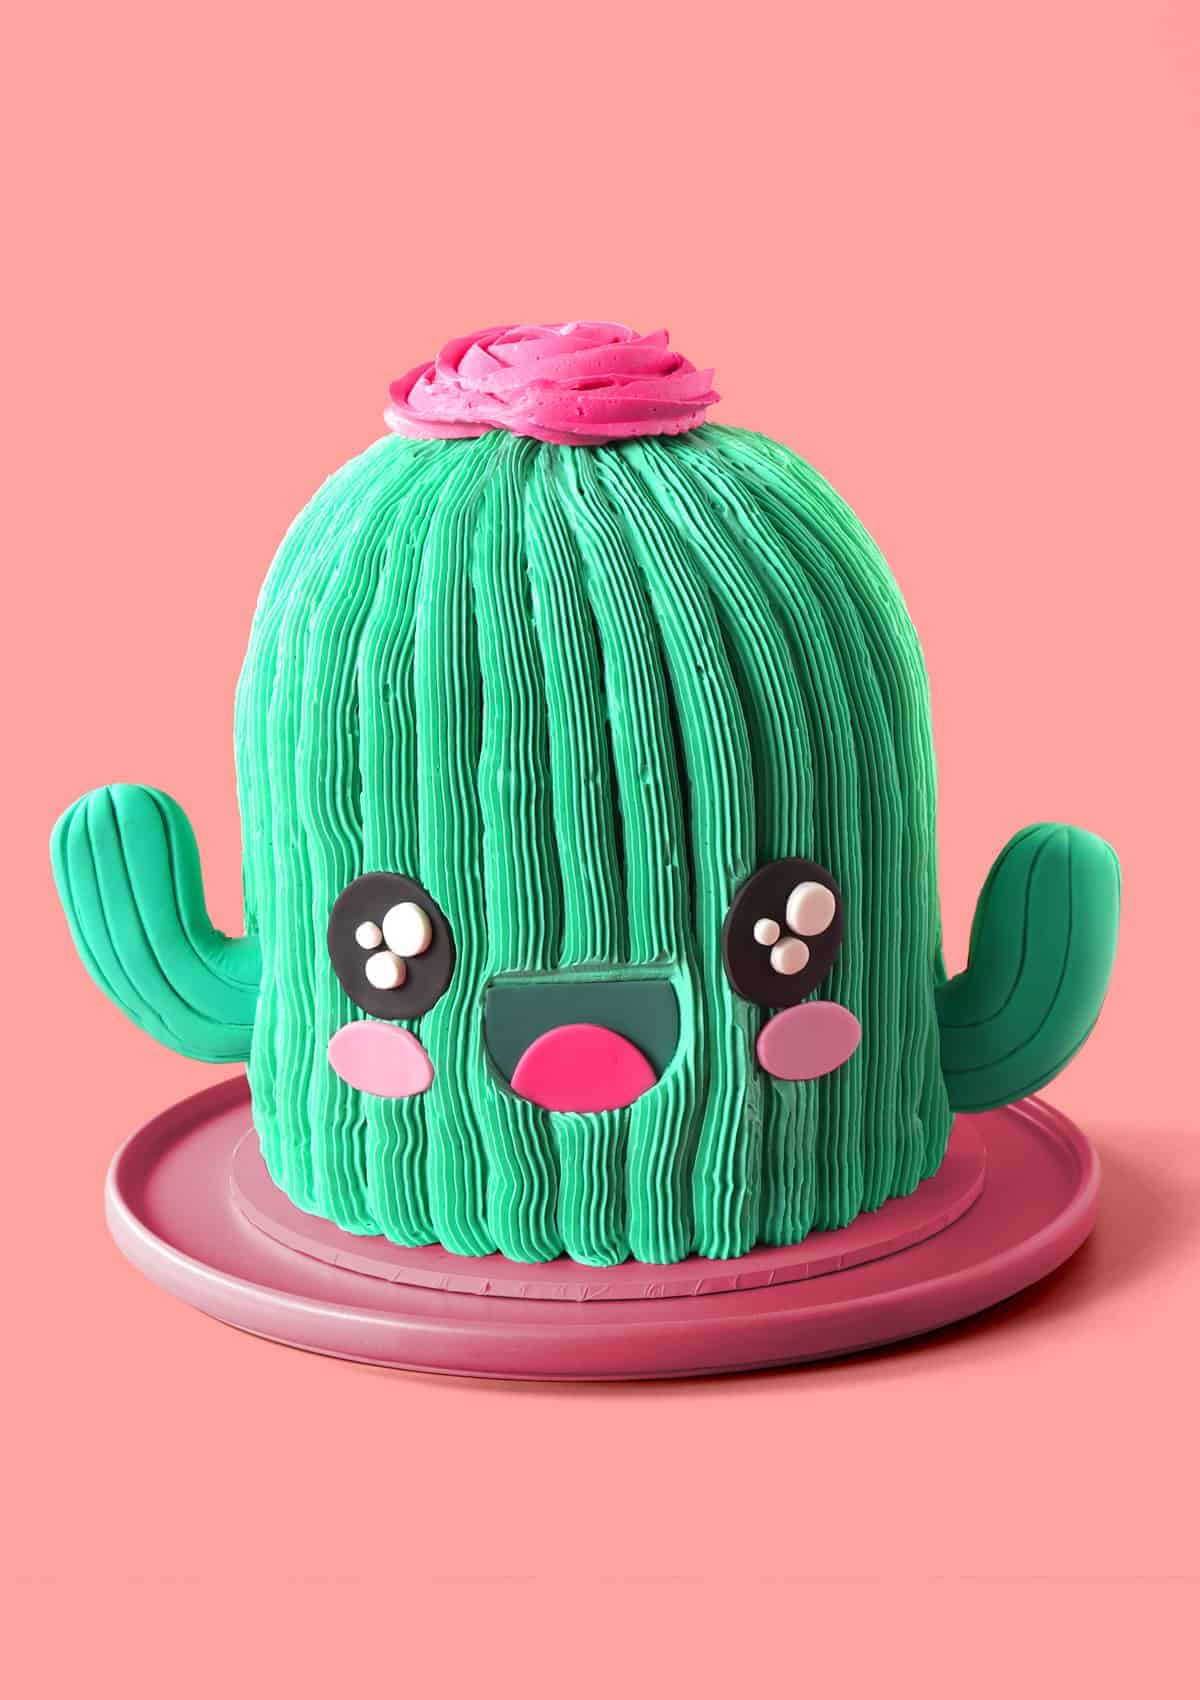
Kawaii Cactus Cake
My kawaii (cute) cactus cake is honestly one of the cutest things I’ve ever seen. And you know what? It’s so easy and fun to make too! It’s made up of my raspberry-flavored vanilla cake, covered in frosting (no-fondant), and has cute little easy-to-make fondant decorations. This is the perfect kids’ baking project!
Nick’s favorite thing…
I came up with the design for this cake at a time when I was going through a 3D cake phase. I love how this one turned out. The little arms were a challenge because they were made of fondant and a little leavy, but with thick cake pop sticks, they hold up really well. Piping the frosting on the outside of the cake is easy using a Wilton 6B piping tip. Overall, I just love how this cake looks and how easy to make it was.

What does Kawaii Cactus Cake taste like?
This cake is made up of my moist vanilla cake. It’s covered in my fluffy American buttercream frosting and decorated using fondant.
What are the ingredients I need for Kawaii Cactus Cake?
All-purpose flour – also known as plain flour.
Caster sugar – also known as superfine sugar.
Salt – I used fine salt.
Unsalted butter – make sure your butter is softened.
Eggs – I used large eggs.
Milk – I used cow’s milk but almond milk will also work.
Vegetable oil – you can also use sunflower oil.
Greek yogurt – you may use sour cream instead if you wish.
Vanilla Extract – Always use good quality vanilla extract when baking, it makes a huge difference. I have a great recipe here for it if you’d like to try your own!
Food gel – I used the chef master brand.
Raspberries – I used frozen raspberries for this recipe. Fresh will also work.
Fondant -I used pre-colored fondant, but you can color your own using food gel. Not liquid food dye.
American Buttercream Frosting – I have a really great recipe for this that you can grab here! It’s great for cupcake, cakes and buttercream decorations!
My Top Tips!
- The arms on this cake are made of fondant and can be heavy. Using thick cake pop sticks are key for making sure it stays on.
- Using food gel instead of liquid food dye is the only way to color your fondant if you’re coloring it yourself.
- Make sure your ingredients are at room temperature before making the batter.
Other Recipes You Might Like!
- Giant Kawaii Ice Cream Cake
- Hawaii Kawaii Cupcakes
- Swedish Princess Cake
- Piña Colada Cheesecake Bites
- Cute Carrot Cake Cupcakes
Make sure to follow me on social media!
Instagram @thescranline, Facebook and watch and subscribe to my videos on YouTube!
I hope you guys enjoyed this simple but delicious Kawaii Cactus Cake recipe with me. Please comment in the comments section below, or feel free to share with your family and friends on social media.
I’ll see you all on the following recipe. Happy baking!
N x

A Quick Baking Guide
If you’re new to baking or just want to brush up on the basics, these guides are a great place to start!
Loved the recipe? Let me know!
If you enjoyed this recipe, leave a star rating and comment below. It helps others find the recipe and keeps the baking community growing. Tag me on Instagram so I can see your version too!
Kawaii Cactus Cake
A moist and delicious vanilla and raspberry cake in the shape of a 3D Cactus. Cute and perfect for kids and Mexican or desert themed videos!
Serves 20
Ingredients
Cake
- 3 3/4 cups / 645 g all-purpose flour
- 1 3/4 cups / 400 g caster sugar
- 4 1/2 tsp baking powder
- 3/4 tsp fine salt
- 3/4 cup / 190 g unsalted butter, softened
- 3 large eggs
- 2 1/4 cups / 560 ml milk
- 3/4 cup / 175 ml vegetable oil
- 3 tbsp Greek yogurt (or sour cream)
- 1 1/2 tsp vanilla extract
- 3 drops pink food gel
- 1 cup frozen raspberries (or fresh)
Fondant Decorations
- 50 g / 50 g black fondant
- 20 g / 20 g dark pink fondant
- 10 g / 10 g pink fondant
- 20 g / 20 g white fondant
- 100 g / 100 g teal fondant (same color as frosting)
- 50 g / 50 g dark teal fondant
Frosting
- 2 batches American buttercream frosting
- 10 drops teal food gel
- 5 drops pink food gel
Learn How To Make it! [VIDEO]
Instructions
Frosting
- Colour 3/4 of the frosting using the teal food gel. Mix until well combined. You’re aiming to get the same colour as the teal fondant. I would recommend coloring your own fondant so that the frosting and arms match in color. You can do that by starting off with 100g white fondant, add the teal food gel and knead with food safe gloves on until evenly colored.
- Colour the rest of the fondant pink using pink food gel. Set aside.
Fondant
- To make the eyes, roll out the black fondant and use a 2cm round cookie cutter to cut out two circles. Then cut out four circles of rolled out white fondant. Two 1cm ones and two smaller than that. I used the end of piping tips to do that.
- To cut out the cheeks, roll out the pink fondant and cut out two 2cm oval shapes using oval fondant cutters.
- To make the fondant mouth, cut out one 3cm dark teal fondant disc and one 3cm pink fondant piece. Use a smaller circle cuter to cut out the bottom of the pink disc and stick it to the bottom of the large dark teal fondant disc. Use a knife to cut the dark teal fondant in half.
- To make the arms, cut the teal fondant in half. Roll both into a ball then create log shapes about 10cm in length. Bend into an 'L' shape. Use a fondant tool or a skewer to create line indents in the fondant. Insert 2 or 3 cake pop sticks in the part where the arm will go into the cake. Set all the fondant pieces aside to dry.
Cake
- Preheat a fan-forced oven to 140°C (275°F) or a conventional oven to 160°C (320°F). Spray three 15cm (6 inch) cake tins with oil spray and line the bottoms with baking paper. Set aside. Spray a 6 inch half sphere cake tin with oil spray and line with baking paper. Set aside.
- Add the flour, sugar, baking powder and salt to a large mixing bowl and mix with a hand mixer until well combined.
- Next, add the softened butter and mix on low speed until the mixture reaches a crumbly, sand-like texture.
- Add the eggs, milk, oil, pink food gel, Greek yogurt and vanilla, and mix on low speed until all the dry ingredients are incorporated. Scrape down the side of the bowl and mix for another 20 seconds. Add the frozen raspberries and fold through using a spatula.
- Fill the half sphere cake tin with batter to about ¾ of the way. Place the sphere mold on a smaller cake tin to help it stay up right and level while it’s baking. Divide the remaining cake mixture between the three tins. I find that using an ice-cream scoop makes it easy to distribute the batter evenly, ensuring that all three cakes will bake at the same rate.
- Bake for 50–60 minutes, or until a tooth pick inserted in the middle a cake comes out clean. If the toothpick is coated with wet batter, continue baking, for 10 minutes at a time, until fully baked.
- Allow the cakes to cool to room temperature in the tins, then chill them in the fridge overnight. Chilling your cakes overnight makes them easier to trim and decorate, so I always bake my cakes the day before I decorate them.
- To trim your chilled cakes, use a cake leveller or large serrated knife to carefully trim the crust off the top of each cake.You’ll end up with 3 layers and the half sphere cake.
- To crumb coat your cake, add a dab of teal frosting onto an 8” cake board or flat serving plate. Use a small offset spatula to spread the frosting around before adding the first cake layer. Gently press down the centre of the cake layer to make sure it’s stuck to the frosting underneath.
- Add frosting to a piping bag and frost a ring around the top of the cake. Fill the centre with more frosting. Use your small offset spatula to smoothen out the frosting before you add the next layer of cake.Repeat with the remaining layers placing the sphere cake on top.
- Add more frosting around and top and sides of the cake. Use the small spatula to smoothen out the top and sides of the cake, taking care to fill in any gaps in between each layer of cake.
- Use a cake scraper (otherwise known as a bench scraper) to smoothen out the frosting on the sides and top. Get it as neat as you can. This should just be a neat, thin layer of frosting which is aimed at trapping any cake crumbs so that random bits of cake crumbs don’t show up on the final layer of frosting. Chill for 2 hours or overnight.
- Once your cake is chilled fit the end of a piping bag with a Wilton 6B piping tip and pipe vertical lines of frosting beginning from the bottom of the cake to the top at the centre of the cactus. Continue doing that until you’ve gone all around the cake.
- Stick the fondant face on and then finish with a swirl of the pink frosting on top to resemble its flower hair. You can do that using a Wilton 1M piping tip.
- Cake can be stored in an airtight container for up to three days in the fridge. Please note, the frosting used in this recipe will crust up. You may use Swiss meringue buttercream frosting instead if you wish.
Notes
Storage
Cake can be stored in an airtight container for up to three days.
Nutrition
Calories : 283kcal
Carbonhydrates: 31g
Protein: 4g
Fat: 11g
Saturated Fat: 6g
Polyunsaturated Fat: 2g
Monounsaturated Fat : 3g
Trans Fat : 1g
Cholesterol: 46mg
Sodium: 231mg
Potassium : 117mg
Fiber: 1g
Sugar : 12g
Vitamin A: 295IU
Vitamin C: 2mg
Calcium: 100mg
Iron: 1mg
Nutrition Disclosure
Gave this recipe a go?Mention @thescranline or tag #thescranline!
previous post
2 comments
So cuteeeee and so delicious 😋😍. Thanks you💐
Hi Tram! Thanks so much! I hope you get to try this out!