Boston Cream Pie Cake Recipe
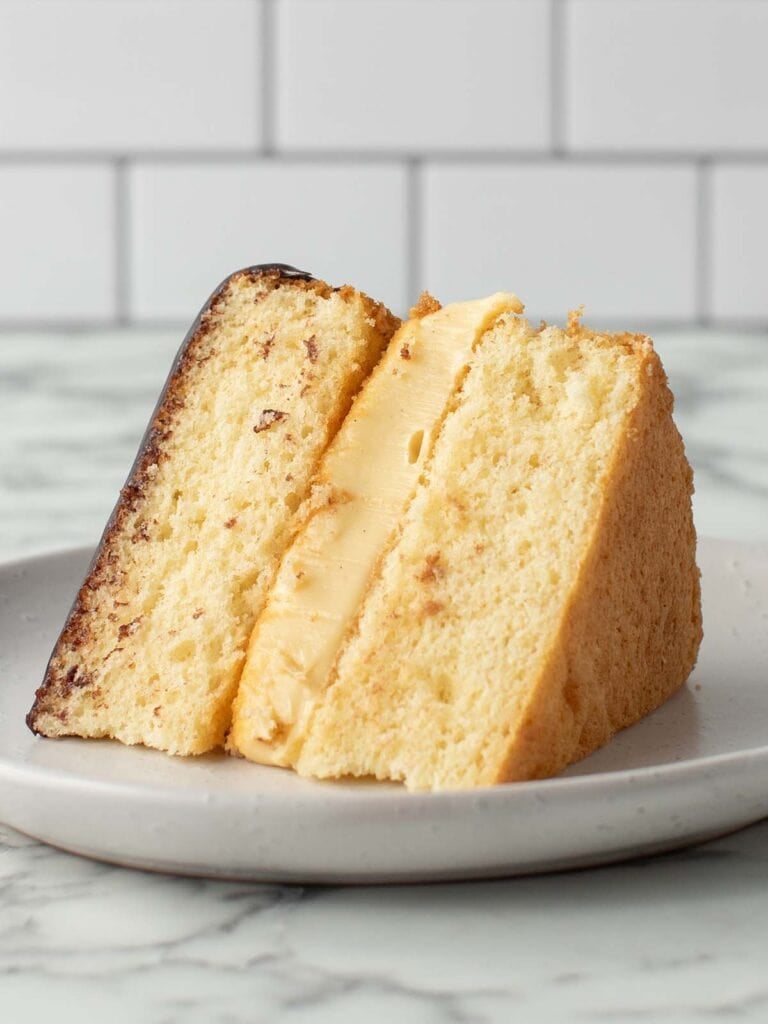
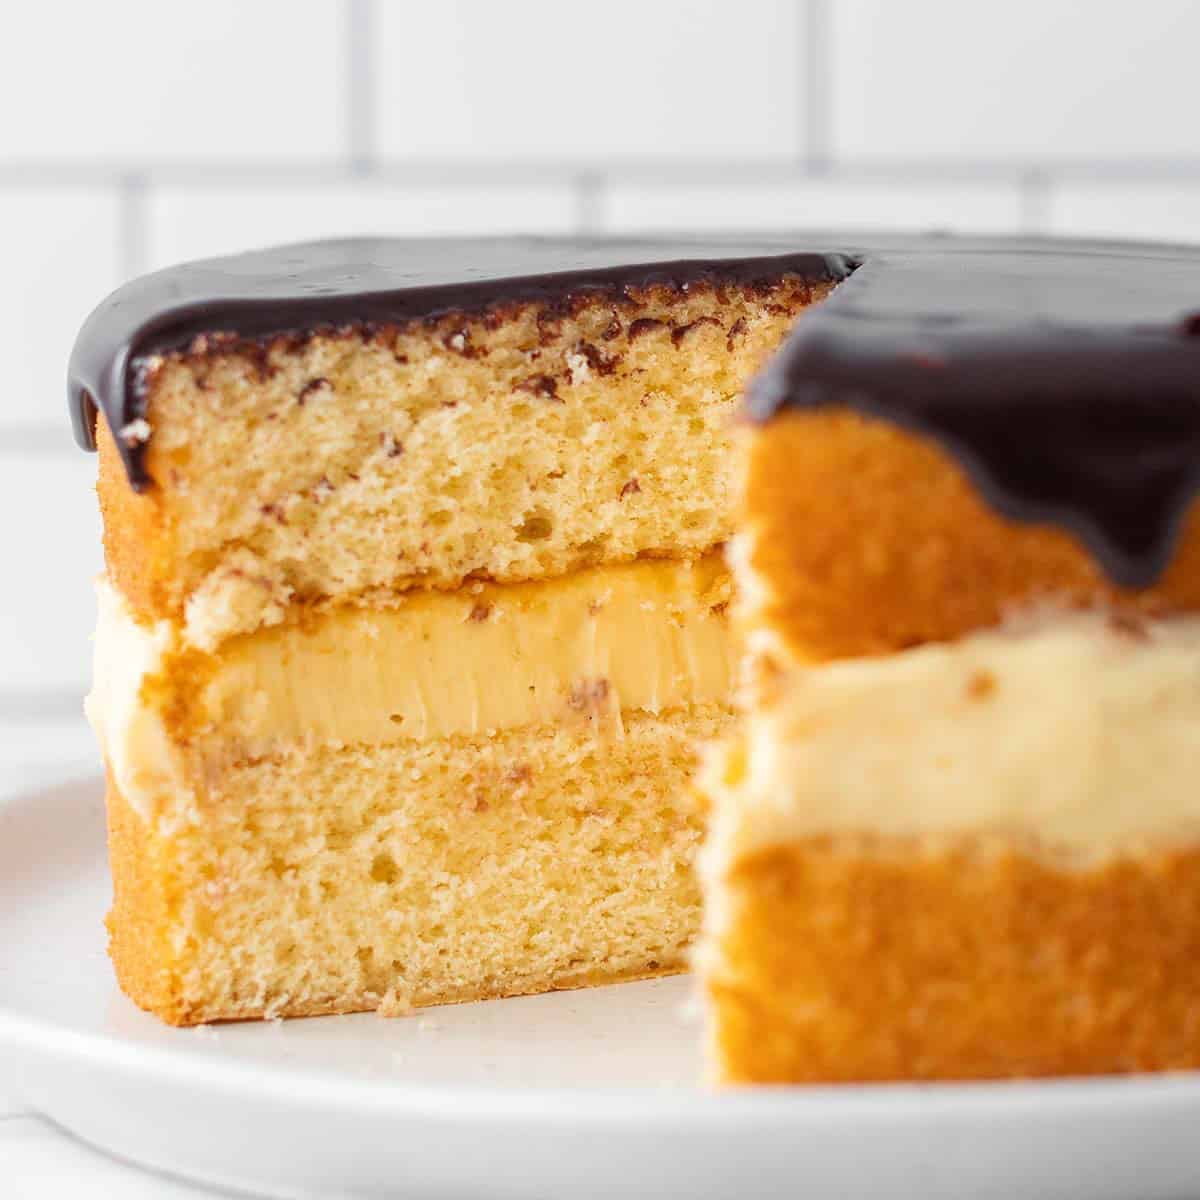
Boston Cream pie (not remotely a pie) is made up of soft tender vanilla cake, silky custard and a thin layer of one-bowl glossy chocolate sauce. It’s an easy layer cake that comes together using simple ingredients and tastes like something you’d pick up at a country bakery.

Hey team, Nick here. I’ve got a soft spot for classic desserts that come together without too much fuss. There’s something about simple flavors done right that just hits the spot. I’ve shared plenty of layer cakes on the blog but this is the only one called a pie. It’s not a pie but it got the name because it was originally baked in a pie tin.
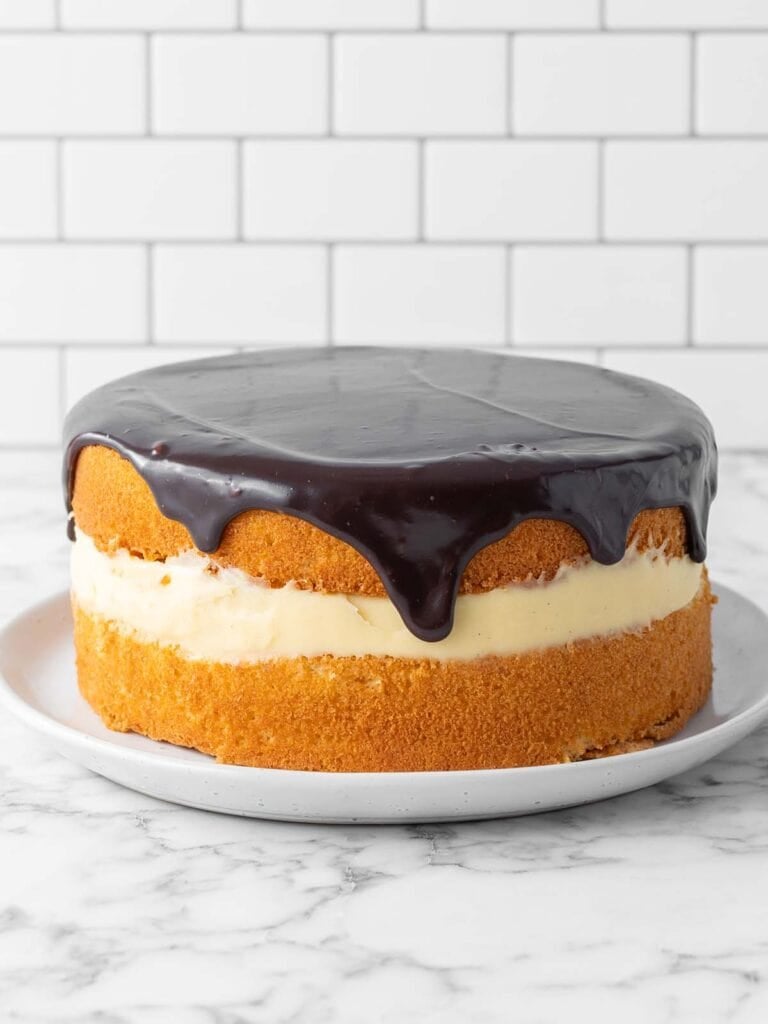
Weird name aside, this recipe starts with my recently updated vanilla cake recipe that bakes up soft and tender. It gets its moisture from the hot milk method, a technique I’ve started using and swear by. It’s filled with my creamy French pastry cream, which is soft and silky but firm enough to hold the layers together, and finished with a generous drizzle of my one bowl chocolate sauce.
Related → If you’re a chocaholic like I am you could use my Chocolate pastry cream to fill the cake instead. And if you’re looking for more vanilla desserts that are big on flavor, try out my vanilla slice which is a reader favorite!
Start with the pastry cream, it needs to set!


Start by whisking together the cornstarch, sugar, salt, and egg yolks in a pot until smooth. Slowly add the warmed milk, whisking after each addition, then cook on medium heat, whisking constantly until it thickens and starts to bubble.


I like running the custard through a sieve to get rid of any lumps, then slowly whisk in the butter until smooth. It makes it super rich and glossy. Cover the surface with plastic wrap and chill until set. Give it a quick whisk before using in the cake.
Tip: I make the custard/pastry cream the day before I bake the cake to give it time to set. That’s important otherwise your cake layers will slide around.
Baking the soft vanilla sponge
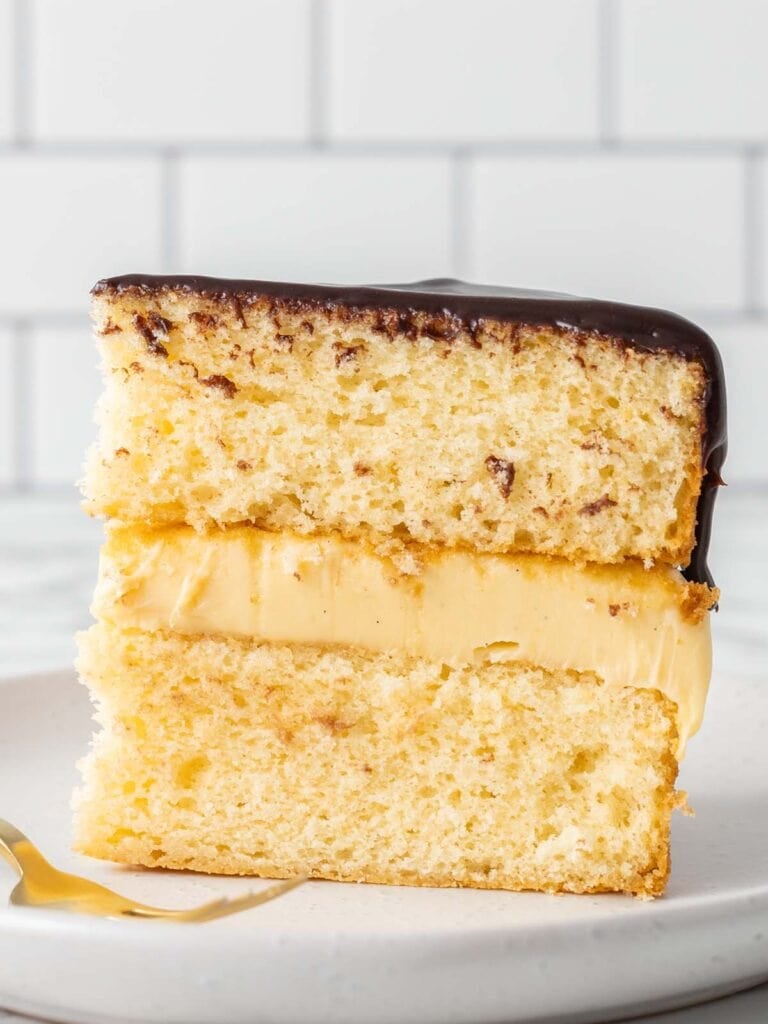
I absolutely love this vanilla sponge recipe. Like I said, it’s soft and tender but light and moist without being dense. Plus it tastes so delicious!


I start by whipping the eggs and sugar until pale and thick, then gently mix in the dry ingredients.


Warm the milk and butter together until the butter melts, then slowly add it to the batter along with the oil and vanilla, mixing until smooth. That warm milk gently cooks the flour which is what locks the moisture in this cake!


Divide the batter between two tins and bake until golden and springy. I would recommend trimming them just to make sure everything looks neat. This is technically a naked cake. We’re going to see everything.
Tip: Make sure the milk and butter are added while still warm. This helps the batter stay smooth and gives the cake its soft, even crumb.
One bowl chocolate sauce
I love this sauce. It’s really easy to make and comes together in one bowl! You can make it in the microwave but I find it comes out smoother in a double boiler.
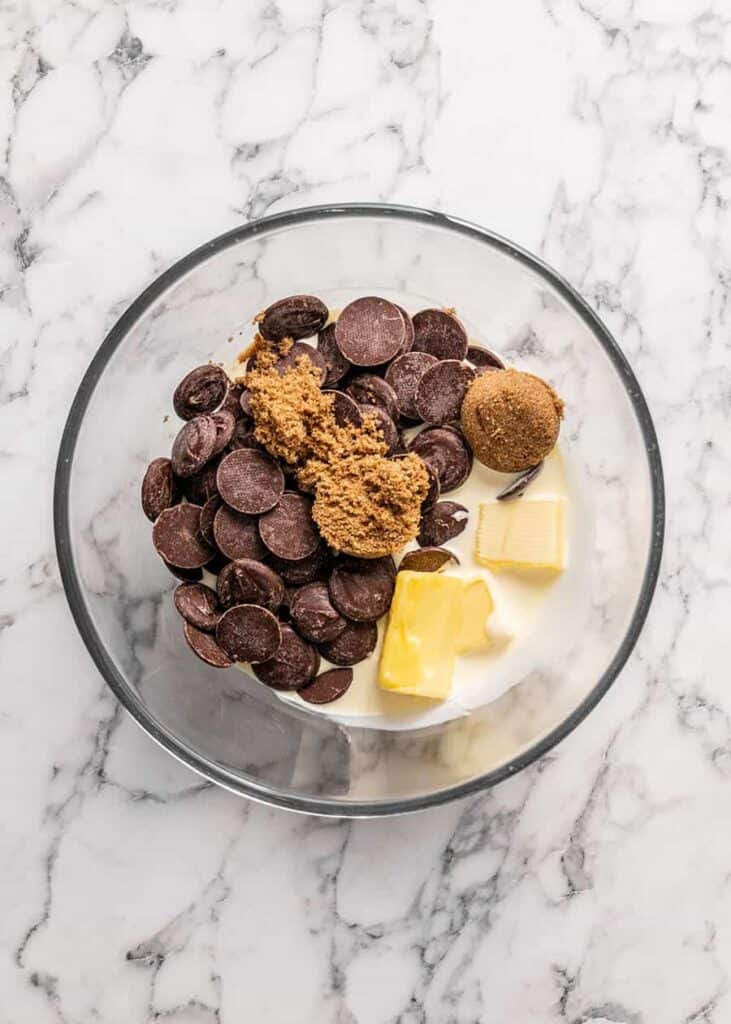

Add all of the ingredients into a heat proof bowl and melt until smooth over a double boiler. You can microwave it in 20 second increments instead. Let it cool for 20 minutes at room temperature.
Getting the right consistency
It’s really important to make sure the sauce isn’t too thin or warm when you drizzle it onto the cake. It’ll just look messy and if it’s too warm it’ll soak into the sponge. You want it to be thick and thin enough to slowly drape over the sides of the cake when you spread it.
Layering your cake
This is one the easiest cakes to layer because you don’t have to frost the outside.
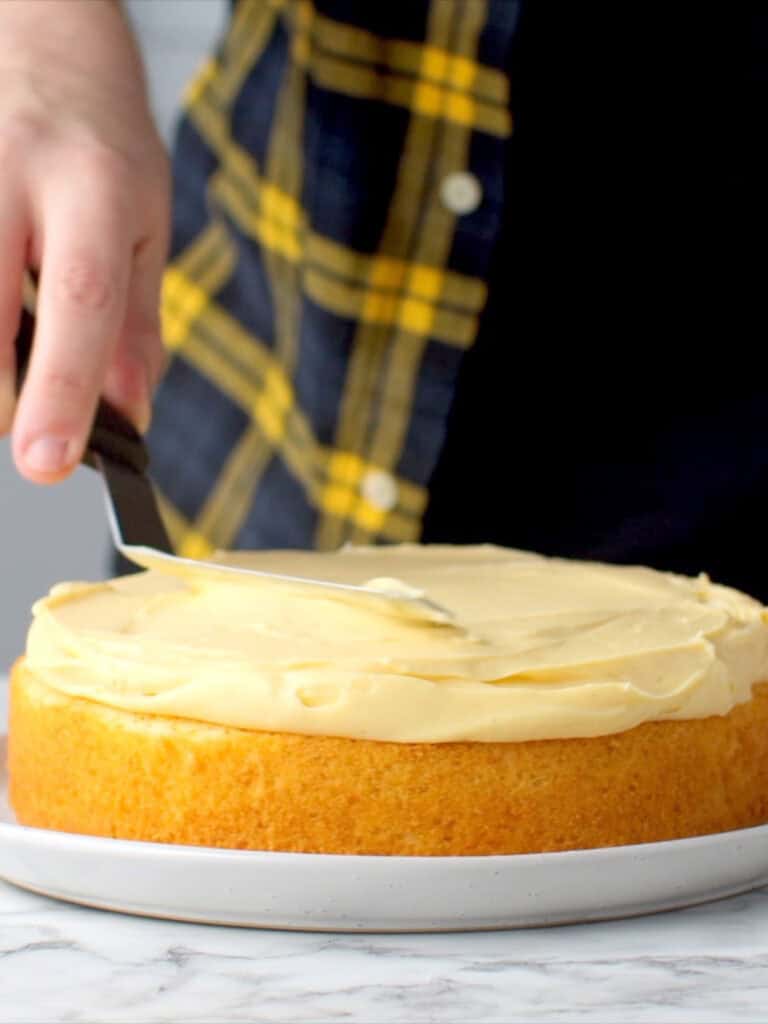
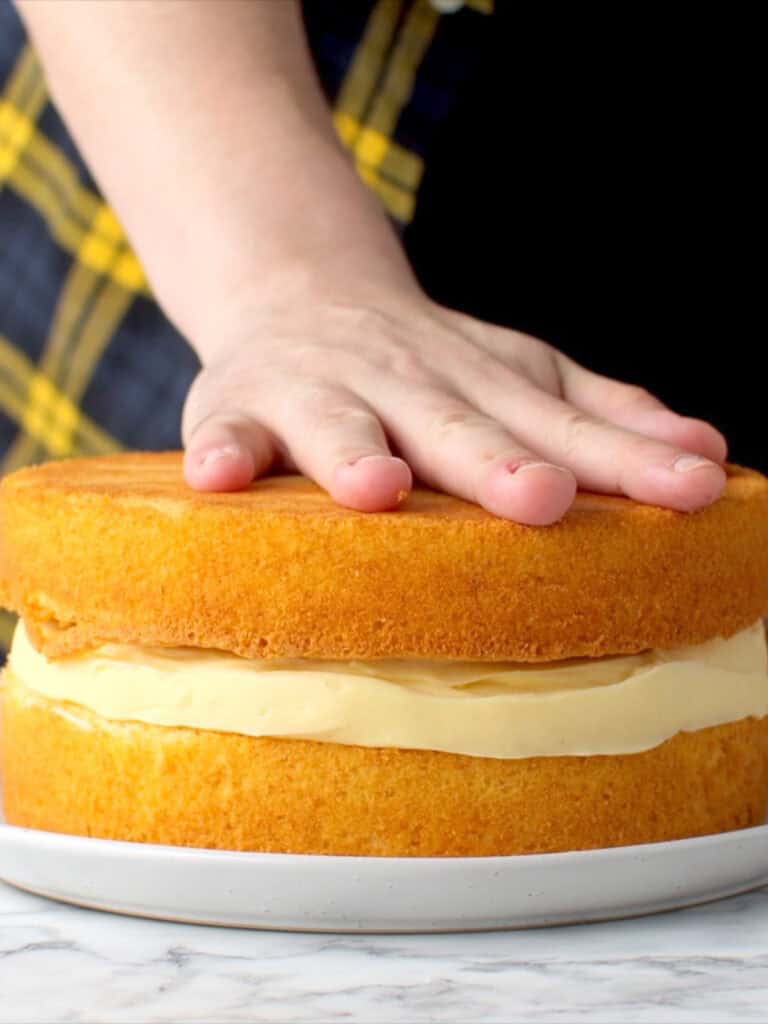
Add the first layer to your serving plate then add the pastry cream. Spread it around as flat and evenly as you can. Don’t worry if some of it got spread outside of the cake. We’ll come back and neaten it later. Add the second layer of cake and then use a spatula to go around the pastry cream to get rid of any excess and make it flush with the sides of the cake.
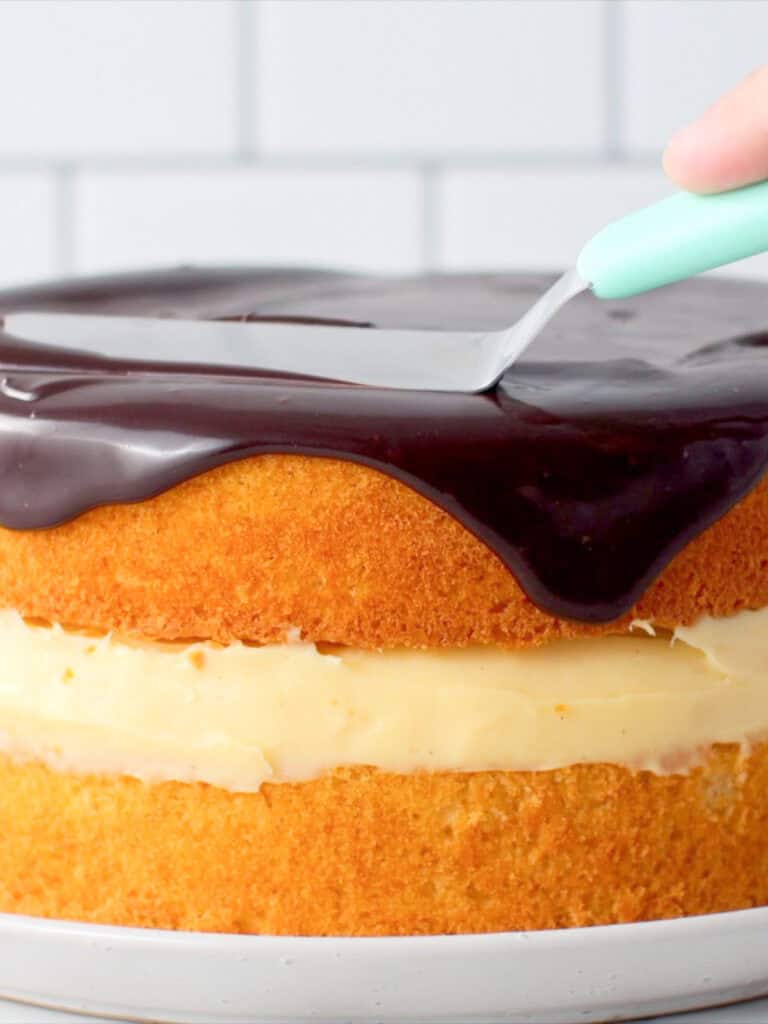
Drizzle the slightly cooled chocolate on top and then use a spoon or spatula to gently spread it letting some of drizzle over the sides. We’re not aiming for a drizzle cake here. Let it set in the fridge for a good hour to help it set which will prevent it sliding around when you slice into it.
A Quick Baking Guide
If you’re new to baking or just want to brush up on the basics, these guides are a great place to start!
Loved the recipe? Let me know!
If you enjoyed this recipe, leave a star rating and comment below. It helps others find the recipe and keeps the baking community growing. Tag me on Instagram so I can see your version too!
Boston Cream Pie Cake Recipe
My Boston Cream Pie Cake has soft vanilla sponge, silky custard, and glossy chocolate ganache for a simple, classic crowd-pleaser.
Serves 8
Ingredients
Custard Filling
- 500 g whole milk, not skim, warmed
- 1 tsp vanilla bean paste or Pure Vanilla Extract
- 40 g corn starch, corn flour
- 60 g caster sugar, superfine sugar
- Pinch of fine salt
- 4 egg yolks
- 80 g unsalted butter, cubed and cold
Soft Vanilla Sponge
- Soft Vanilla Cake
- 330 g all-purpose flour, plain flour
- 3 tsp baking powder
- 3/4 tsp salt
- 4 large eggs, 55g each, room temperature
- 310 g caster sugar / superfine sugar, see notes
- 245 g milk, full fat
- 90 g unsalted butter, cubed
- 50 g vegetable oil, can use canola oil
- 14 g vanilla extract
Chocolate Topping
- 135 g dark cooking chocolate, see notes
- 20 g unsalted butter
- 10 g brown sugar, see notes
- 10 g glucose syrup, see notes
- 85 g heavy cream, see notes
Instructions
Custard Filling
- How to prepare a vanilla bean (if using) – Use a sharp knife to cut the bean in half lengthwise. Then, use the sharp end of the knife to scrape out the vanilla pods from inside the bean. Add the milk, bean halves and scraped out seeds into a medium sized heavy bottomed stainless-steel pot. Heat on medium heat until warm, not hot. When you’re ready to use it, run it through a sieve as you pour it into the rest of the ingredients.
- Combine dry ingredients and eggs – To a medium sized heavy bottomed stainless-steel pot, add the corn starch, sugar and salt and use a whisk to combine. Add the egg yolks and whisk until smooth.
- Add the milk – Slowly add the warmed milk, about 1/4 cup at a time, and whisk each time until all of the milk has been added. It’s at this point you can add the vanilla extract or vanilla bean paste if using.
- Cook custard – Cook in the pot on medium heat. Use a whisk to mix continuously. Do not stop mixing or the custard will become grainy. After about 3-4 minutes the mixture will begin to thicken. Continue whisking until the mixture begins to bubble. When it bubbles, stir for 3 minutes, then take off the heat.
- Add butter – Add 1/4 of the butter and whisk until it’s melted and well combined. Repeat until all the butter has been added. You want to do this slowly, so the custard doesn’t split.
- Run through a sieve – Run the thickened custard through a fine mesh sieve into a medium sized mixing bowl to get rid of any lumps.
- Chill to set – Cover the surface of the custard with plastic wrap and chill in the fridge for at least 5 hours. Overnight is best.
- Once set – Give the custard a whisk before using to smoothen right before you’re ready to use it in the cake
Soft Vanilla Sponge
- Preparing your oven – Preheat your oven to 170C / 340F (fan off), 150C / 300F (fan on). I like baking with the fan on for an even rise. Position your rack in the middle of the oven.
- Preparing your cake tins – Spray the bottom (not sides) of two 20cm / 8-inch cake tins with oil spray and line the bottom with baking paper. I prefer just rubbing cold butter on the cake tins for better flavor.
- Combine dry ingredients – In a medium sized bowl, whisk together the flour, baking powder and salt. Set aside.
- Beat the eggs and sugar – Add the eggs to a large mixing bowl (glass or metal), and use an electric hand mixer to beat until frothy, about 1 minute. A stand mixer with a whisk attachment also works. With the mixer on medium-high speed, add the sugar a spoonful at a time. It’ll take about a minute. Once all the sugar is added, keep beating on medium-high speed for 6 minutes until the mixture is pale, thickened, and tripled in size.
- Add dry ingredients to egg mixture – Add half the dry ingredients to the egg mixture and mix on low speed until just combined. Repeat with the rest. The batter will be thick. Avoid overmixing the batter, small lumps are fine, they’ll disappear in the next step.
- Heat milk and butter – Heat the milk and butter in a saucepan over medium heat, stirring continuously, until it reaches about 60C/140F or small bubbles form around the edges. Do not let it boil. Alternatively, you can also do this in a heatproof jug in the microwave. Mine takes about 90 seconds for the butter to melt.
- Add hot milk – Add half the hot milk mixture, along with the oil and vanilla. Mix on low speed until combined. Add the rest of the milk mixture and mix again until smooth. The batter will be thin and pour in a steady ribbon.
- Divide the batter – Divide the batter evenly between the two cake tins. It works out to about 600g in each tin. Tap each tin on the counter a couple times to release any air bubbles.
- Bake – Bake on the middle rack for 30–32 minutes, or until a toothpick inserted in the center comes out clean. The cakes should be golden and spring back when lightly touched. If they sink and don’t spring back, bake for a couple more minutes.
- Cool the cakes – Let them cool in the tins for 10 minutes, then run a knife around the edges to loosen. Transfer to a cooling rack, placing them baking paper side down, and let them cool completely.
- To level off the cake (optional) – Use a large, serrated knife or cake leveler to very top of each cake to level it off. This is completely optional. The cakes bake pretty flat anyway.
Chocolate Topping (Microwave Method)
- Add the dark chocolate, butter, brown sugar, glucose syrup and heavy cream to a large, microwave-safe bowl and microwave on high, for 20 seconds at a time, mixing well between each interval until smooth. Allow to cool slightly, about 15-20 minutes, before pouring on top of the cake.
Chocolate Topping (Double Boiler Method)
- To make the chocolate topping over a double boiler, simply add the dark chocolate, butter, brown sugar and heavy cream to a large heatproof bowl. Place the bowl on top of a pot of gently simmering water making sure the bottom of the bowl is not touching the water. Stir until melted. Take off the heat and allow to cool for 20 minutes before pouting on the cake.
- Consistency – Let the chocolate topping cool for 20 minutes until it’s thick enough to spread but still soft enough to slowly drizzle over the sides. If it runs too quickly, let it cool for another 5–10 minutes before using.
Layering the cake
- To layer the cake – Add the first cake layer on your serving plate. Add the chilled custard filling and spread around using a spatula. Add the next layer of cake and gently press down. Use a spatula to neaten up any custard that might be spilling out the sides to make it flush with the cake. Pop this back in the fridge to set for an hour before pouring the chocolate topping on top of the cake. Use a spatula to gently spread it and let some drizzle over the sides.
- Chill cake – chill the finished cake for an hour to let everything set before slicing.
Notes
Caster sugar – also known as superfine sugar is ideal for this cake as it dissolves into the eggs quickly which will prevent overmixing. Alternatively, you can use granulated sugar or even pulse granulated sugar in a food processor until it’s finer.
Mixing the batter – it’s important to follow the speeds given in the recipe when it comes to mixing. Especially after the flour is added as it prevents overmixing which can cause your cake to be tough. Make sure you scrape down the bowl after each mix to ensure any ingredients that are hiding at the bottom are properly mixed in. It’ll ensure a nice uniform batter that rises in the oven properly.
Mixers You Can Use – Using an electric mixer to make the cake batter is going to make it an easier process and also gives you the best results, especially when whipping the eggs and sugar. You can use a stand mixer with the paddle attachment or a hand held electric mixer.
Storage – Wrap the cooled cakes in plastic wrap and store at room temp for 3 days. The fully frosted cake can be stored in an airtight container, in the fridge for up to three days. Thaw to room temperature before serving.
How to freeze – Wrap the undecorated cake tightly in plastic, then place it in a freezer bag. Freeze for up to 3 months. Thaw completely at room temperature before unwrapping and using as normal.
Nutrition – is an approximate and is based on per slice. This recipe makes 12 generous sized slices.
A note on measurements – This recipe uses weight measurements for the most accurate results. Cup measurements can vary depending on where you are, which affects the precision needed for a recipe like this. Here is where you can learn more about how to measure ingredients using digital kitchen scales.
Nutrition
Calories : 781kcal
Carbonhydrates: 48g
Protein: 13g
Fat: 46g
Saturated Fat: 27g
Polyunsaturated Fat: 2g
Monounsaturated Fat : 13g
Trans Fat : 1g
Cholesterol: 312mg
Sodium: 454mg
Potassium : 408mg
Fiber: 2g
Sugar : 17g
Vitamin A: 1451IU
Vitamin C: 0.1mg
Calcium: 217mg
Iron: 4mg
Nutrition Disclosure
Gave this recipe a go?Mention @thescranline or tag #thescranline!
50
previous post
16 comments
Hi Nick, Thanks for this video. Looks so delicious. Question: Can I use custard powder instead of eggs for the custard recipe? Do you think it will come out the same way? Thanks in advance for your response. keep safe!
Hi Sharls! Thanks so much for watching! I haven’t tried that, but think it would turn it into a much thicker custard. I’d say give it a go. If it comes out too thick you can always thin it out with a dash of warm milk. N x
I can’t wait to try this!!!!! It brings me so much lovely memories of when I first tried Boston cream doughnuts from one of the franchises that opened up in my home country! I even worked with them for 4 years! I live in Malta 🇲🇹 so 20 years ago it was something I had never tried!!! Unfortunately we don’t have this franchise anymore and no one really makes similar authentic doughnuts like I remember!!
Thats amazing Sharleen! They sound so yum! Got to try Boston cream donuts! N x
Custard tasted awful! There was so much raw flour taste! No matter how long I was cooking and stir it again and again. I baked it with twice more milk and it did help a bit. I suggest using 20 g. cornstarch instead. And yep, I haven’t checked the rest of the recipe after this mess 🙁
I’ve made this recipe loads of times and I haven’t had that problem. And the custard is not baked. It’s cooked on the stove. I’ve also had lot’s of people tell me they enjoyed the recipe. I stand by this recipe 100% for those reasons and I would encourage anyone reading this to follow the recipe.
I LOVE YOUR RECIPES!!! Do you think this could be made into a two tiered cake and hold up as a wedding cake?
Hi Nivia! Hmm, it’s a sponge cake so you would need to make sure you have a properly support structure built for it. But I don’t see why not! And thanks for the kind words! N x
So recipe is great, I juts change a bit of cream technique, cooked and chilled custard, then remaining butter whipped and added and one spoon at the time od custard still whipping, consistency is heaven.
Everyone loved it 😉
Thanks David! N x
WOW! first attempt at a Scran line recipe after many years following on FB. What a recipe to start with. The custard was absolutely amazing, cooked it slowly on the hob and had no flour taste at all. I did splash out and buy the vanilla paste instead of just essence and it really made a difference. I also used whole milk (UK) so not sure if this made a difference. Will defo be trying more recipes, in love with this one!
Thanks so much Em! So glad you loved it! N x
Be careful with the metric converted recipe. First time we made it we used the cup measurements and cake worked perfectly. Second time we used the weights and the cake flopped horribly. Remade it and checked the flour weight bs cups and it was missing half a cup of flour. Should be 250g of flour not 190g. Worked perfectly third try.
Tastes great bit this is one recipe that you should use cup measurements for.
Hi Amy, thanks so much for your comment. I’ve gone in and converted this recipe and updated it with the correct measurements. Thanks for being pateient as I go through the site and update ingredients to gram measurements! N x
Hi Nick. Baked your Boston Cream Pie and it came out delicious. I tried to tag you on instagram but it doesn’t allow so please see pics at TJlooker1. Thanks for another great recipe and catch you again real soon 😀
Thanks so much! I took a look and it looks so great! N x