Lamington Swiss Roll Cake
This soft Lamington Swiss Roll is made of a fluffy vanilla sponge, rolled up with a raspberry jam filling and draped in chocolate sauce and coconut. This recipe went through I’ll take you through each step of making the sponge, including an easy way to roll your swiss roll so it doesn’t crack and slices like a dream.
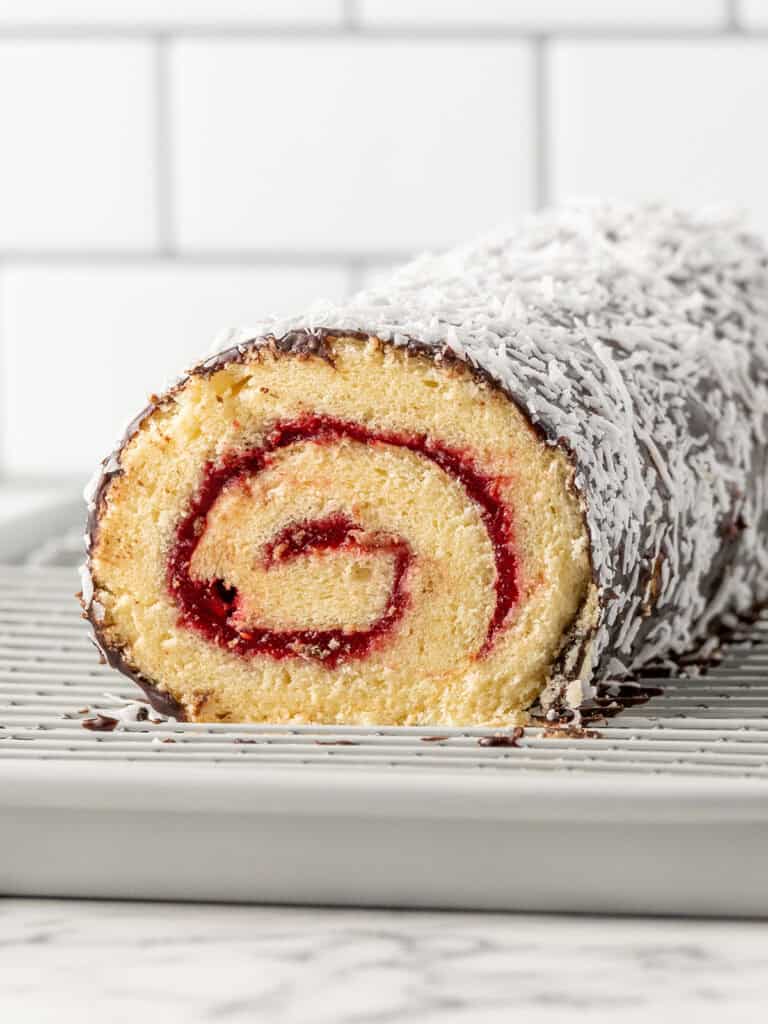
Hey team, Nick here! I’ve gone through 5 rounds of testing to bring you this lamington Swiss roll recipe which is inspired by my classic lamingtons. To me, a lamington must have jam in it. It just isn’t a lamington otherwise. It’s not the law, but it bloody should be.
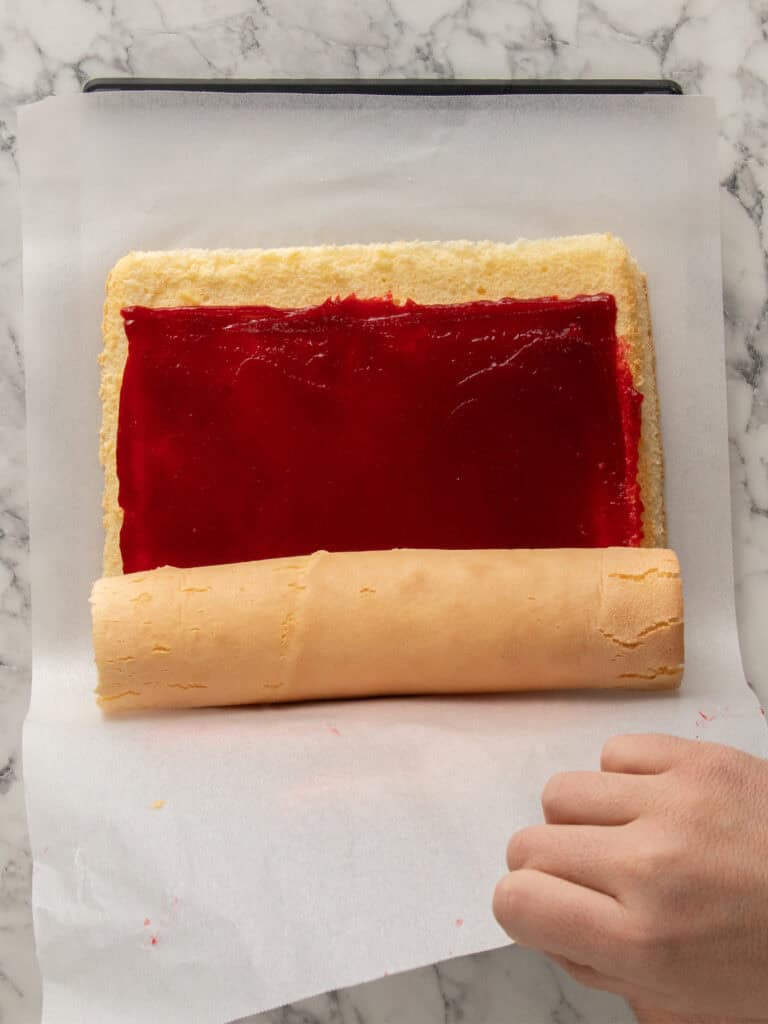
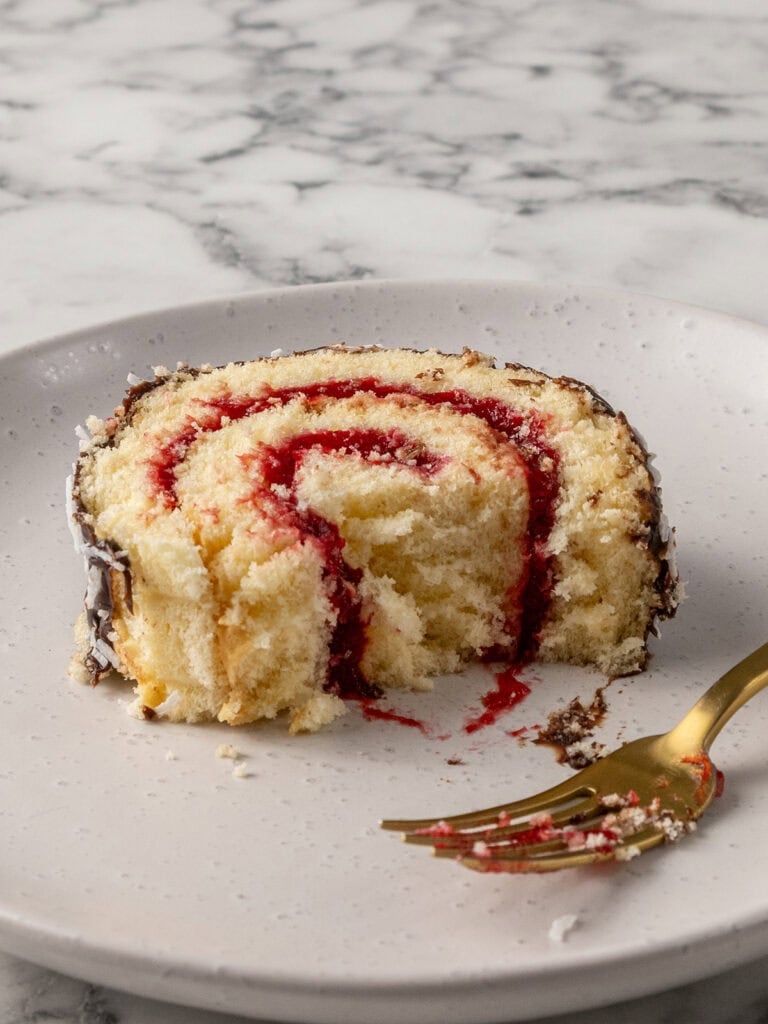
The jam is what I had to hone in on in this recipe. In early tests it seeped into the sponge which made each slice look messy. So I borrowed a technique I used when I developed the ham for my Swedish Princess Cakewhere I added a little corn flour to thicken it, so it wouldn’t ooze out when you sliced into it, but also didn’t seep into the sponge.
So that’s what you’re getting today, a delicious lamington in the form of a Swiss roll, that slices like a dream and is made up of all the flavors that make this iconic dessert so loved by aussie. Oh, and it stays moist for days.
Make the jam first
In my testing, the jam soaking into the sponge was the biggest issue. Simply making or using store bought jam wasn’t going to cut it here. There was too much moisture in it and that would soak into the sponge. So the fix was corn starch!
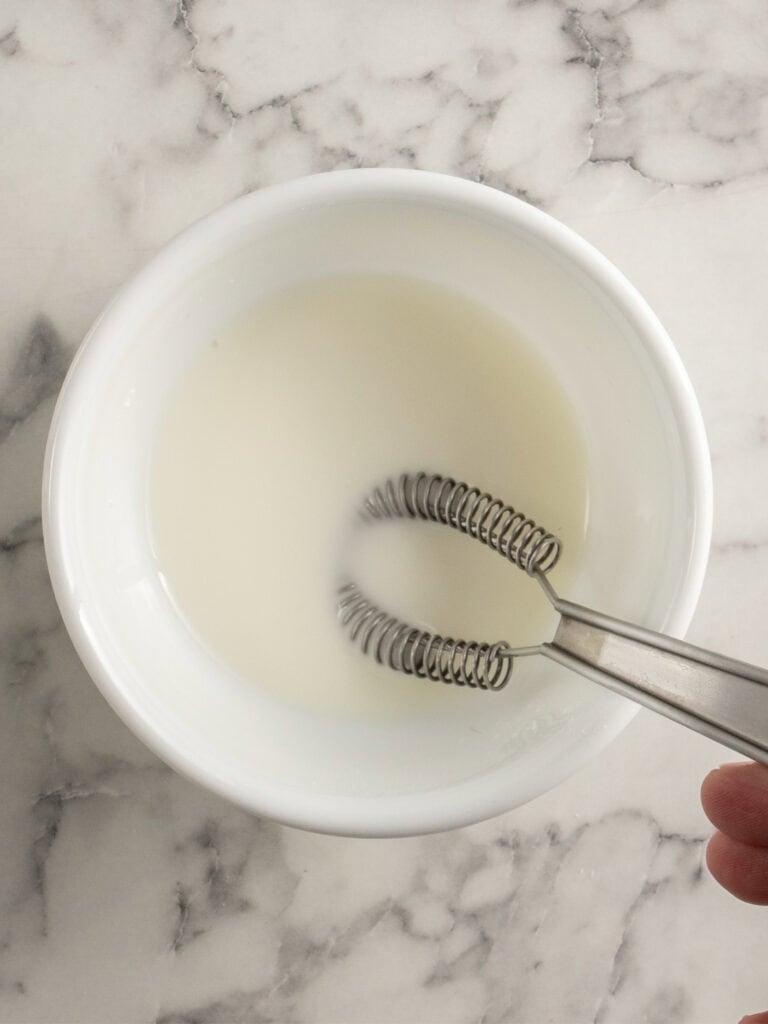
- Combine the corn starch and water in a small bowl and set it aside.
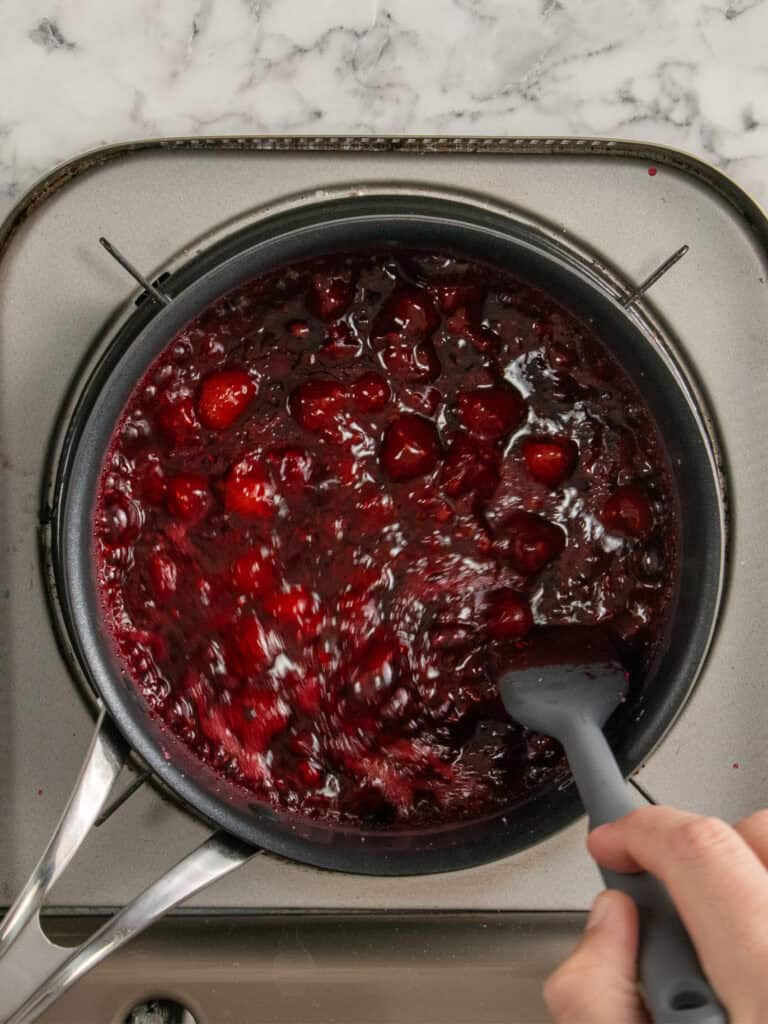
- To a large pot (preferably nonstick) add the raspberries (frozen or fresh) and sugar and stir until the sugar has dissolved and mixture begins to bubble.
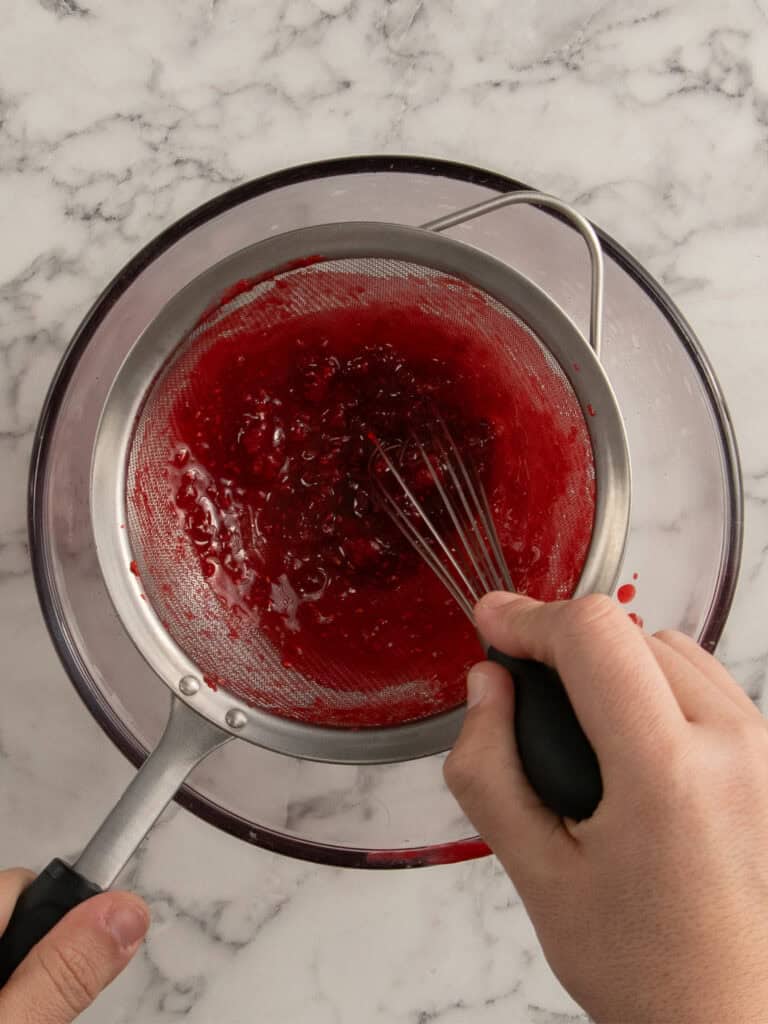
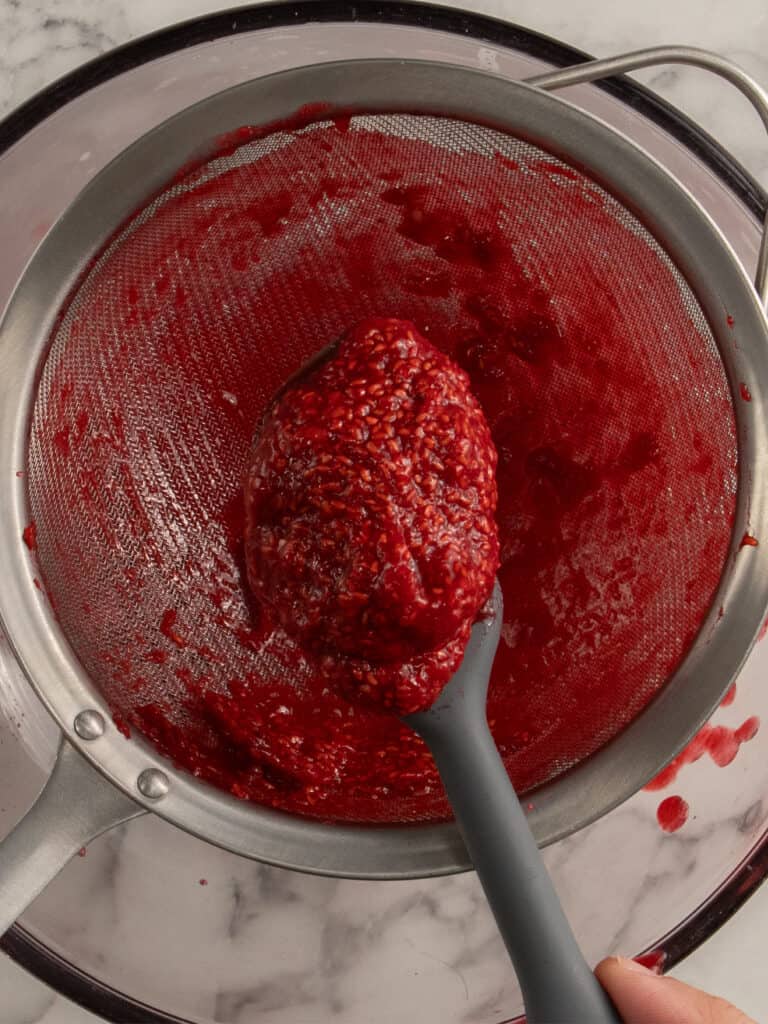
- Take off the heat and run it through a sieve into a heatproof bowl to get rid of the seeds. I like doing this in four goes…
- Taking the seeds out each time before adding the next lot of jam. Once it’s all gone through the sieve, get rid of the seeds and use a spoon to scrape down the bottom of the sieve where any thick jam might be sticking.
Tip – Using a whisk, for some reason, makes this a faster process.
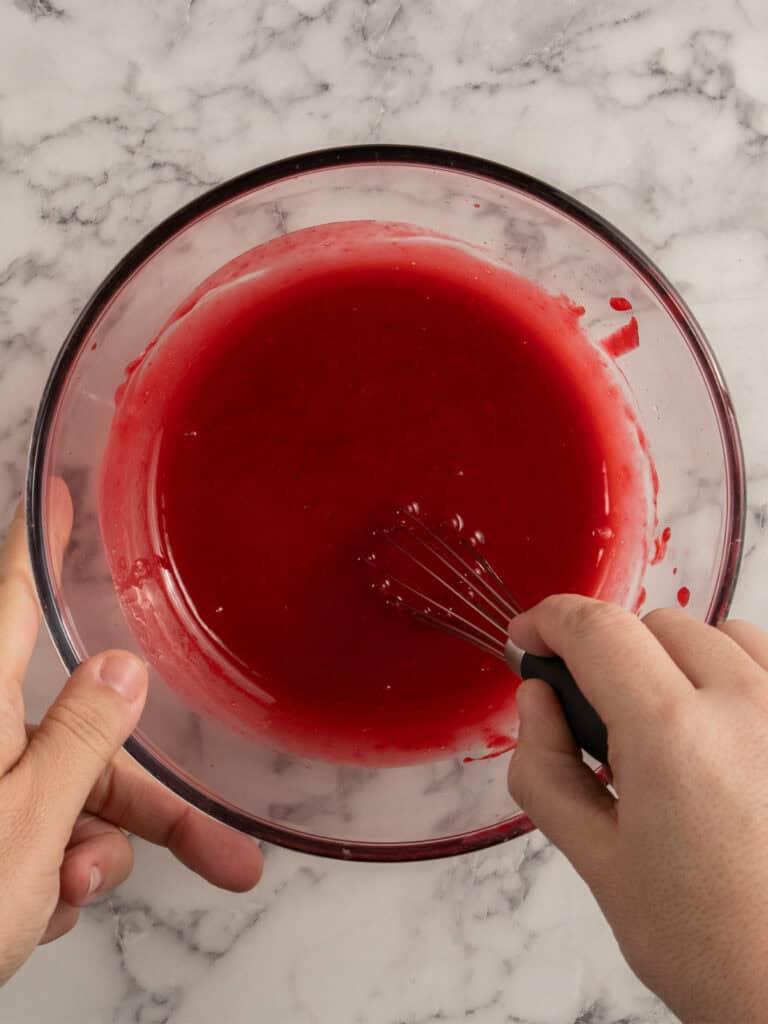
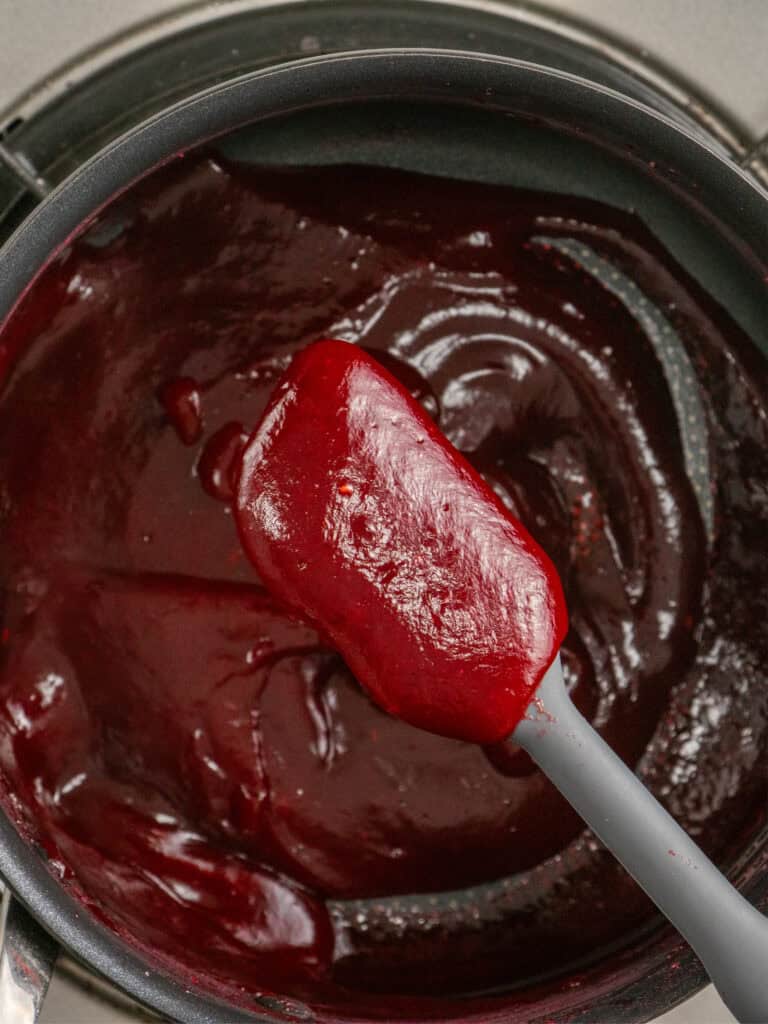
- Add the corn starch slurry and mix it in
- Then add back into the pot and stir until the mixture has thickened, become translucent and begins to boil again. Let it boil while you stir for one minute and then take off the heat.
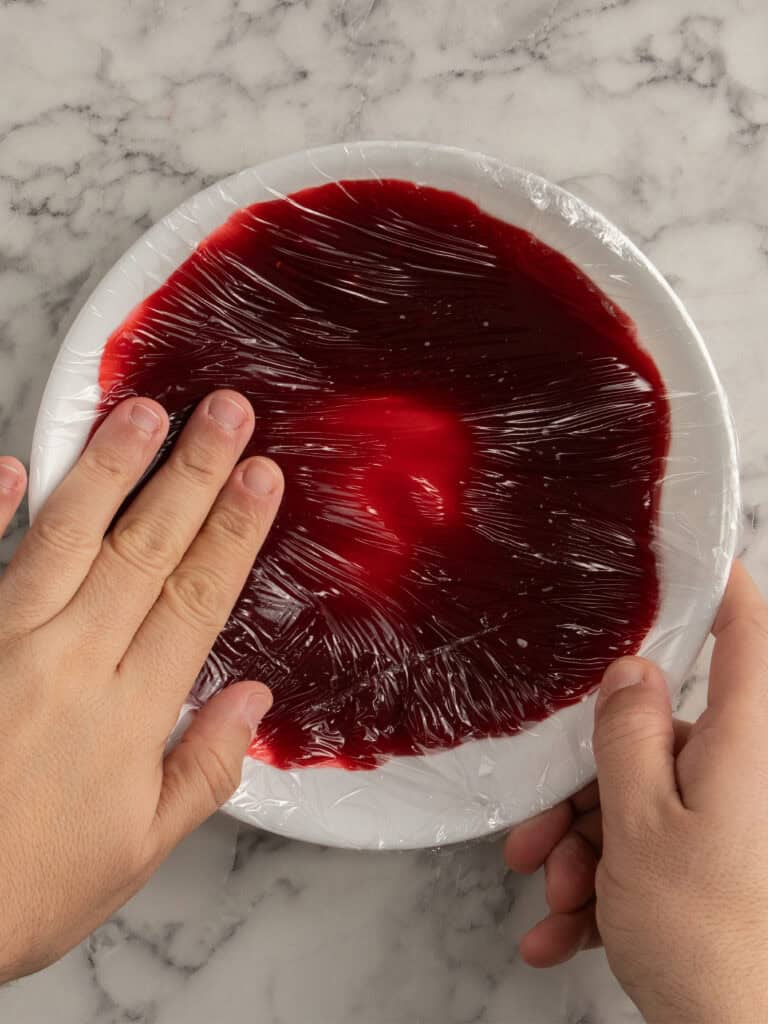
- Transfer to a flat bowl or serving dish and cover with plastic wrap. Let it cool to room temp then pop it in the fridge for an hour to chill.
Get ready for a sponge that doesn’t crack when you roll it.
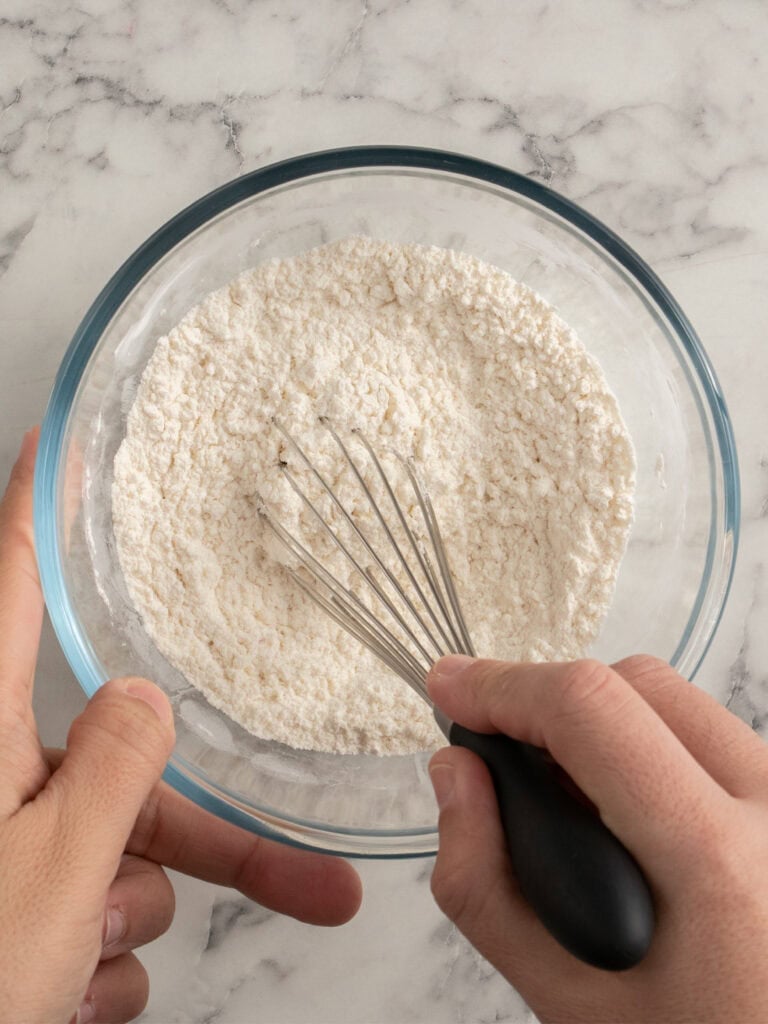
- Whisk together the flour, baking powder and salt. Set aside.
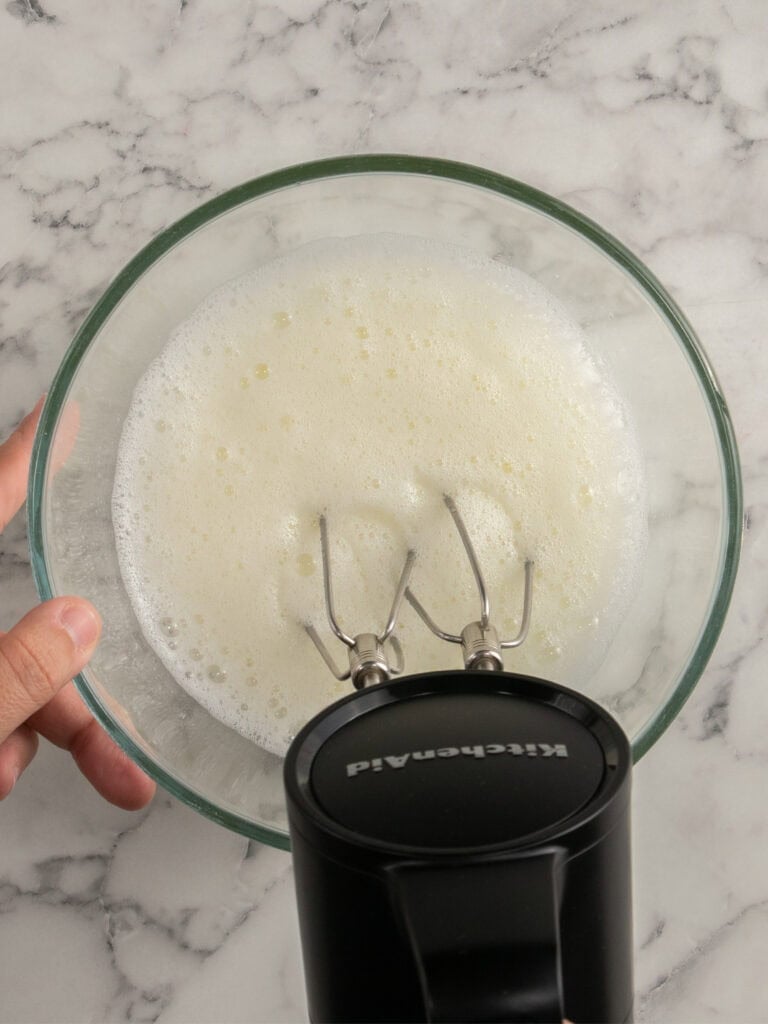
- To make the meringue whip the egg whites and cream of tartar in a medium sized bowl until frothy.
Tip – The cream of tartar is an acid that helps stabilize the meringue which gives you a fluffier sponge. You can use a small squeeze of fresh lemon juice instead.
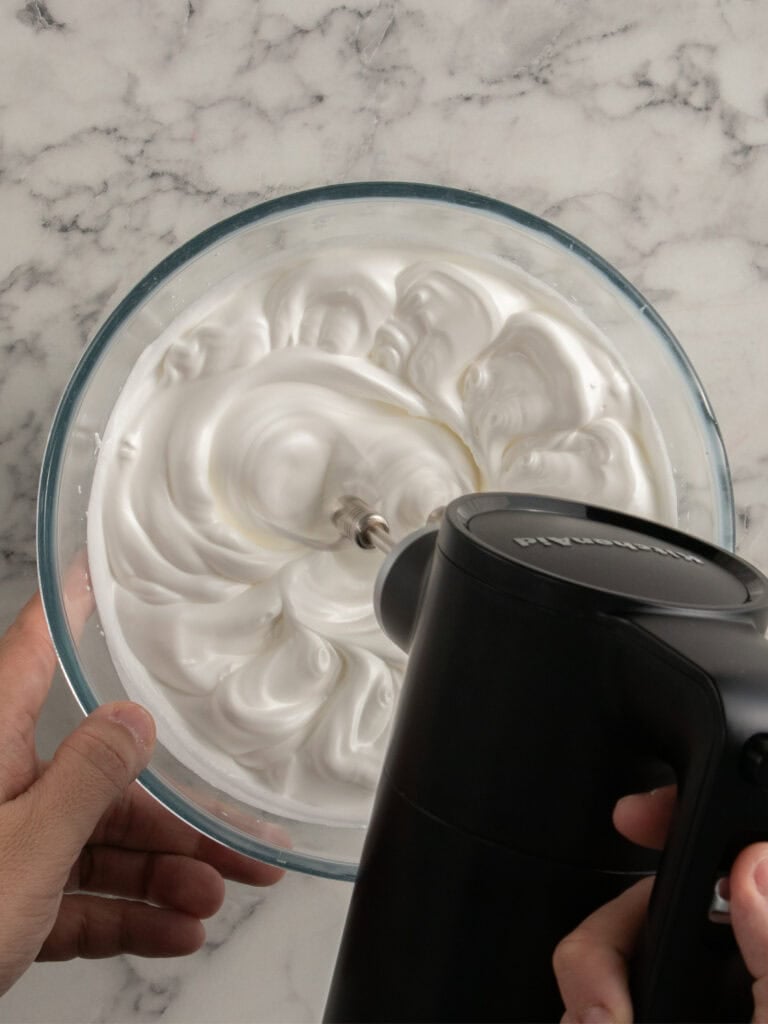
- Then slowly begin adding the sugar while the mixer is on medium speed. About 1 tbsp at a time. Continue whipping until it becomes thick and glossy. About 2-3 minutes.
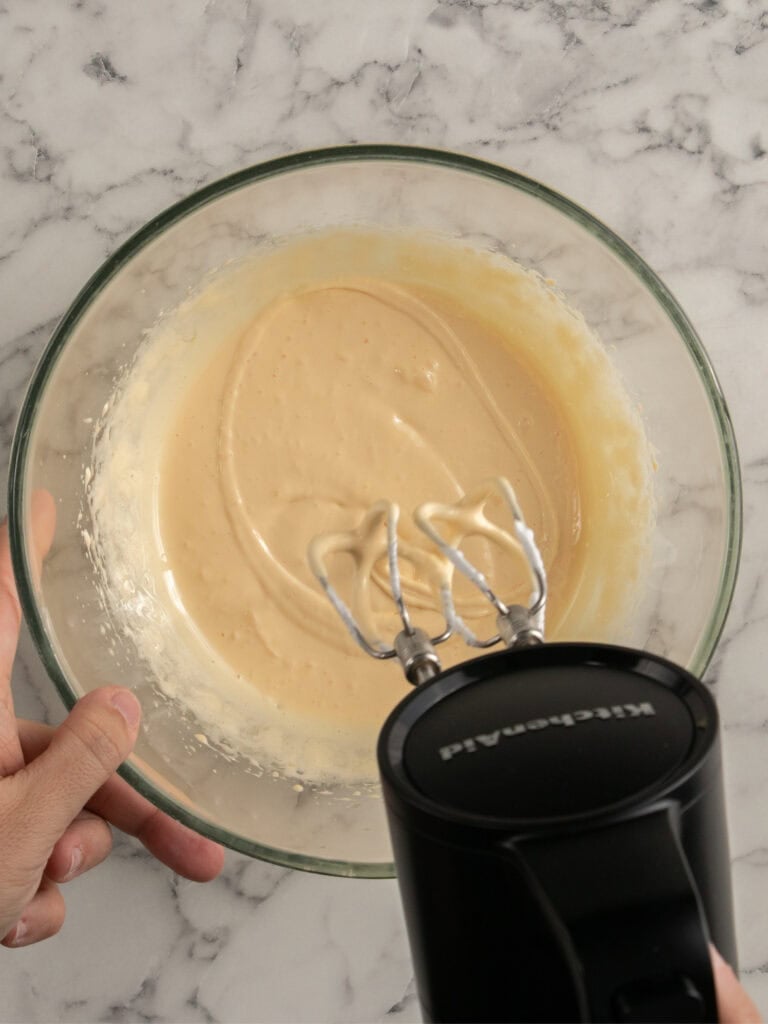
- To a separate large bowl, add the egg yolks, sugar and vanilla and whip on high speed until it becomes thick and glossy. About 5 minutes.
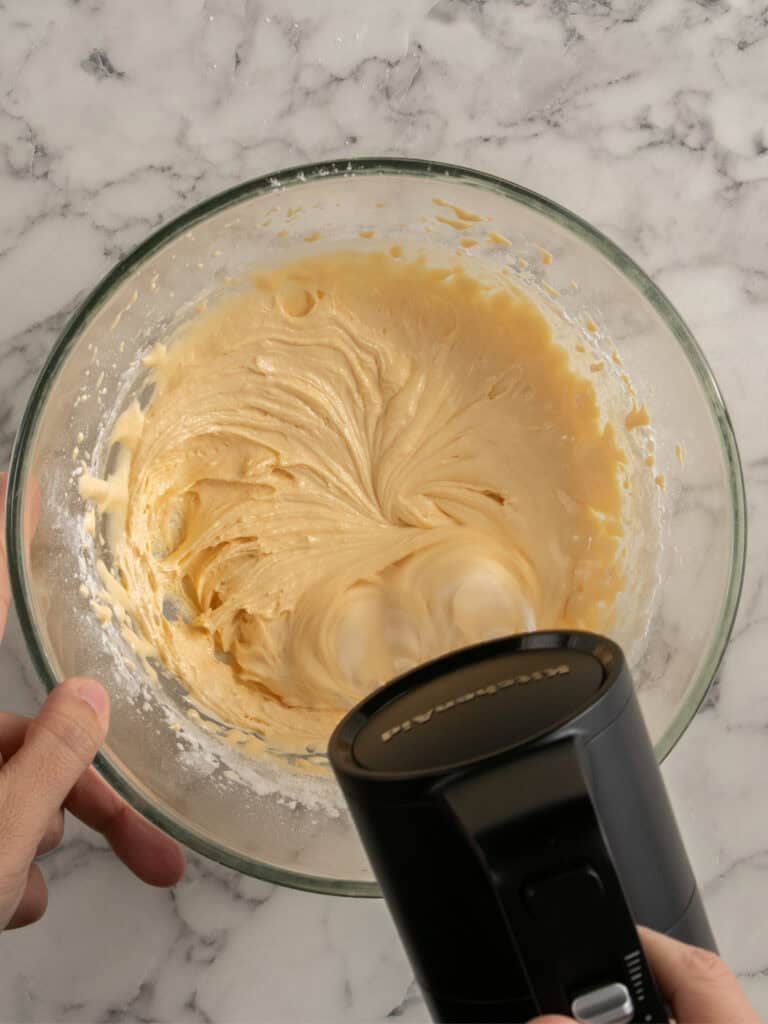
- Add the dry ingredients to the thickened egg yolk mixture and fold through until no dry ingredients are showing.
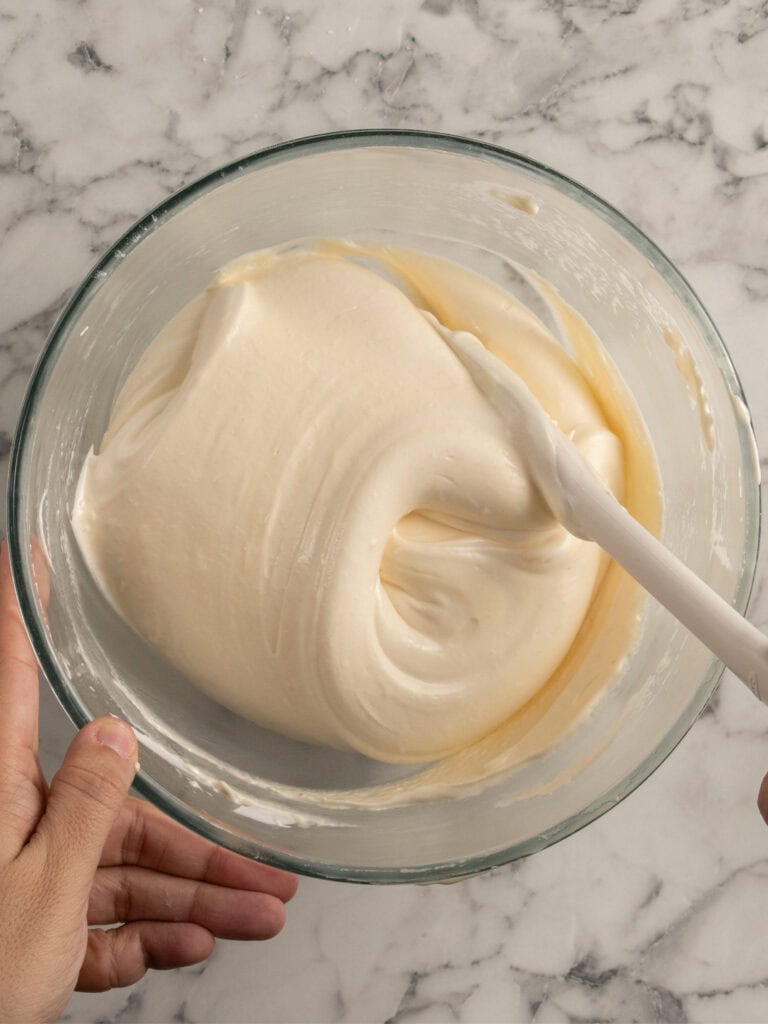
- Fold through half the meringue and then add the rest and fold it through.
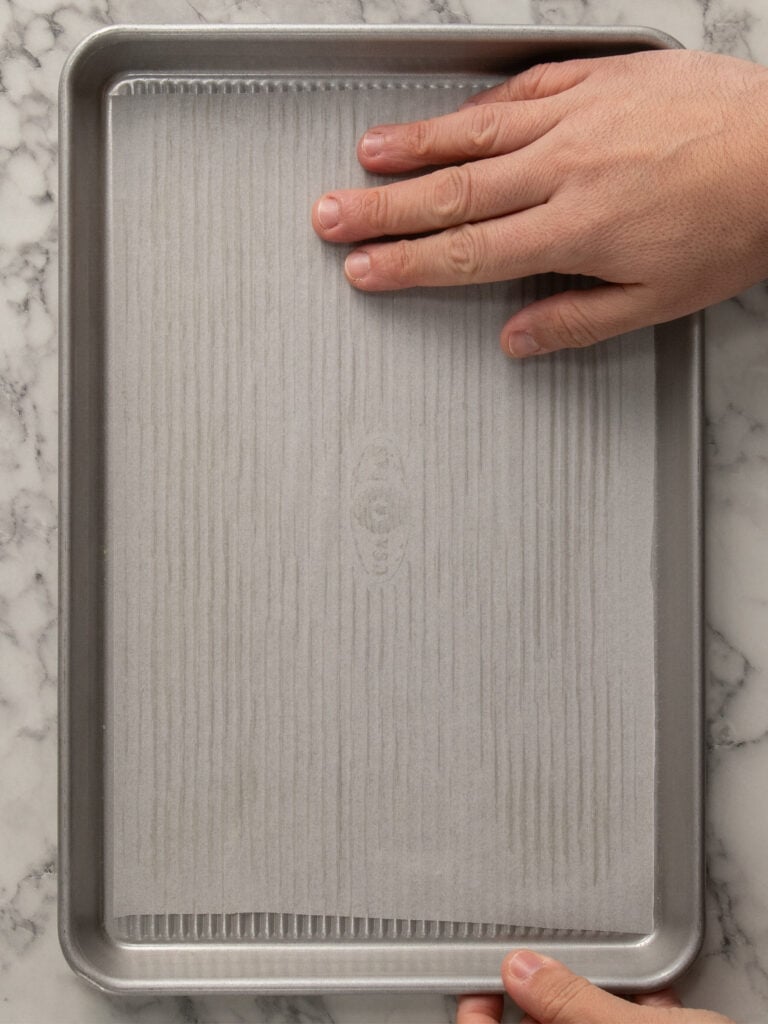
- Rub cold butter on the bottom of the your baking tray and line with baking paper. I used a Jelly roll pan. measurements are in the recipe card below.
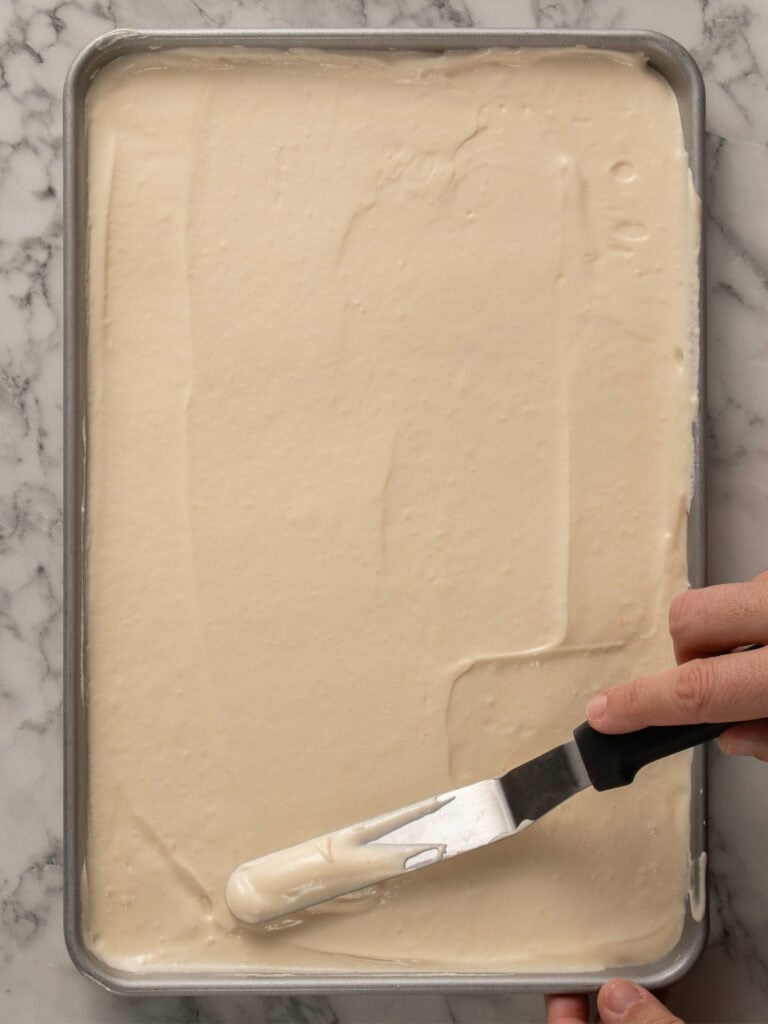
- Pour the finished batter into your prepared baking tray. Use an offset spatula and spread as evenly as you can. Bake it for 14-15 minutes or until golden on top.
How to cool down the sponge
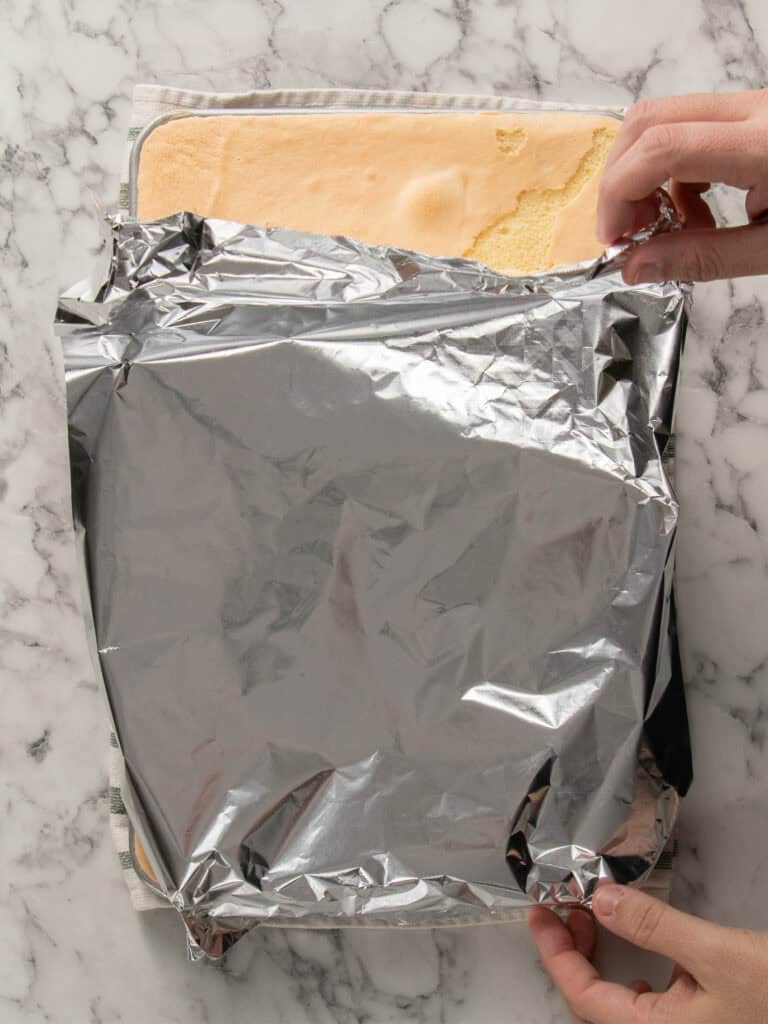
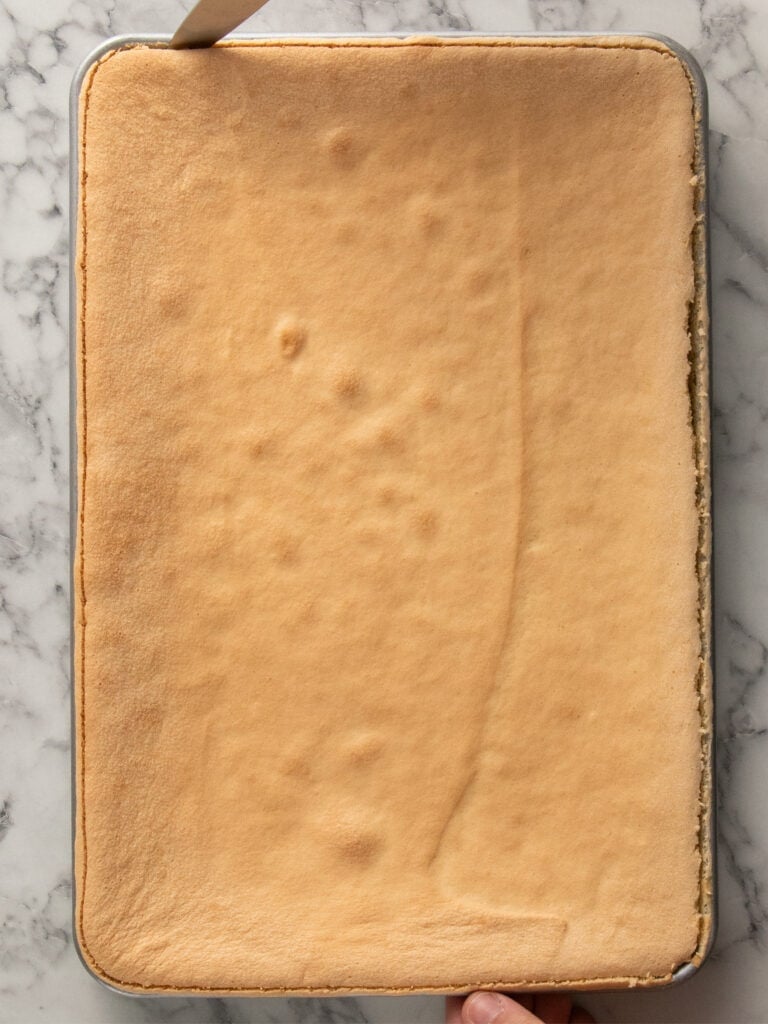
- Ok, so there’s a method to the madness here. We’re going to trap the moisture in the hot sponge by loosely (not directly touching the sponge) with foil. Once it’s cooled, take it off.
How much you should let it cool
Don’t let it cool down completely. It shouldn’t feel cold, it should feel barely warm. That’s when it’s at it’s most pliable.
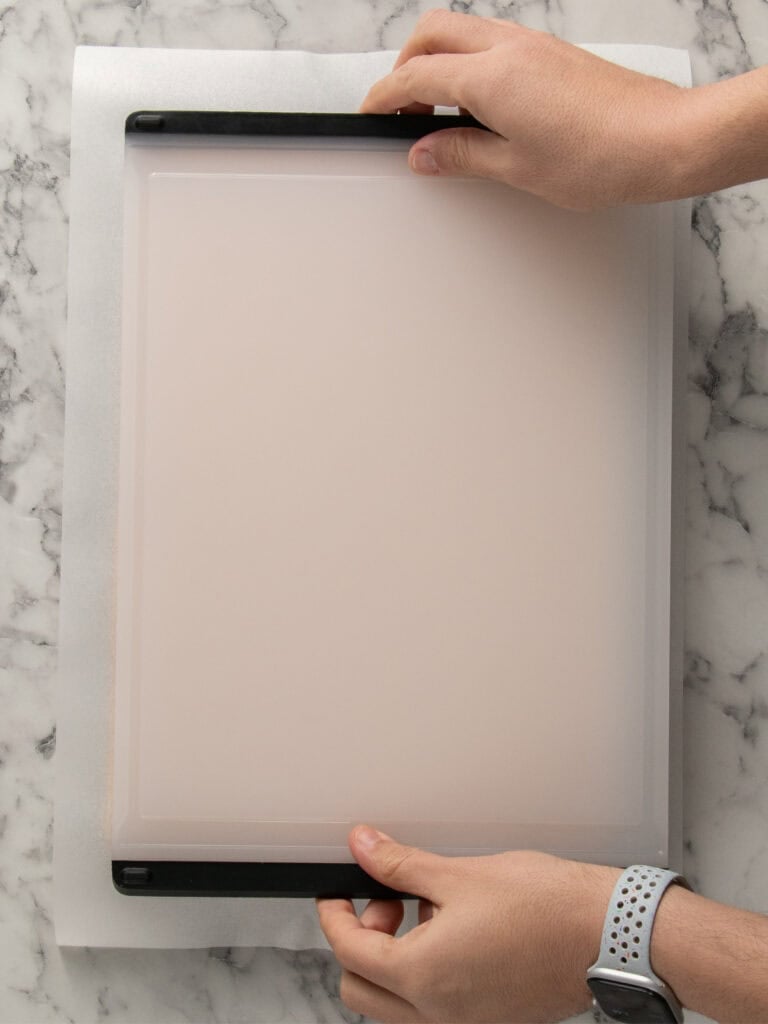
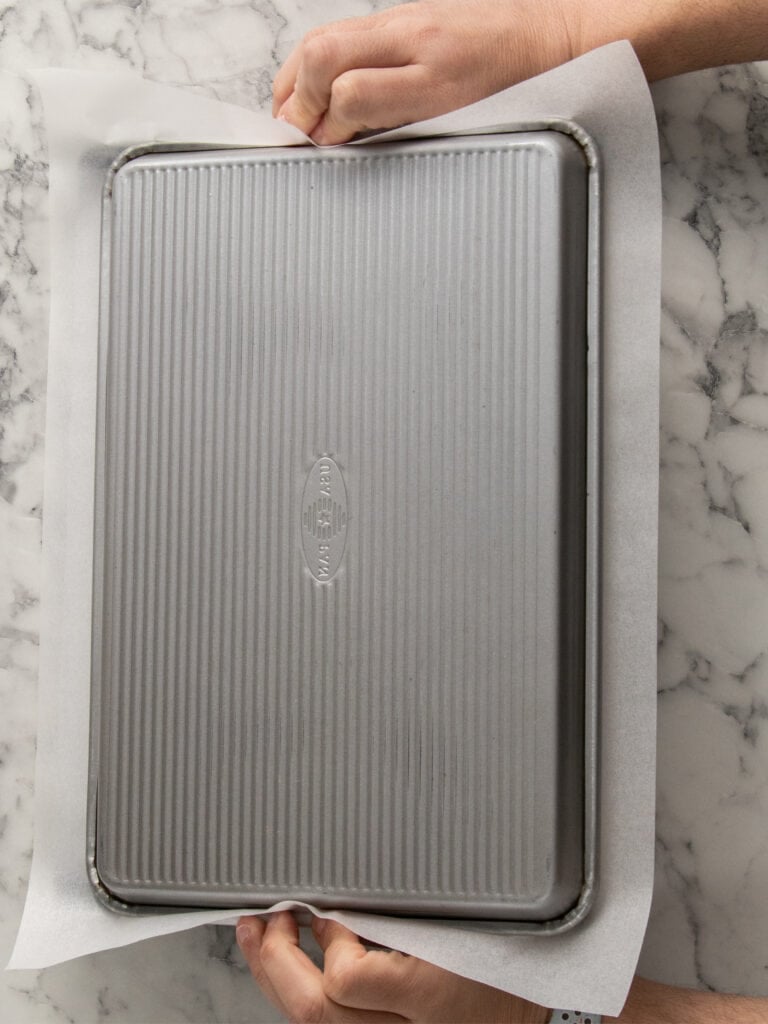
- When it’s cooled, I like to place a large piece of baking paper on top, then a large chopping board and flip it over. That way I have lots of baking paper overhand to play with when I’m rolling the cake.
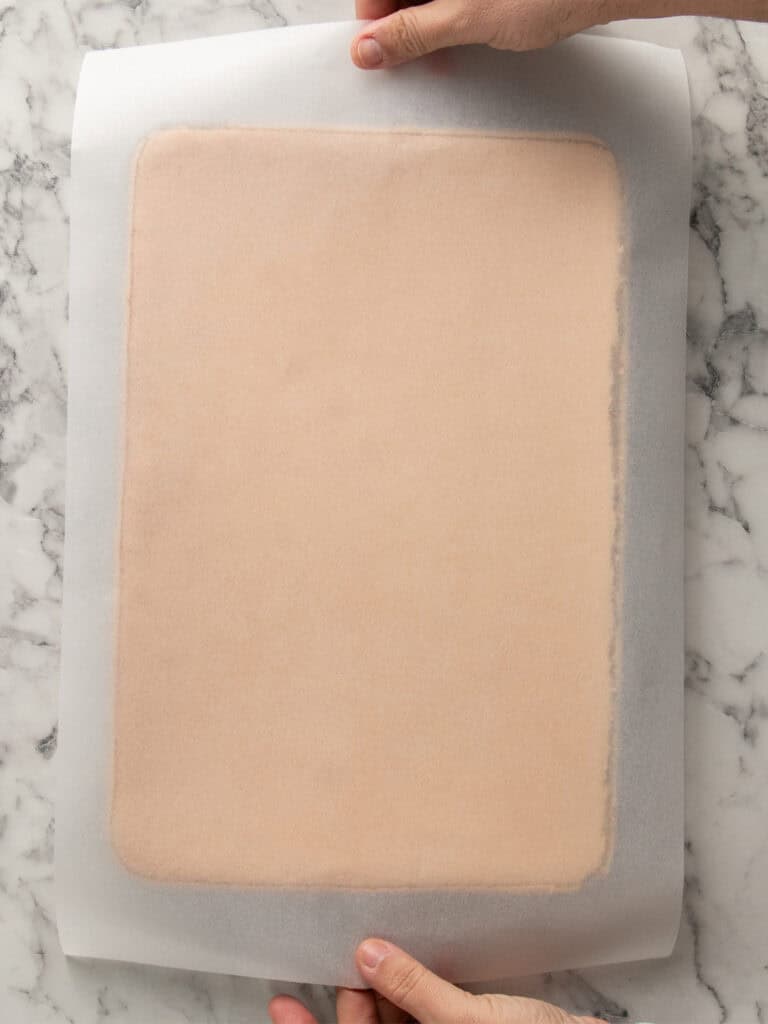
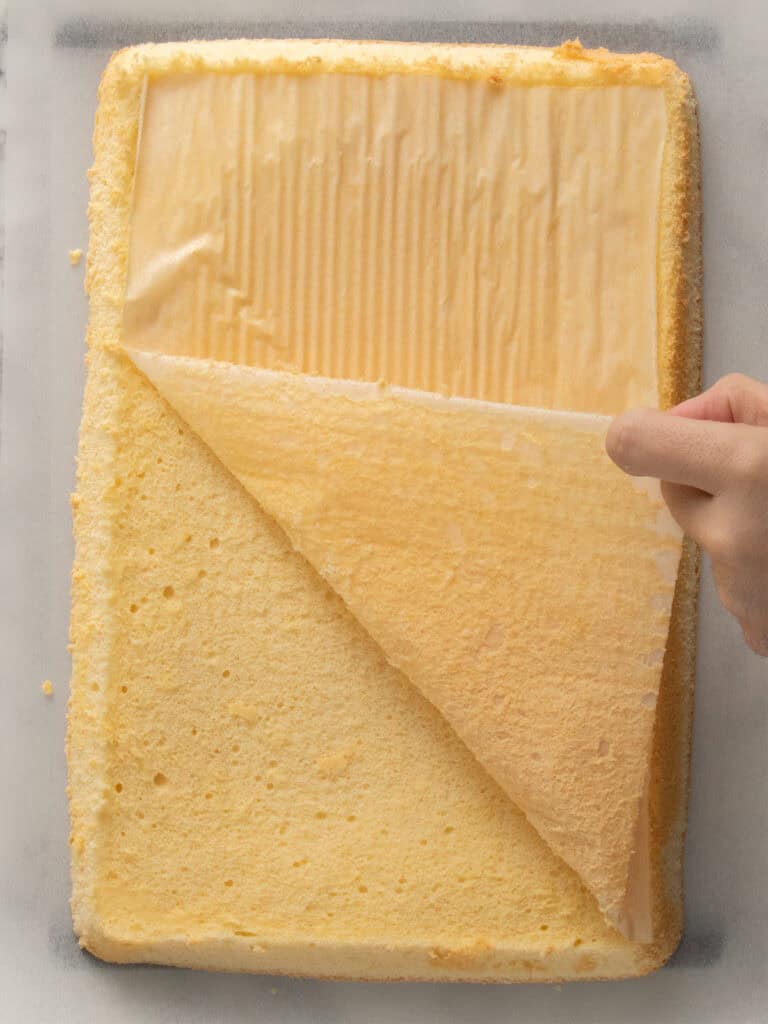
A lot of testing went into how to fill and roll this cake.
Trust me, every single step in here plays a roll.
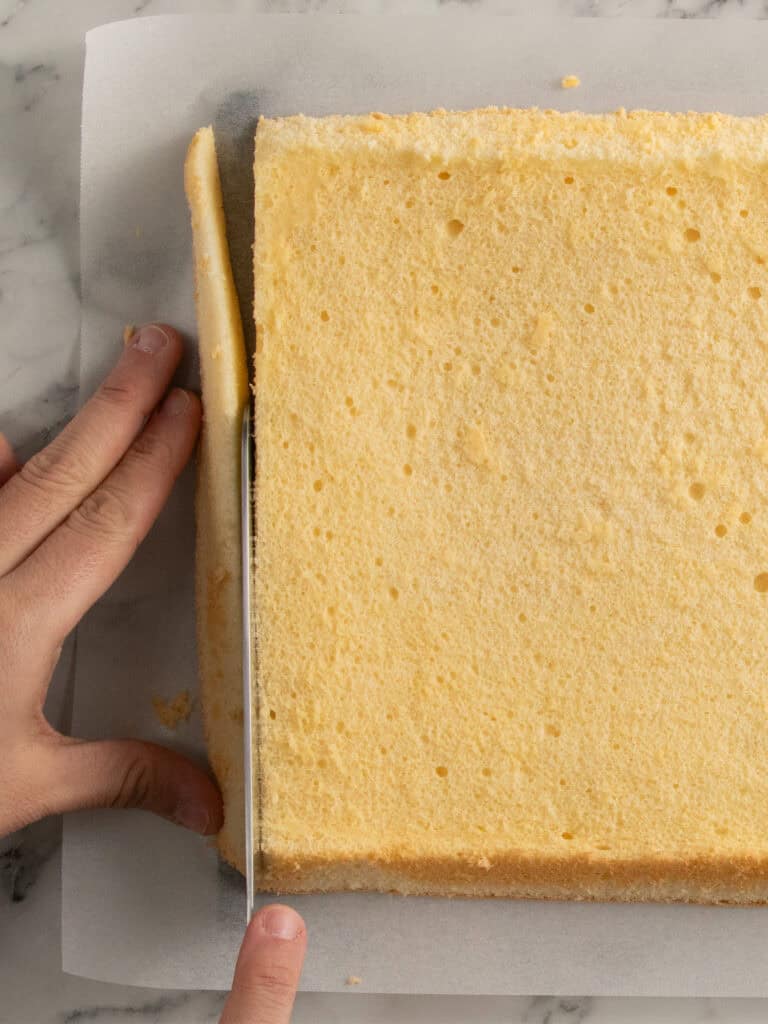
- We need trim it first. Use a large serrate knife to trim one of the short ends nice and neat. You don’t need to trim a lot off, just get it nice and straight. This will be the inside of your roll and where you’ll begin rolling.
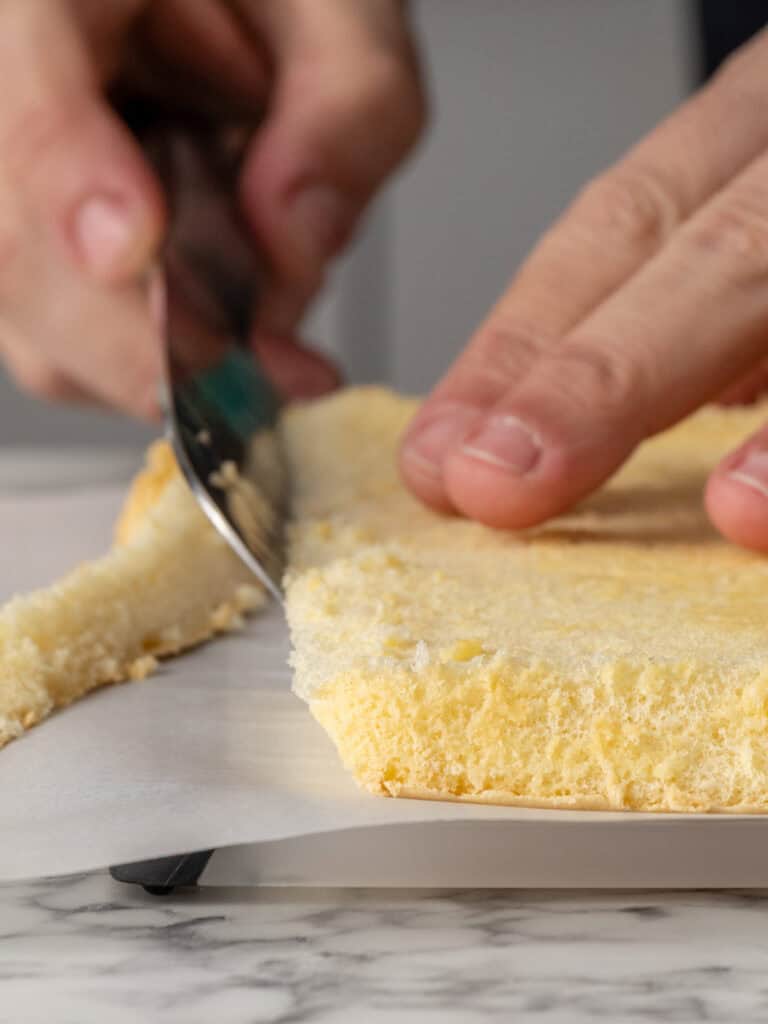
- On the other end, trim a diagonal cut going inward as you cut down. This will be the end that sits under your Swiss roll.
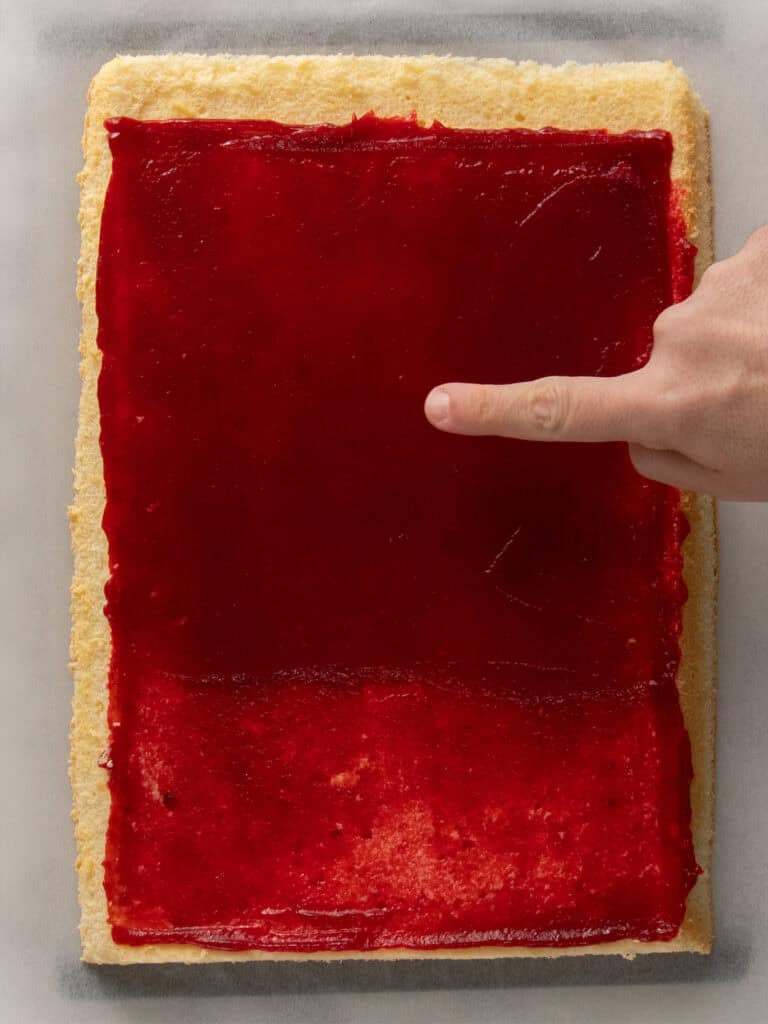
- Pipe a perimeter around the sponge, leaving a 3cm gap on the inside edge. Spread the jam slightly thinner over the first third, starting from the straight-trimmed short end. This’ll be the center of the roll and helps prevent the jam from pooling so that the swirl is neat and even.
- Begin slowly rolling the sponge. Take care to get it as neat as you can. Once you get the very first part rolled, it’s easier to continue rolling by lifting the baking paper up to let it continue rolling.
Getting a nice round Swiss roll.
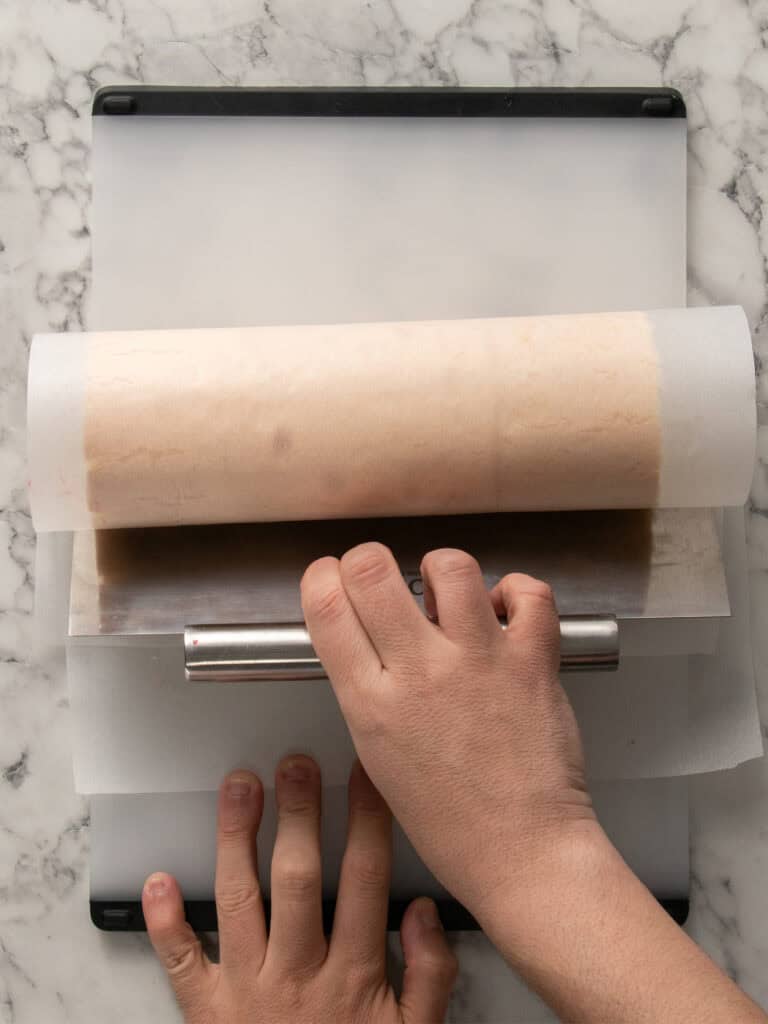
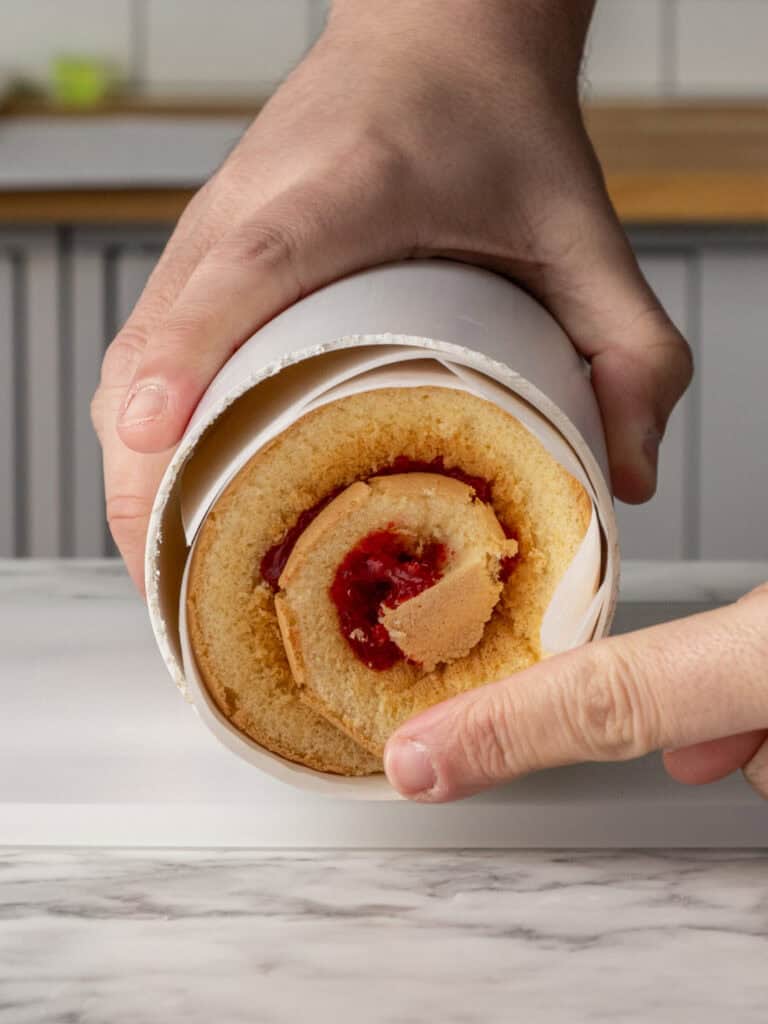
- Ok, so I saw this trick online so I can’t claim it as my own idea but it works! I went to my local Hammerbarn and got a pipe measuring 9cm (3.5 inches) wide and 27cm (10.5 inches) long.
- Slowly insert the cake into the pipe and pop it in the fridge to chill for an hour. Make sure the bottom of the cake is facing down.
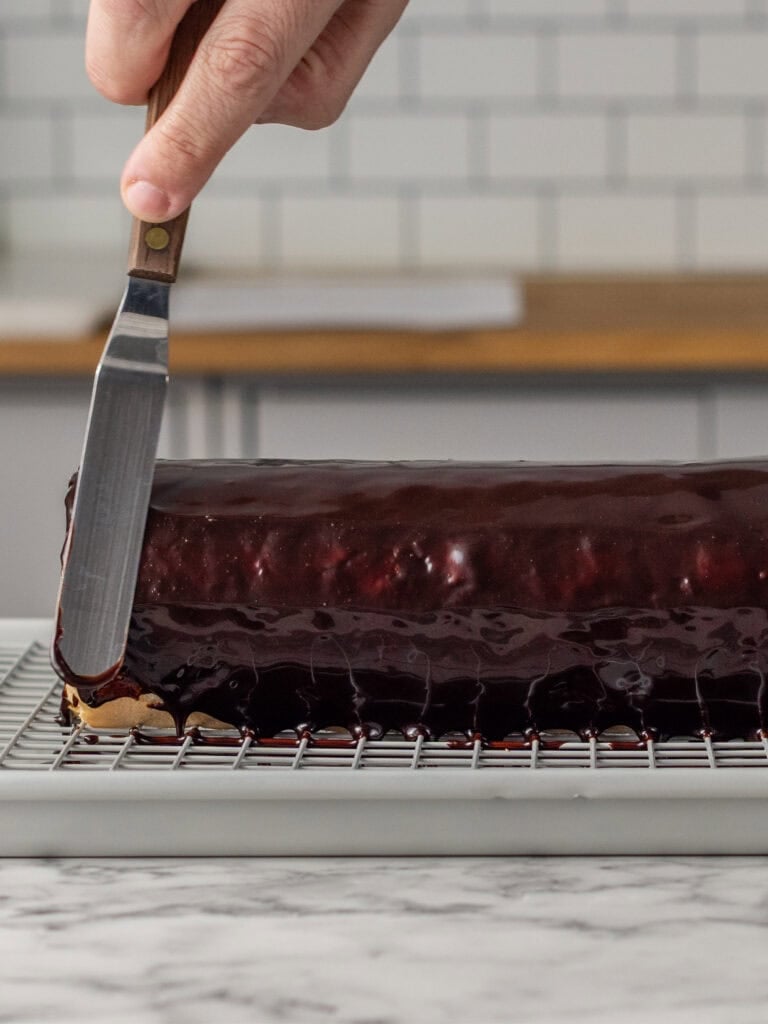
- To finish the cake – Transfer the cake to a cooling rack with a baking tray underneath it and rizzle it with the chocolate sauce and use a spatula to spread evenly.
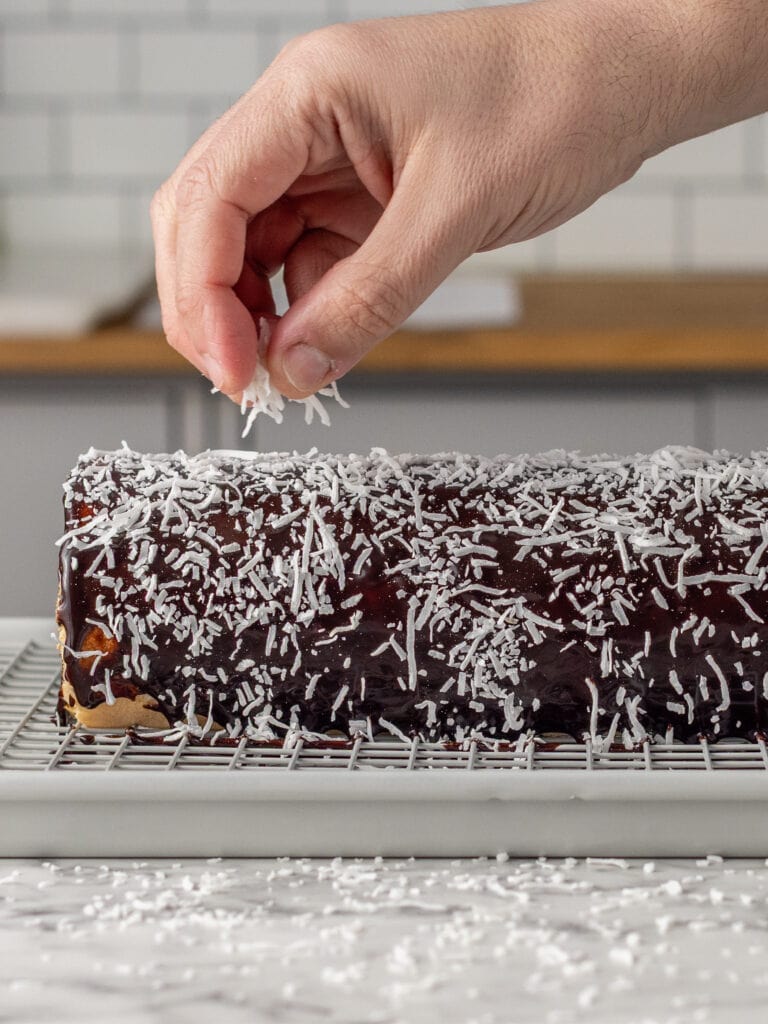
- Then sprinkle with coconut.
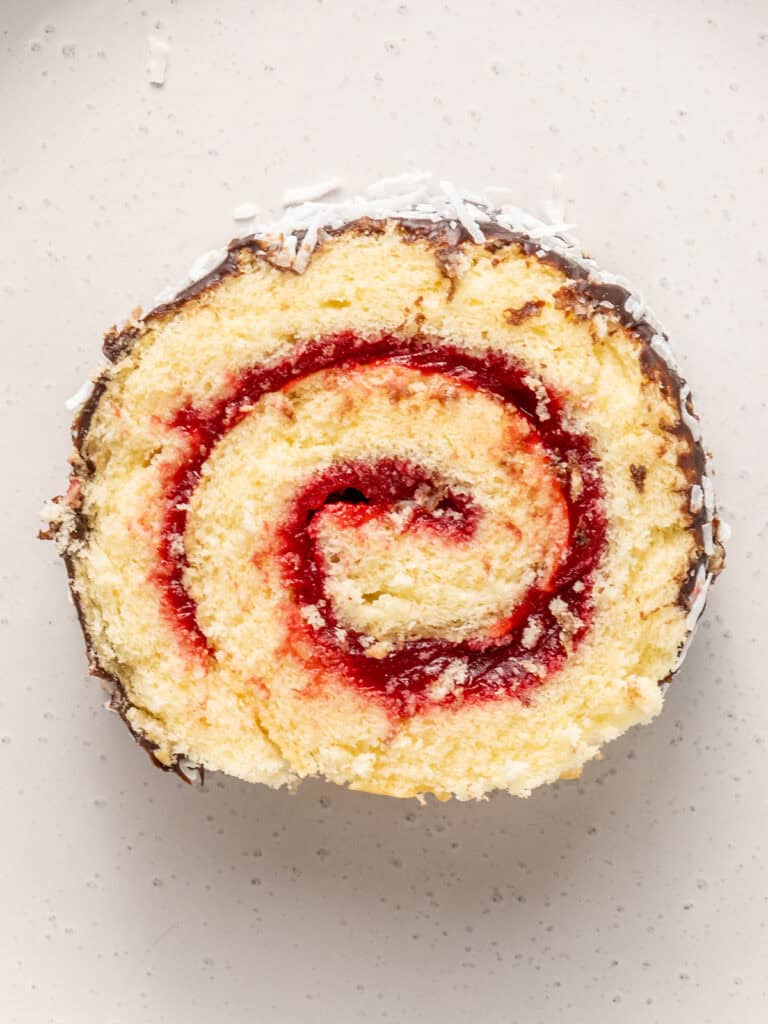
Tip – I like chilling the cake in the fridge again for an hour because it makes slicing the cake easier.
To slice the cake
Slice in one motion using a very sharp knife. If you don’t get to the bottom in one slice, that’s ok, wipe the knife clean and continue that motion until you have a clean slice.
A Quick Baking Guide
If you’re new to baking or just want to brush up on the basics, these guides are a great place to start!
Loved the recipe? Let me know!
If you enjoyed this recipe, leave a star rating and comment below. It helps others find the recipe and keeps the baking community growing. Tag me on Instagram so I can see your version too!
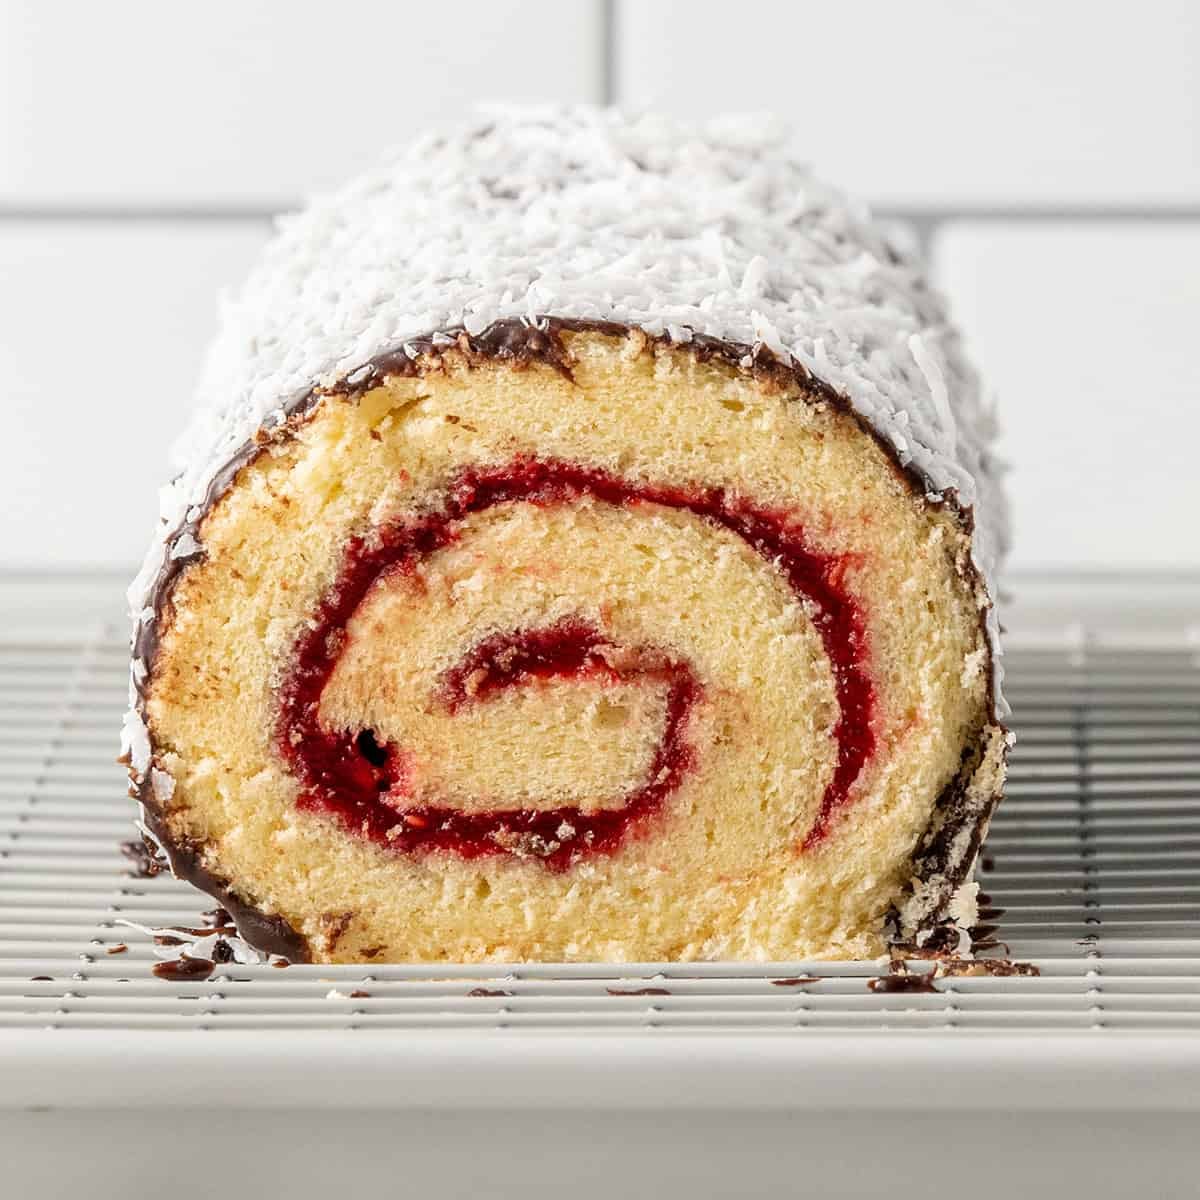
Lamington Swiss Roll Cake
My Easy Lamington Swiss Roll Cake is soft, light, and filled with raspberry jam, finished with a chocolate glaze and coconut.
Serves 12
Ingredients
Raspberry Jam (stabilized)
- 240 g raspberries, frozen is best!
- 130 g granulated sugar
- 15 g corn flour/starch
- 15 g glucose syrup, corn syrup
- 40 g water, cold
- 1/4 tsp vanilla extract
Vanilla Swiss Roll
- 80 g all-purpose flour
- 20 g corn starch, corn flour
- 1/2 tsp baking powder
- 1/4 tsp salt
- 4 large eggs, room temperature (55g each), divided
- 60 g caster sugar, superfine sugar (for the egg yolks)
- 100 g caster sugar, for the egg whites
- 1/4 tsp cream of tartar, for the egg whites
- 1 tsp water, lukewarm (for the egg whites)
- 40 g vegetable oil
- 7 g vanilla bean paste
- 200 g shredded coconut
Chocolate Glaze
- 150 dark cooking chocolate, see notes
- 20 g unsalted butter
- 15 g glucose syrup, see notes
- 90 g heavy cream, see notes
- Pinch of salt
Learn How To Make it! [VIDEO]
Instructions
Raspberry Jam (stabilized)
- Mix slurry – Add the corn starch and water to a small bowl and mix until well combined.
- Cook jam – Add the raspberries and sugar to a heavy bottomed pot. Place on medium high heat and stir until it comes to a boil. As soon as it does, turn the heat off.
- Run through a sieve – Run the jam through a sieve into a heat proof bowl. Doing this in 4 goes makes it an easier process. I found using a small metal whisk also makes it quicker! Once it’s all done, use a spoon to scrape any left-over raspberry jam from the bottom of the sieve into the rest of the sifted jam. Get rid of the seeds.
- Mix in the slurry – Add the slurry to the sifted jam and stir to combine. Then pour back into the pot and stir until it begins to thicken, become translucent and bubbles. Let it gently bubble for 1 minute, then take off the heat.
- Cooling – Transfer to a heat proof bowl or dish and cover the surface with plastic wrap. Let it cool down completely. Then transfer to the fridge to chill. This can be made up to 12 hours in advance. Any longer than that and the liquid begins to seperate
- Transfer to a piping bag – Once the jam has cooled completely, transfer it to a piping bag.
Vanilla Swiss Roll
- Preheat your oven to 175C / 350F (fan off), 155C / 310F (fan on). For this recipe I used a jelly roll pan measuring 37 x 24cm / 14.5 x 9.5-inches. Rub cold butter on the bottom only and line with baking paper. Set aside.
- Combine dry ingredients – To a small mixing bowl, add the flour, baking powder and salt. Whisk to combine. Set aside.
- Whip meringue – To a separate medium sized mixing bowl, add the egg whites and beat on medium speed using an electric hand mixer until you reach soft peaks, about 1 minute. Begin slowly adding (100g) of the caster sugar, about 1 tbsp at a time, while the mixer is on high speed. The mixture will thicken and become glossy. Continue beating for 2-3 minutes until the sugar is mostly dissolved. Set aside.
- Whip egg yolks and sugar – Add the egg yolks, remaining sugar (70g) and vanilla extract to a separate large bowl and whip on high speed for 5 minutes until it becomes thick and pale. Then while the mixer is on high speed slowly drizzle the oil in until well combined.
- Add dry ingredients – Sift the dry ingredients over the egg yolk mixture. Gently fold through until well combined. Sift the remaining dry ingredients in and repeat. The batter will be thick.
- Fold meringue through the egg yolks – Add half of the egg white mixture to the egg yolk mixture and use a spatula to gently fold through until almost completely combined. Add the remaining egg white mixture and repeat until mixture is uniform.
- Bake – Add the batter to the prepared baking tray and use a spatula to gently spread the mixture as evenly as you can. Bake for 14-15 minutes or until golden.
- Cooling down – As soon as the sponge comes out of the oven, cover the pan with foil and seal the edges to trap the steam. This keeps the sponge soft and flexible, making it easier to roll without cracking. Let it cool at room temperature. Just above room temperature is fine, but don’t cool it in the fridge or a cold room or it will stiffen and crack when rolled.
- To trim the sponge – Trimming both ends of the sponge before rolling will give you a super neat looking roll. Use a large, serrated knife to trim one short end straight across to create a clean edge that will be visible in the center of the roll. On the opposite short end, trim the edge at a slight angle, cutting towards the underside of the sponge. This angled edge will tuck neatly underneath the rolled cake, creating a smooth, tidy finish. Take a look at the photos for reference.
Chocolate Sauce (Microwave Method)
- Add the dark chocolate, butter, brown sugar, glucose syrup and heavy cream to a large, microwave-safe bowl and microwave on high, for 20 seconds at a time, mixing well between each interval until smooth. Allow to cool slightly, about 10 minutes, before pouring on top of some desserts. Goes nicely on top of ice-cream when it’s warm.
Chocolate Sauce (Double Boiler Method)
- To make the chocolate sauce over a double boiler, simply add the dark chocolate, butter, brown sugar and heavy cream to a large heatproof bowl. Place the bowl on top of a pot of gently simmering water making the sure the bottom of the bowl is not touching the water. Stir until melted. Take off the heat and allow to cool completely.
- To thin the sauce – You want to make sure your sauce is thin enough to drizzle on your cake before doing so but you want to make sure its not too warm. To do this microwave for 10 seconds at a time, stirring between each interval until it’s smooth and pourable.
Let’s put it together!
- Add the jam – Pipe a border of jam around the edge of the sponge leaving about a 3cm gap on the end which will be the middle. Fill in the center. Use an offset spatula to spread it into a thin, even layer. Spread the jam slightly thinner over the first third of the sponge, starting from the short end that was trimmed straight. This end will become the center of the roll, and using less jam here helps prevent it from pooling in the middle as you roll the cake, creating a neater, more even swirl.
- To roll – Use one hand to lift the baking paper up and away from the sponge while using your other hand to gently guide and hold the roll in place as it curls over itself. Roll slowly and tightly, keeping even pressure without squashing the filling.
- To get a super round cake – I went to my local Hammerbarn and got a pipe measuring 9cm (3.5 inches) wide and 27cm (10.5 inches) long. Slowly insert the cake into the pipe and chill it in the fridge for an hour. Make sure the bottom of the cake is facing down.
- To cover the cake – Once rolled, carefully lift it off the baking paper by placing your hands under the cake to support it and place it seam side down on a cooling rack with a baking tray underneath. Pour the chocolate sauce on top. Let the excess drizzle off and use an offset spatula or spoon to spread evenly across the outside of the rtoll. Then sprinkle with coconut. Transfer to the fridge and let it chill for an hour. That’ll give you nice clean slices.
- Trim and slice– Trim 1cm off each end with a sharp knife to neaten. You can serve it straight away, but chilling for 1 hour makes slicing easier and cleaner.
Notes
Caster sugar – is also sometimes known as superfine sugar is best for making meringues because it dissolves quicker than granulated sugar without risking overwhipping. You can use granulated sugar if you don’t have caster, but I would recommend caster for the very best results!
Raspberry Jam – Use a smooth seedless store-bought jam for a clean swirl when sliced. If the jam has seeds or chunks, press it through a fine mesh sieve with a spoon. Avoid thick or chunky styles as they catch on the knife and ruin the swirl. Spread a thin even layer. Too much jam will pool, soak into the sponge, and make the roll look messy and uneven.
Storage – This Vanilla Swiss roll cake can be stored in an airtight container, in the fridge for up to three days.
Nutrition – is based on per slice. This makes 8 slices.
A note on measurements – this recipe is offered in weight measurements. This is in an effort to offer the most accurate way to get the best results. Cup measurements simply aren’t accurate enough for a recipe that needs precision and cup sizes differ depending on where you are in the world. Here is where you can learn more about how to measure ingredients using digital kitchen scales!
Rolling method credit – This is a technique I’ve adapted from Stella Parks at Serious Eats and it’s genius!
Nutrition
Calories : 352kcal
Carbonhydrates: 40g
Protein: 5g
Fat: 17g
Saturated Fat: 12g
Polyunsaturated Fat: 1g
Monounsaturated Fat : 4g
Trans Fat : 0.1g
Cholesterol: 74mg
Sodium: 139mg
Potassium : 153mg
Fiber: 3g
Sugar : 27g
Vitamin A: 245IU
Vitamin C: 5mg
Calcium: 34mg
Iron: 1mg
Nutrition Disclosure
Gave this recipe a go?Mention @thescranline or tag #thescranline!

previous post
6 comments
My cake turned out over twice the height of this one, so i made a double layer “Lamington sponge” instead – it tasted amazing!
Thanks so much for the comment Ali! N x
Love all the flavors in this Swiss roll. I used my homemade cherry instead raspberry. Super easy and delicious!
Thats amazing Azra! N x
I watched the ‘how to make it’ video but it’s quite different to the written instructions
I know both will turn out great but which one is best for beginners?
Hi Bea! Hmm, which part specifically is different. It’ll make it a little clearer so I can help out 🙂 N x